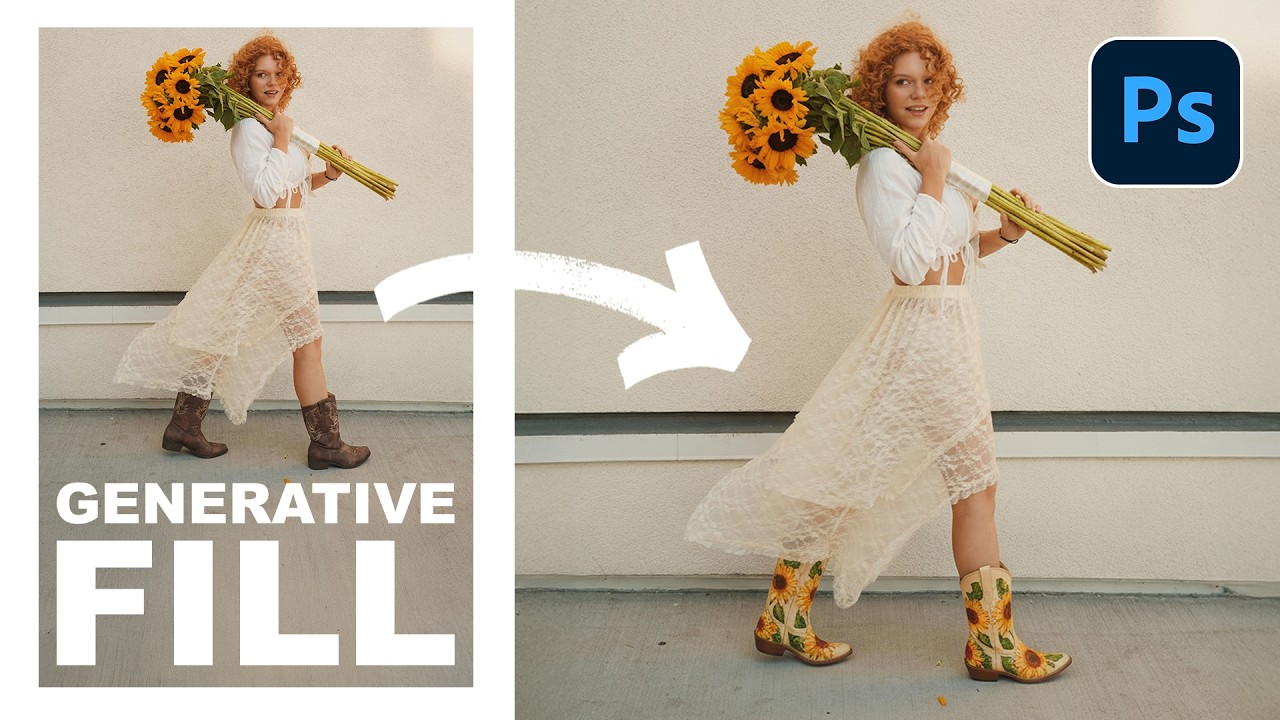
There’s a specific kind of frustration that comes from spending forty-five minutes carefully cloning out graffiti, power lines, or some random stranger’s elbow from a photo, only to realize the result looks like a smeared fever dream. I’ve been there more times than I’d like to admit. It’s the kind of thing that makes you question your life choices while you’re hunched over a laptop at a coffee shop, desperately trying to make a background look like it was never disturbed.
That’s exactly why this tutorial from Aaron Nace over at PHLEARN stopped me mid-scroll. Watch the full tutorial on YouTube - it’s the first video in a free AI series he’s putting together covering Generative Fill, smart selections, detail enhancement, and more. In this one, he focuses specifically on using Generative Fill for object removal, and the workflow is so straightforward it almost feels like a trick.
The short version: you make a loose selection around whatever you want gone, leave the text prompt completely empty, hit Generate, and let Adobe Firefly fill in the background. No cloning. No patching. No manual healing brush gymnastics. Let me walk you through it exactly the way Aaron does it.
Step 1: Open Your Image and Assess What Needs to Go
 Portrait photo open in Photoshop with graffiti visible on wall
Before you touch a single tool, take a beat and look at your image. In the tutorial, Aaron is working with a portrait shot that has great composition and color, but the background is covered in graffiti and there’s a thick cable cutting through the frame. Those are the targets. Knowing exactly what you want to remove before you start making selections saves you from messy, overlapping marquees later. It sounds obvious, but it’s the step most people rush past.
Portrait photo open in Photoshop with graffiti visible on wall
Before you touch a single tool, take a beat and look at your image. In the tutorial, Aaron is working with a portrait shot that has great composition and color, but the background is covered in graffiti and there’s a thick cable cutting through the frame. Those are the targets. Knowing exactly what you want to remove before you start making selections saves you from messy, overlapping marquees later. It sounds obvious, but it’s the step most people rush past.
If you’re working in Photoshop 2026 (or the current beta), you’ve got everything you need built right in. No plugins, no third-party subscriptions beyond your existing Creative Cloud plan.
Step 2: Grab the Selection Brush Tool
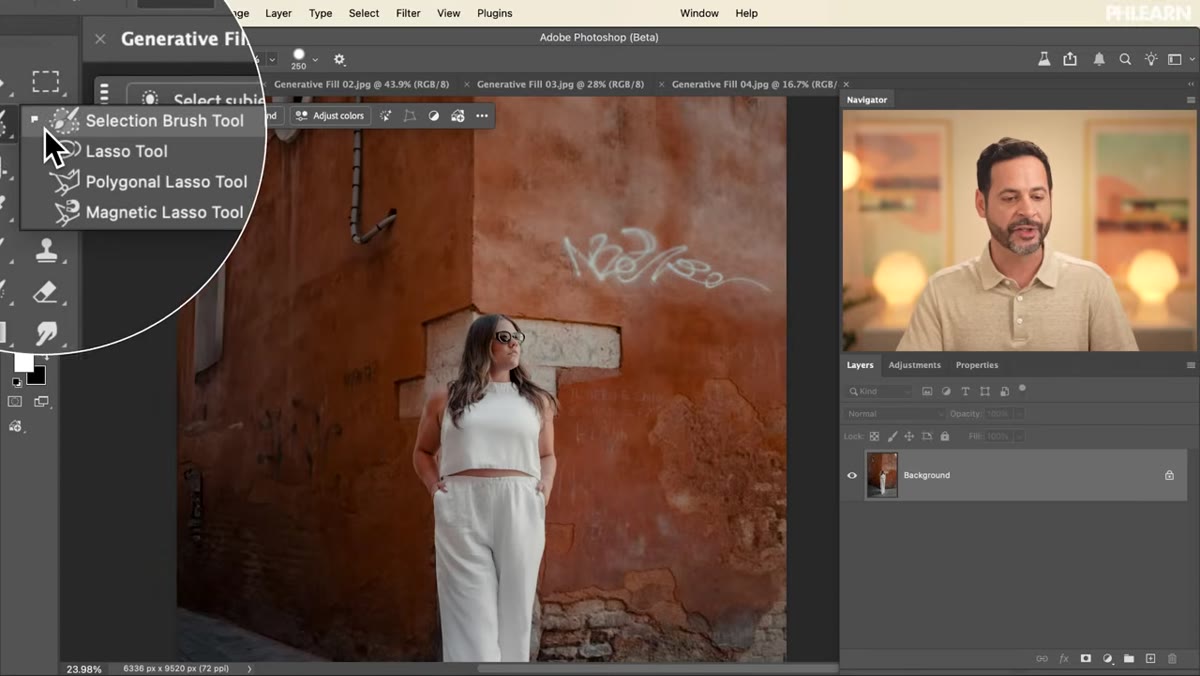 Toolbar open with Selection Brush Tool highlighted
Head to your toolbar and pull out the Selection Brush Tool. This is Aaron’s preferred tool for this kind of job, and after watching him use it, I get why. It’s fast, it’s forgiving, and it doesn’t demand precision. You’re not trying to trace the exact outline of the object you want to remove. You just need to paint a rough circle around it.
Toolbar open with Selection Brush Tool highlighted
Head to your toolbar and pull out the Selection Brush Tool. This is Aaron’s preferred tool for this kind of job, and after watching him use it, I get why. It’s fast, it’s forgiving, and it doesn’t demand precision. You’re not trying to trace the exact outline of the object you want to remove. You just need to paint a rough circle around it.
The Selection Brush automatically fills in the center of whatever shape you paint, so a loose loop around a cable or a graffiti tag is all you need. No feathering sliders, no lasso fiddling. Just paint and move on.
Step 3: Paint Your Selections Around the Objects to Remove
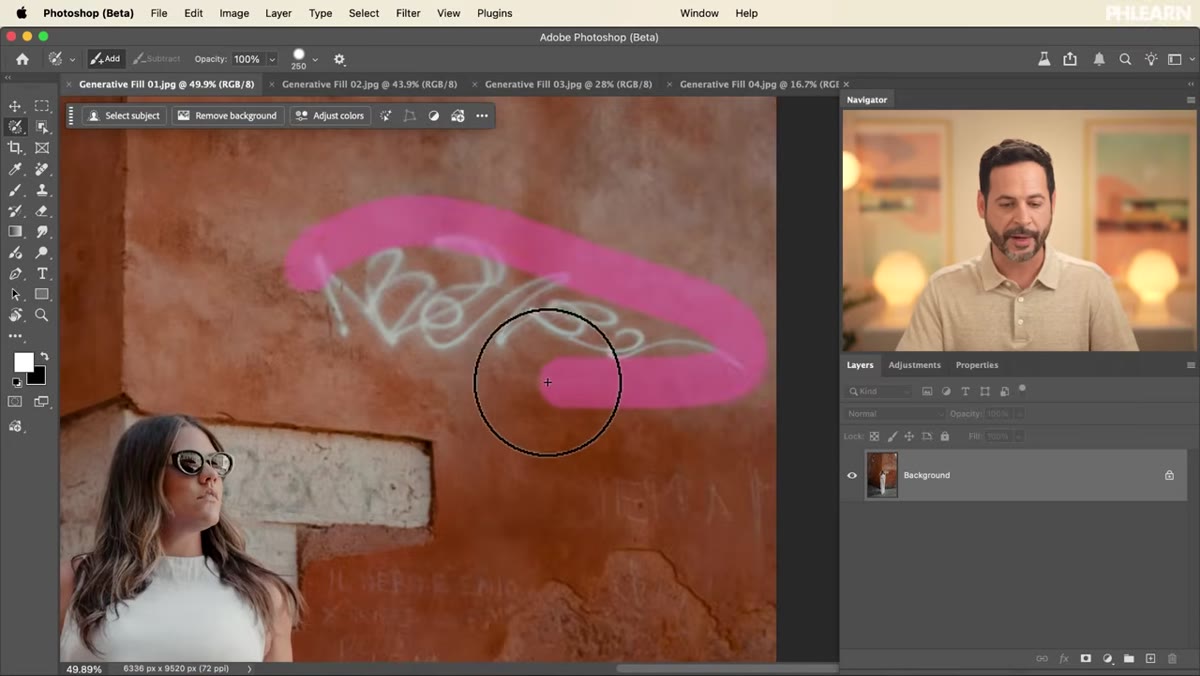 Loose circular selection painted around graffiti and cable
With the Selection Brush active, Aaron paints a rough circle around the first object (the cable), and then another around the graffiti area. The key point here is that you do not have to be accurate. The AI is going to handle the heavy lifting, and a selection that’s slightly too big is always better than one that clips the edge of what you’re trying to remove.
Loose circular selection painted around graffiti and cable
With the Selection Brush active, Aaron paints a rough circle around the first object (the cable), and then another around the graffiti area. The key point here is that you do not have to be accurate. The AI is going to handle the heavy lifting, and a selection that’s slightly too big is always better than one that clips the edge of what you’re trying to remove.
You can select multiple objects in one pass before you generate anything. Paint around the cable, paint around the graffiti, and both will be included in a single generation. This saves time and keeps the result looking cohesive since the AI is filling everything in one context-aware pass rather than two separate operations.
Step 4: Open Generative Fill From the Contextual Taskbar
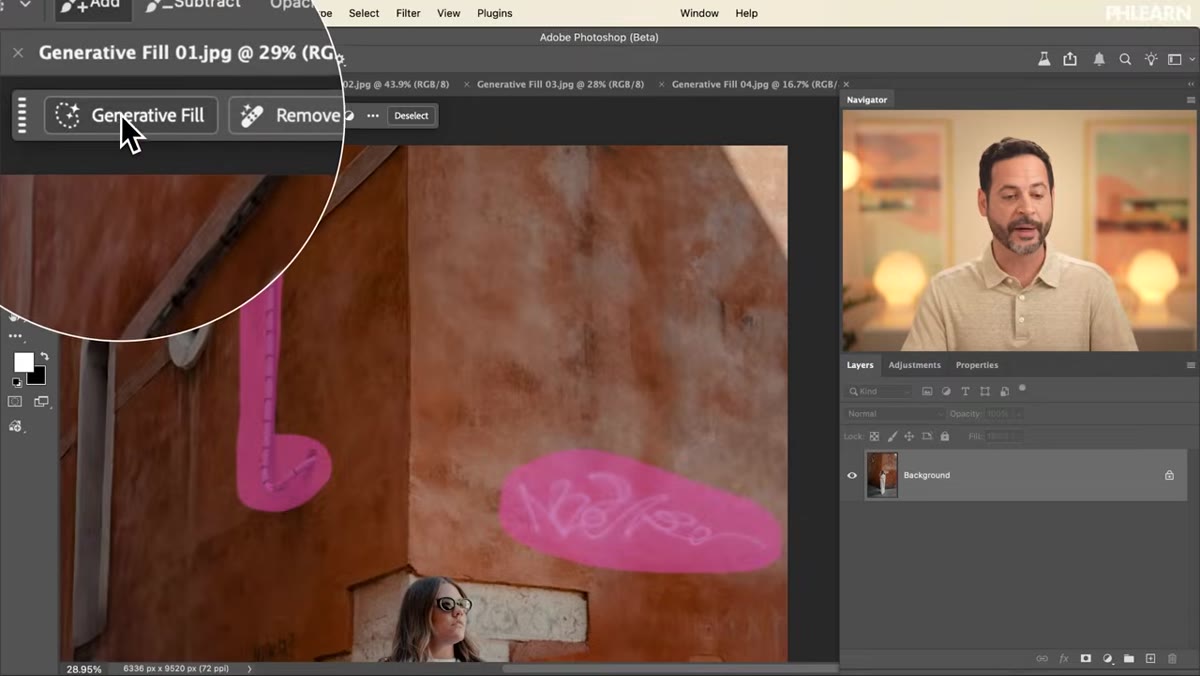 Contextual Taskbar visible with Generative Fill button highlighted
Once your selections are active, look for the Contextual Taskbar. If you don’t see it, go to Window and scroll down until you find “Contextual Taskbar” and make sure it’s checked. Aaron keeps his pinned near the top of the workspace, but it defaults to the bottom of the screen. Either way works fine.
Contextual Taskbar visible with Generative Fill button highlighted
Once your selections are active, look for the Contextual Taskbar. If you don’t see it, go to Window and scroll down until you find “Contextual Taskbar” and make sure it’s checked. Aaron keeps his pinned near the top of the workspace, but it defaults to the bottom of the screen. Either way works fine.
Click the Generative Fill button. A prompt field and a model selector will appear. Do not type anything in the prompt field. Leaving it blank is the signal to the AI that you want the selected area removed and replaced with background content. If you type something, it will try to generate that thing instead.
Step 5: Select Your AI Model (Firefly Image 3)
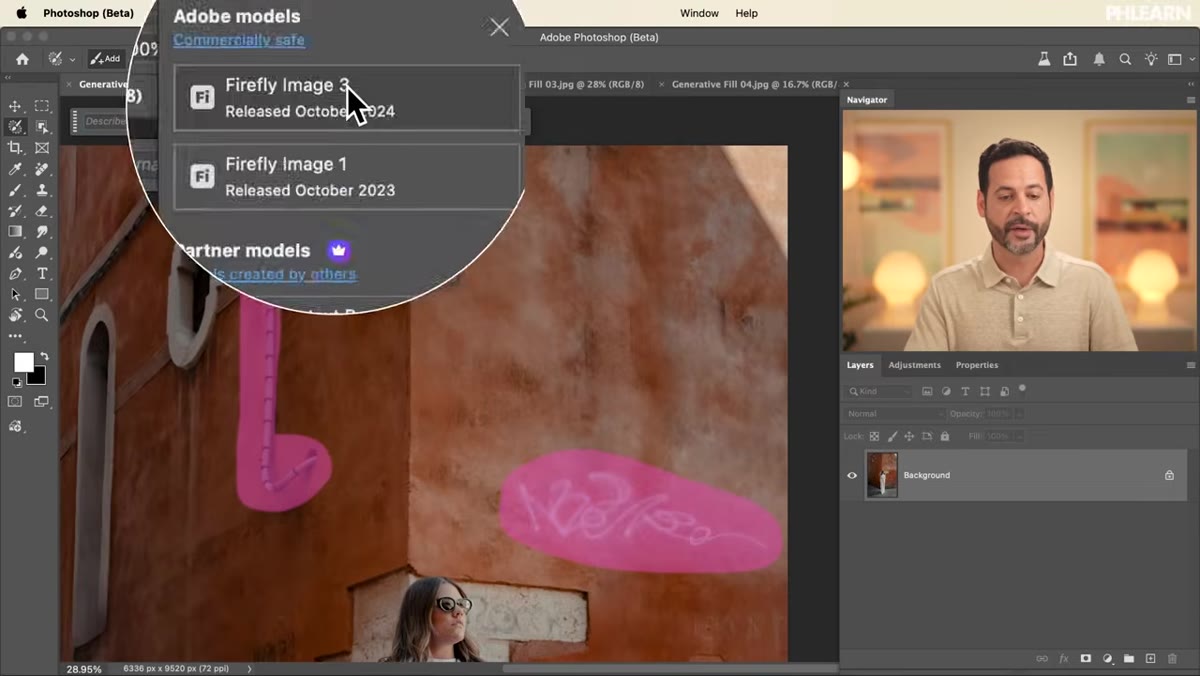 Model selector dropdown showing Firefly Image 3 option
Before you generate, click the model selector to confirm which AI engine you’re using. Aaron uses Firefly Image 3 for this demo, which is Adobe’s own model and the one that’s best trained on photographic content for seamless fills. There are now additional partner models available in Photoshop, which Aaron mentions covering later in the series, but for straight object removal on a photo, Firefly Image 3 is the right call.
Model selector dropdown showing Firefly Image 3 option
Before you generate, click the model selector to confirm which AI engine you’re using. Aaron uses Firefly Image 3 for this demo, which is Adobe’s own model and the one that’s best trained on photographic content for seamless fills. There are now additional partner models available in Photoshop, which Aaron mentions covering later in the series, but for straight object removal on a photo, Firefly Image 3 is the right call.
This is one of those settings that’s easy to overlook, especially if you’ve been in Photoshop a while and you’re just clicking through familiar dialogs. Take two seconds to confirm the model before you generate.
Step 6: Hit Generate and Review Your Variations
 Generation progress indicator running in Photoshop
Click Generate. Photoshop sends your selection and (empty) prompt to Firefly, processes the request, and returns three variations you can flip through in the Properties panel. Aaron notes that in his example, all three looked solid, which is pretty representative of what you can expect when the surrounding background has enough texture and detail for the AI to sample from.
Generation progress indicator running in Photoshop
Click Generate. Photoshop sends your selection and (empty) prompt to Firefly, processes the request, and returns three variations you can flip through in the Properties panel. Aaron notes that in his example, all three looked solid, which is pretty representative of what you can expect when the surrounding background has enough texture and detail for the AI to sample from.
Click through the variations and pick the one that blends best. The result lives on its own generative layer, so you’re not touching the original pixels. If none of the three options are perfect, you can click Generate again for a fresh set without starting over.
Step 7: Repeat the Process for Additional Problem Areas
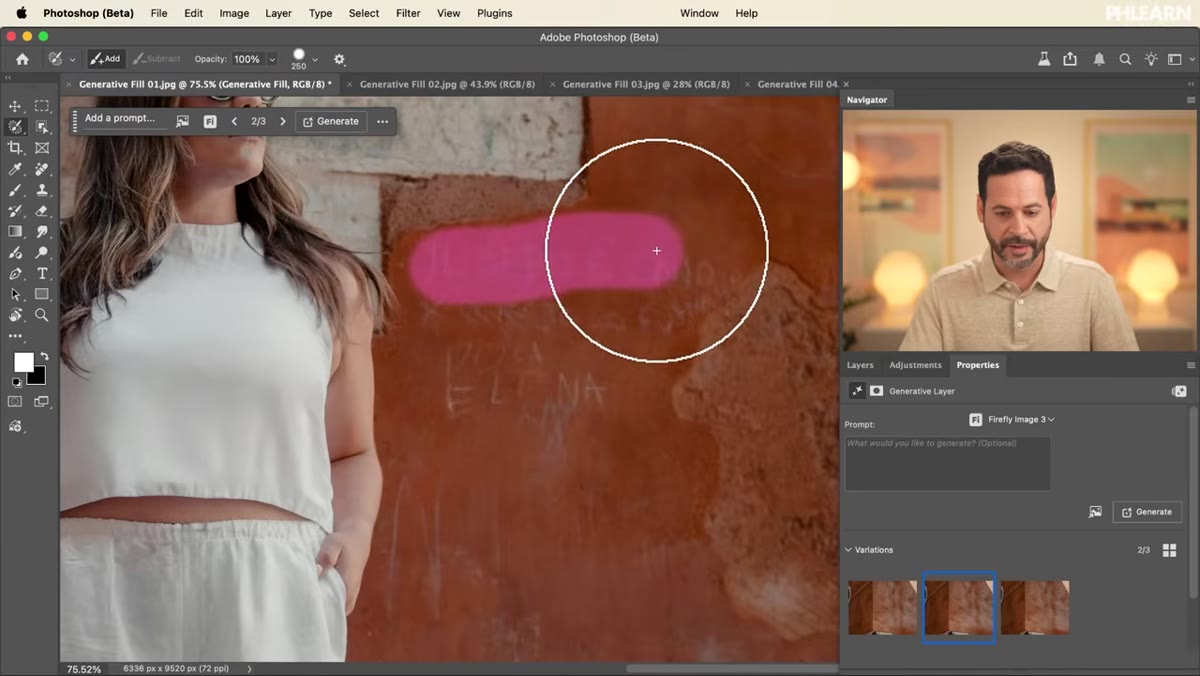 Zoomed in view with additional graffiti selected using Selection Brush
After the first round of removal looks good, zoom in and see what else needs to go. Aaron zooms into a corner of the wall where there’s a heavy concentration of tags and names, reactivates the Selection Brush, and paints over those areas the same way. Same process: loose selection, blank prompt, Generate.
Zoomed in view with additional graffiti selected using Selection Brush
After the first round of removal looks good, zoom in and see what else needs to go. Aaron zooms into a corner of the wall where there’s a heavy concentration of tags and names, reactivates the Selection Brush, and paints over those areas the same way. Same process: loose selection, blank prompt, Generate.
This iterative approach works really well because each generation is localized. You’re not regenerating the whole image every time, just the specific area you’ve selected. It keeps things fast and gives you granular control over which parts you’re asking the AI to touch.
What I’d Add From My Own Experience
The one thing Aaron doesn’t dig into in this first video (probably because it’s coming later in the series) is what to do when the fill result has a subtle but visible seam. With complex textures like brick or rough concrete, Firefly occasionally produces a patch that reads just slightly too smooth or too uniform. My fix is to paint a new, slightly larger selection that overlaps the edges of the generated area and run another pass. The second generation usually blends it out cleanly. It takes maybe thirty extra seconds and saves you from ever having to touch the Clone Stamp for this kind of job.
The single most useful thing to remember from this whole workflow: leave the prompt blank when you want to remove something. It’s counterintuitive because we’re conditioned to think AI needs instructions, but an empty prompt is actually the instruction here. It tells Firefly to reconstruct, not to invent.
Watch Aaron walk through the full thing himself here: Watch the full tutorial on YouTube. The free series includes sample images, PSDs, and a downloadable calendar so you can follow along day by day. Worth bookmarking if AI-assisted editing is anywhere on your radar right now.
Comments (2)
Clear and practical. No fluff. Appreciate that.
Solid advice. Especially the part about taking your time with it.
Leave a Comment