I’ll be honest with you: I am the person who ignores software update notes. I click “update” and then just go back to doing things the way I’ve always done them, completely oblivious to whatever Adobe just shipped. That habit has cost me hours. Hours I could have spent doing literally anything else, including staring at the wall, which I sometimes do between coffee refills at my usual spot on South Congress. So when I came across this Matt Kloskowski tutorial covering the new features in Photoshop 2020, I sat down and actually paid attention. Matt is sharp, he keeps things photographer-focused, and he skips the stuff that only matters if you’re designing cereal boxes. Good man.
Watch the full tutorial on YouTube
What I walked away with were two features that I now use constantly, one of which I would describe as embarrassingly good for how simple it is, and one that genuinely changes how I think about selections. If you’re a photographer who lives in Photoshop, these are the ones that matter. Let me walk you through both.
Step 1: Find Your Layers Panel and Hold Down Option (or Alt)
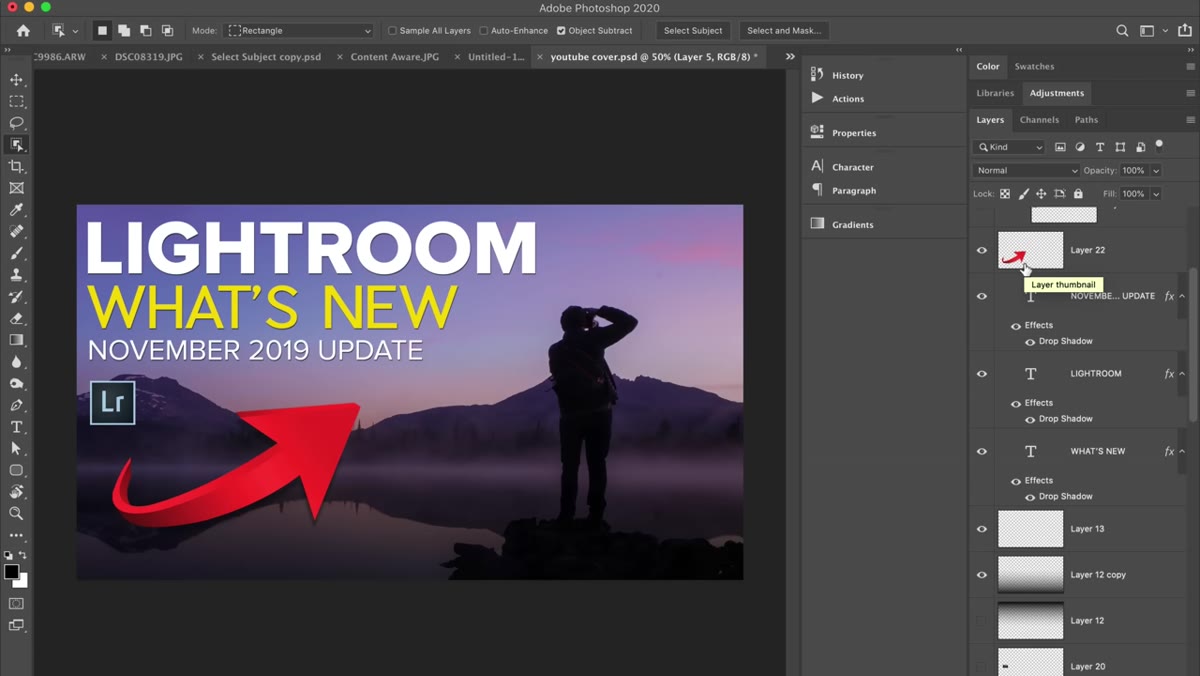 Layer panel with multiple layers visible, cursor hovering
This is the zoom trick Matt opens with, and the reason he leads with it is because once you see it, you immediately want to use it. The old workflow for zooming into a specific element on a complex document was a small but genuine pain: grab the Zoom tool, click in, scroll around, hope you land somewhere useful. With Photoshop 2020, you skip all of that.
Layer panel with multiple layers visible, cursor hovering
This is the zoom trick Matt opens with, and the reason he leads with it is because once you see it, you immediately want to use it. The old workflow for zooming into a specific element on a complex document was a small but genuine pain: grab the Zoom tool, click in, scroll around, hope you land somewhere useful. With Photoshop 2020, you skip all of that.
In your Layers panel, hold down Option on Mac or Alt on Windows, then click any layer. Photoshop immediately zooms the canvas to fit that layer’s content perfectly in your view. Click a different layer while still holding Option/Alt and it snaps to that one instead. Matt calls it a “sneaker feature,” meaning it wasn’t loudly announced, but it quietly became one of his most-used additions. Same for me. I have documents with 40-plus layers sometimes, and this single shortcut has eliminated a lot of squinting.
Step 2: Locate the Object Selection Tool in Your Toolbar
 Toolbar showing Object Selection Tool grouped with Quick Selection and Magic Wand
The Object Selection Tool lives grouped with the Quick Selection Tool and the Magic Wand. If you’ve never touched your toolbar, it should be right there. However, Matt flags something important before you start panicking that it’s missing: if you’ve ever customized your toolbar through Edit > Toolbar, there’s a known quirk where this tool can end up hidden even if you didn’t specifically move it. The fix is going to Edit > Toolbar and hitting “Restore Defaults.” Slightly annoying, completely fixable.
Toolbar showing Object Selection Tool grouped with Quick Selection and Magic Wand
The Object Selection Tool lives grouped with the Quick Selection Tool and the Magic Wand. If you’ve never touched your toolbar, it should be right there. However, Matt flags something important before you start panicking that it’s missing: if you’ve ever customized your toolbar through Edit > Toolbar, there’s a known quirk where this tool can end up hidden even if you didn’t specifically move it. The fix is going to Edit > Toolbar and hitting “Restore Defaults.” Slightly annoying, completely fixable.
Once you can see it, select it. The concept is straightforward: you draw a rough rectangle or lasso around the object you want to select, and Photoshop figures out the actual edges of the subject within that area. It’s doing the hard thinking so you don’t have to.
Step 3: Choose a Photo That Sets You Up for Success
 Busy background photo open in Photoshop, subject visible but surrounded by clutter
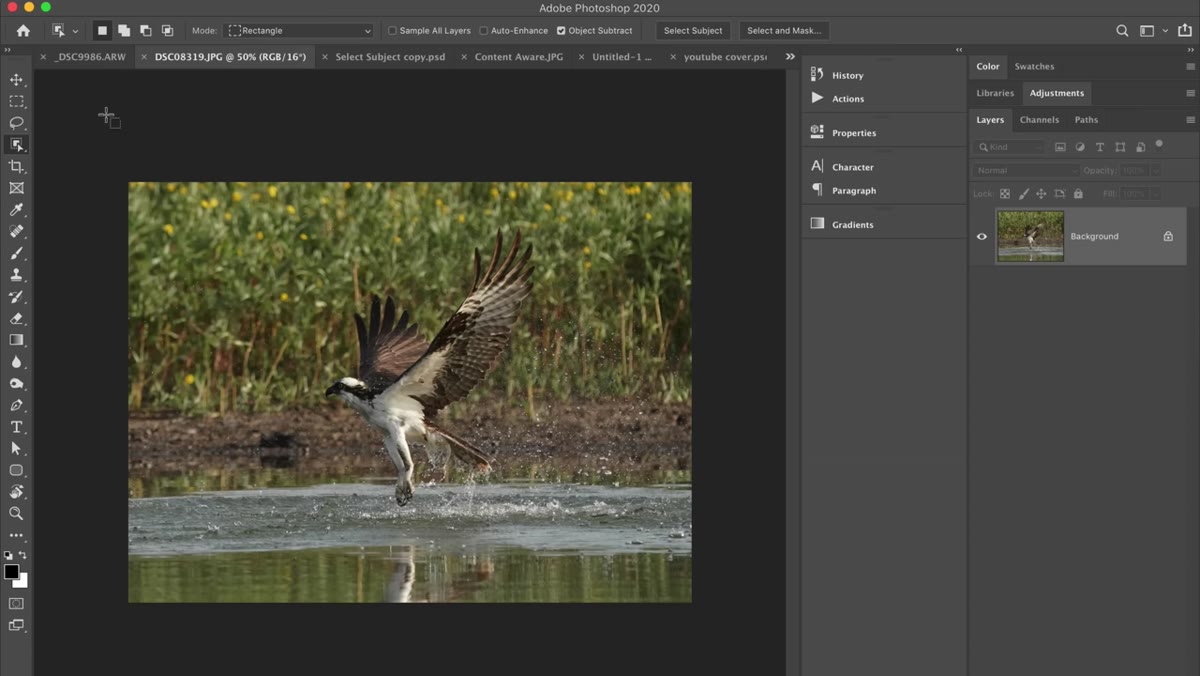
Matt makes a point here that I think is genuinely useful and often glossed over in tutorials: the tool is impressive, but it’s not magic, and the quality of your result is directly tied to the complexity of your background. He demonstrates on a photo with a messy, water-filled background to show that yes, the tool still tries, and yes, it does a decent job relative to how hard the image is. But he’s also honest that he personally wouldn’t attempt a professional extraction on that particular image.
Busy background photo open in Photoshop, subject visible but surrounded by clutter
Matt makes a point here that I think is genuinely useful and often glossed over in tutorials: the tool is impressive, but it’s not magic, and the quality of your result is directly tied to the complexity of your background. He demonstrates on a photo with a messy, water-filled background to show that yes, the tool still tries, and yes, it does a decent job relative to how hard the image is. But he’s also honest that he personally wouldn’t attempt a professional extraction on that particular image.
The practical takeaway is this: Object Selection works best when there’s meaningful contrast between your subject and what’s behind it. Clean backgrounds, distinct edges, obvious separation between subject and scene. If you shoot product photography, portraits with simple backdrops, or wildlife against open sky, this tool is going to feel like witchcraft. If you’re trying to isolate a brown dog against a muddy trail, you’re going to need to put in some cleanup work afterward regardless of what tool you use.
Step 4: Draw Your Selection Rectangle Around the Subject
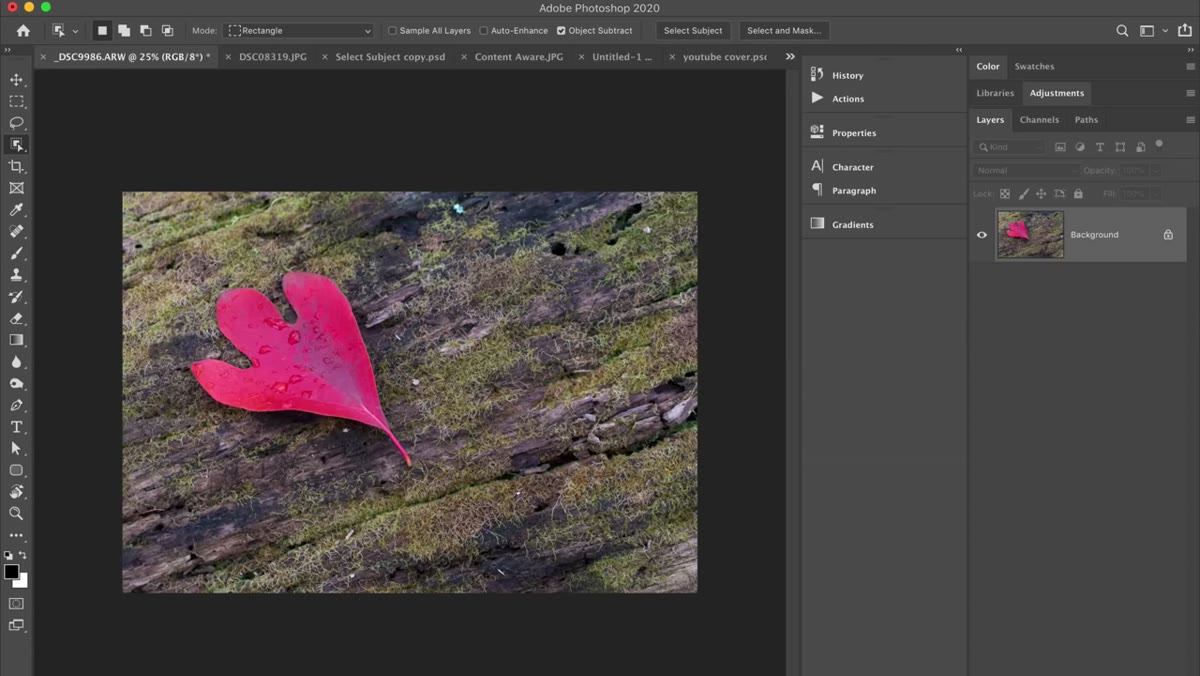 Rectangle being drawn loosely around a subject in a simpler background photo
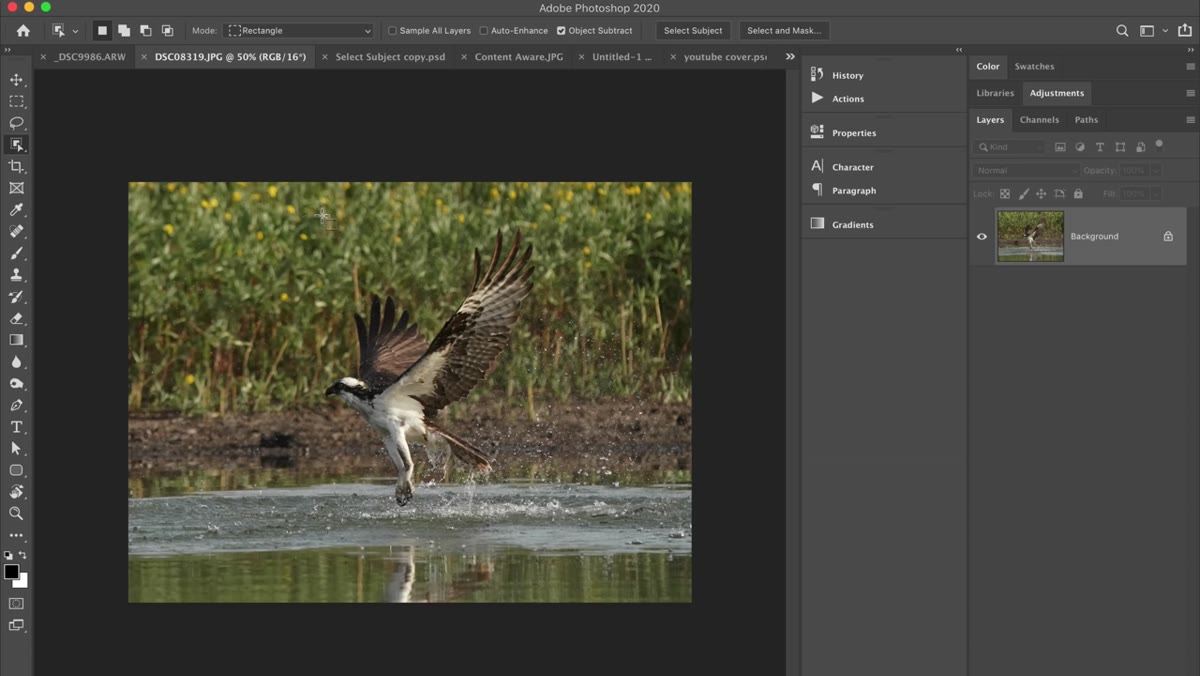
With your image open and the Object Selection Tool active, draw a rough bounding box around the subject you want to isolate. You don’t need to be precise here. That’s the entire point. You’re just telling Photoshop “somewhere in this region, there’s a thing I want.” Give yourself a little padding around the edges of the subject rather than trying to trace it tightly.
Rectangle being drawn loosely around a subject in a simpler background photo
With your image open and the Object Selection Tool active, draw a rough bounding box around the subject you want to isolate. You don’t need to be precise here. That’s the entire point. You’re just telling Photoshop “somewhere in this region, there’s a thing I want.” Give yourself a little padding around the edges of the subject rather than trying to trace it tightly.
Photoshop analyzes what’s inside your rectangle, identifies the dominant object, and snaps the selection to its actual edges. The result is a marching-ants selection that follows the real contours of the subject, not your sloppy rectangle. On a reasonably clean image, this is genuinely fast and often accurate enough to go straight to a mask with minimal refinement.
Step 5: Refine the Selection if Needed
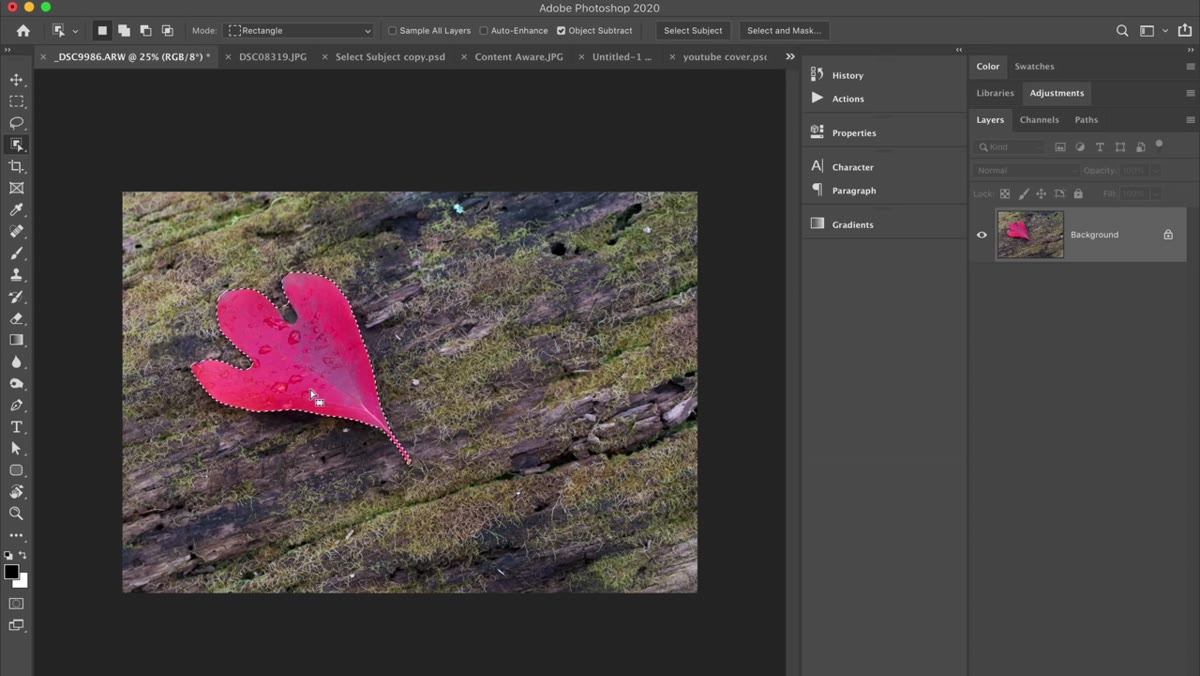 Selection active on subject, showing marching ants following subject edges closely
No AI-driven selection tool gets it right 100% of the time on the first pass, and it would be weird if this one did. After your initial selection appears, check the edges. If there are areas where the selection grabbed background instead of subject, or missed part of the subject, you have two good options. You can hold Shift and draw another rectangle over a missed area to add to the selection. Or you can switch briefly to Quick Selection mode and paint in any corrections.
Selection active on subject, showing marching ants following subject edges closely
No AI-driven selection tool gets it right 100% of the time on the first pass, and it would be weird if this one did. After your initial selection appears, check the edges. If there are areas where the selection grabbed background instead of subject, or missed part of the subject, you have two good options. You can hold Shift and draw another rectangle over a missed area to add to the selection. Or you can switch briefly to Quick Selection mode and paint in any corrections.
From there, click “Select and Mask” in the options bar to clean up edge detail, especially around hair or fur. The Object Selection Tool does the heavy lifting on the broad strokes. Select and Mask handles the finesse work. These two tools together are a significantly faster pipeline than the old “draw a path and pray” approach, and I say that as someone who spent years drawing paths and praying.
Something Worth Adding From My Own Experience
I started testing the Object Selection Tool on stock images like most people do, simple subjects, good lighting, clean backgrounds. Then I tried it on a real client job: a food photographer’s product shots with slightly cluttered table surfaces. It performed well enough that I kept it in the workflow, but the key thing I noticed is that your initial rectangle placement matters more than you’d think.
If you draw the rectangle tight to your subject, the tool sometimes clips edges. If you draw it loose enough to include some background on all four sides, it seems to get better context for where the subject ends. Give it room to breathe. Think of it less like a lasso tool and more like you’re pointing at something and saying “that one, there, in the middle of all this.”
The single biggest thing I took from Matt’s tutorial is that Photoshop 2020 made two genuinely time-saving additions for photographers, and one of them (the Option/Alt zoom) takes about four seconds to learn and start using immediately. The Object Selection Tool has a slightly higher ceiling to get the most out of it, but even at 80% proficiency it’s faster than most alternatives for clean subject isolation.
Go watch the full breakdown from Matt himself, because he covers additional features and his demo work is clear and practical.
Watch the full tutorial on YouTube
Comments
Leave a Comment