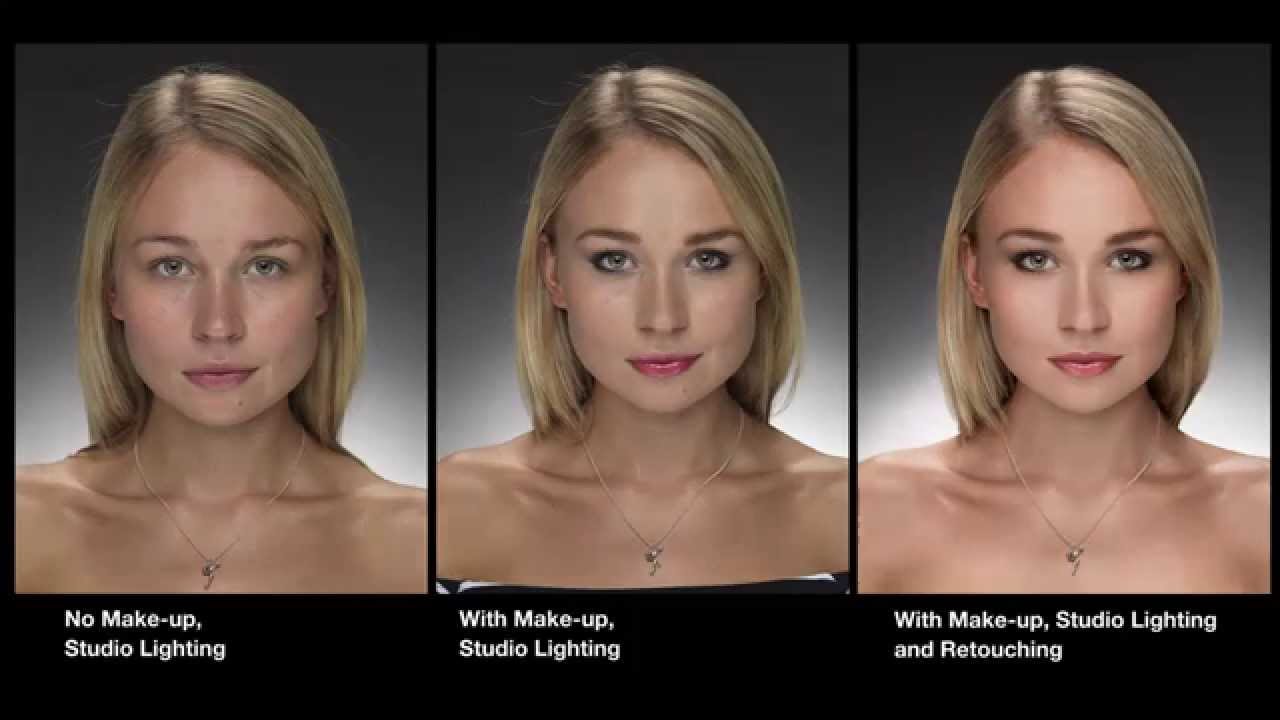
There’s a question I get from clients more than any other, and it’s some version of: “How much of this is Photoshop?” Usually they’re holding up a magazine or a campaign image, and they genuinely can’t tell where the photographer’s work ends and the retoucher’s begins. I never had a clean, visual answer to that until I watched this Visual Education tutorial from photographer Carl Taylor. He does something I’ve never actually seen done in a single video: he photographs the same model under three completely different conditions and stacks the results so you can see exactly what each variable contributes. No guessing. No hand-waving. Just receipts.
The breakdown goes like this: natural window light with zero makeup, then professional studio beauty lighting with zero makeup, then studio lighting with full makeup, and finally the post-production polish on top of that last shot. Each stage isolates one variable. That structure is what makes this useful rather than just impressive. If you’ve ever tried to explain to a non-photographer why lighting matters as much as retouching, or why a great retouch still needs a solid foundation to work with, this video gives you a visual argument you can actually point to.
I work mostly in Austin coffee shops with a laptop and a moderate caffeine dependency, so I’m not shooting product or beauty campaigns myself. But I do retouch portraits and headshots regularly, and understanding how much work the photographer does before the image ever reaches me has genuinely changed how I communicate with clients about what’s realistic. This tutorial Watch the full tutorial on YouTube is worth your time even if you never touch a studio strobe in your life.
Step 1: Establish Your Baseline With Natural Light
 Sophie photographed at window with no makeup, natural light
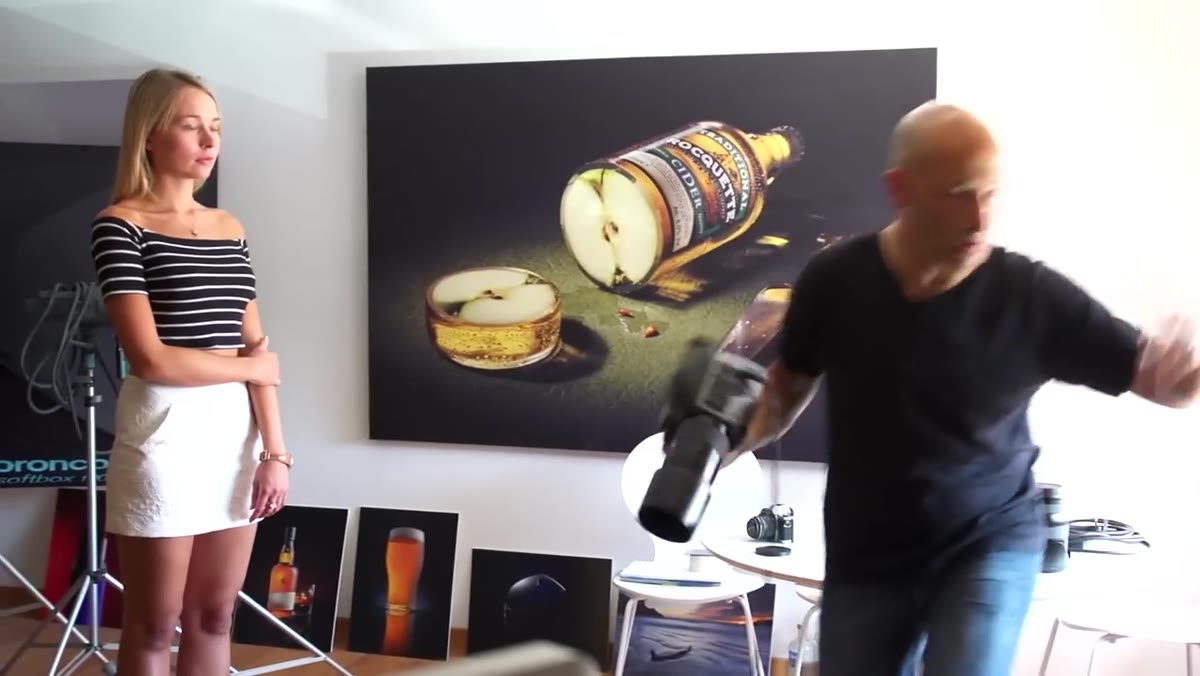
Before anything fancy happens, Carl positions his model Sophie in front of a window and shoots a straightforward portrait. Same lens, same angle he’ll use throughout. No colour correction, no diffusion, no flash. This shot is the control group, and it’s important to treat it that way. Don’t soften or warm it in camera. You want an honest read of what ambient daylight and no makeup actually looks like on a real person. That’s your ground truth for everything that follows.
Sophie photographed at window with no makeup, natural light
Before anything fancy happens, Carl positions his model Sophie in front of a window and shoots a straightforward portrait. Same lens, same angle he’ll use throughout. No colour correction, no diffusion, no flash. This shot is the control group, and it’s important to treat it that way. Don’t soften or warm it in camera. You want an honest read of what ambient daylight and no makeup actually looks like on a real person. That’s your ground truth for everything that follows.
What this stage teaches you is how much your eye already corrects for. When you see someone in person under a window, your brain fills in a lot. The camera doesn’t. Pores, uneven skin tone, shadows under the eyes from overhead light. None of that is a flaw in the subject. It’s just what a sensor sees without intervention. Keep that in mind when you’re looking at your own portraits before you start retouching.
Step 2: Build a Beauty Lighting Setup
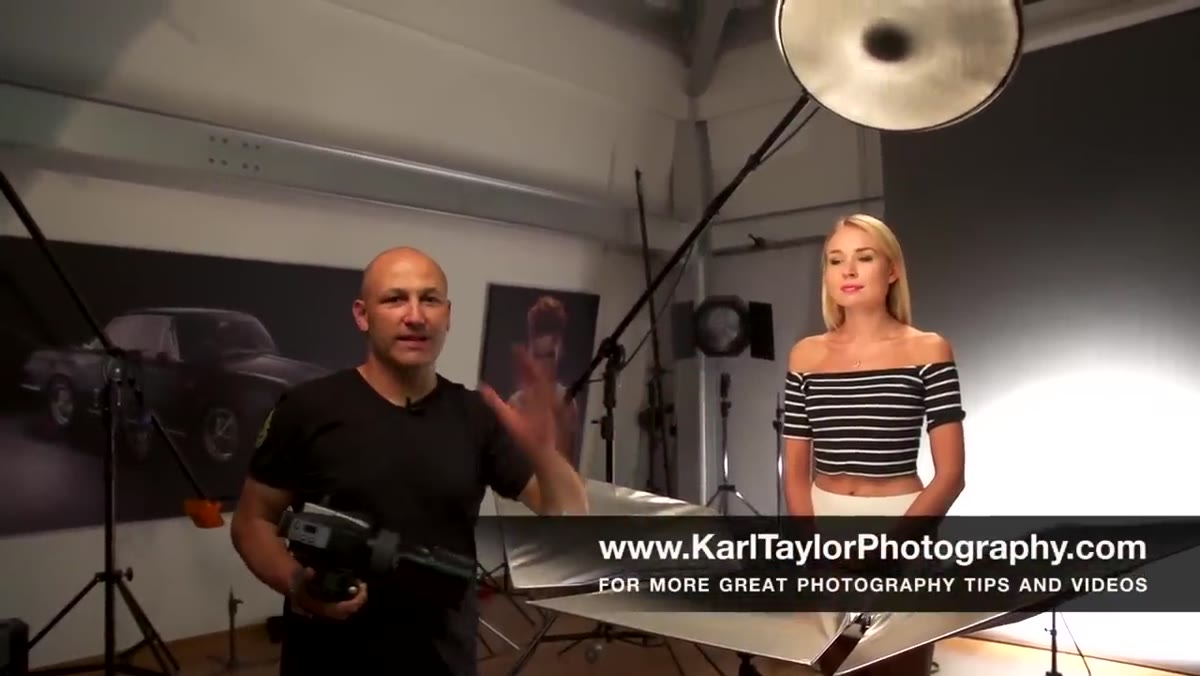
 Studio beauty lighting rig with para reflector and hair light visible
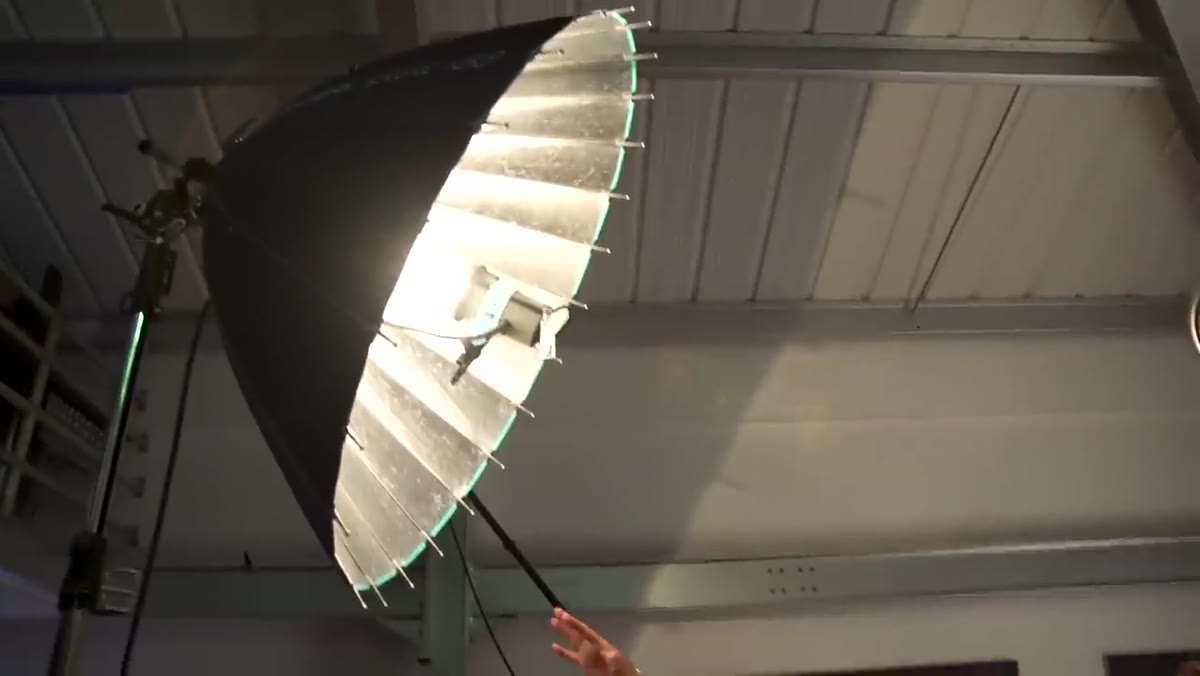
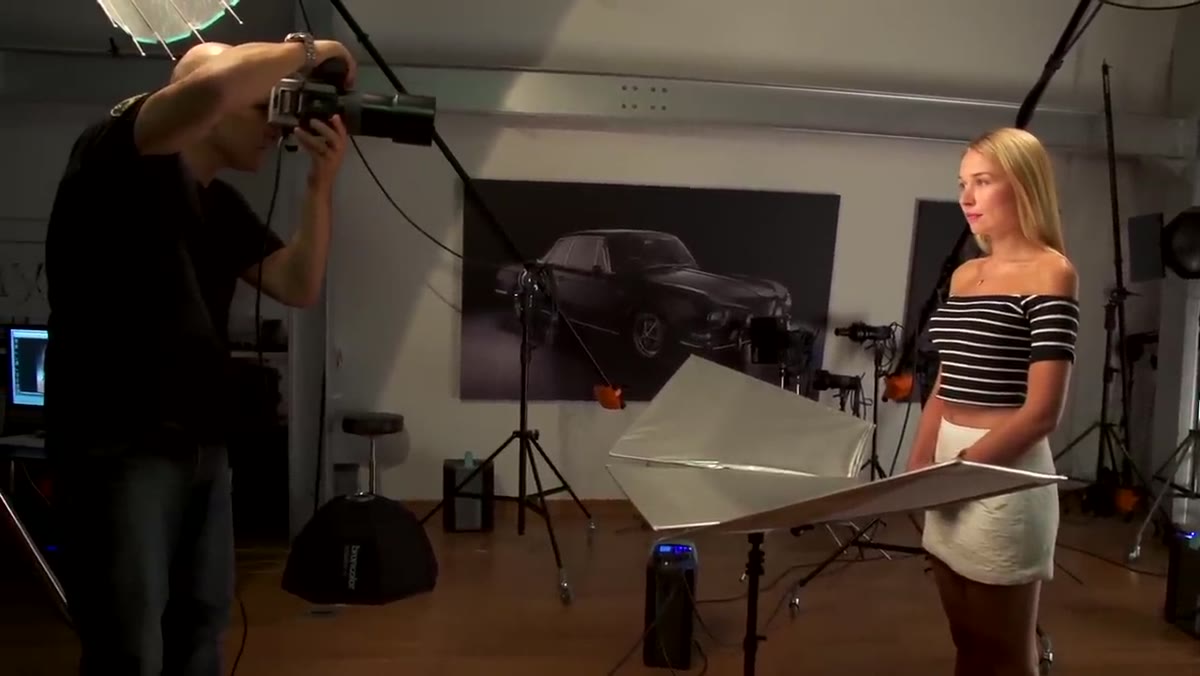
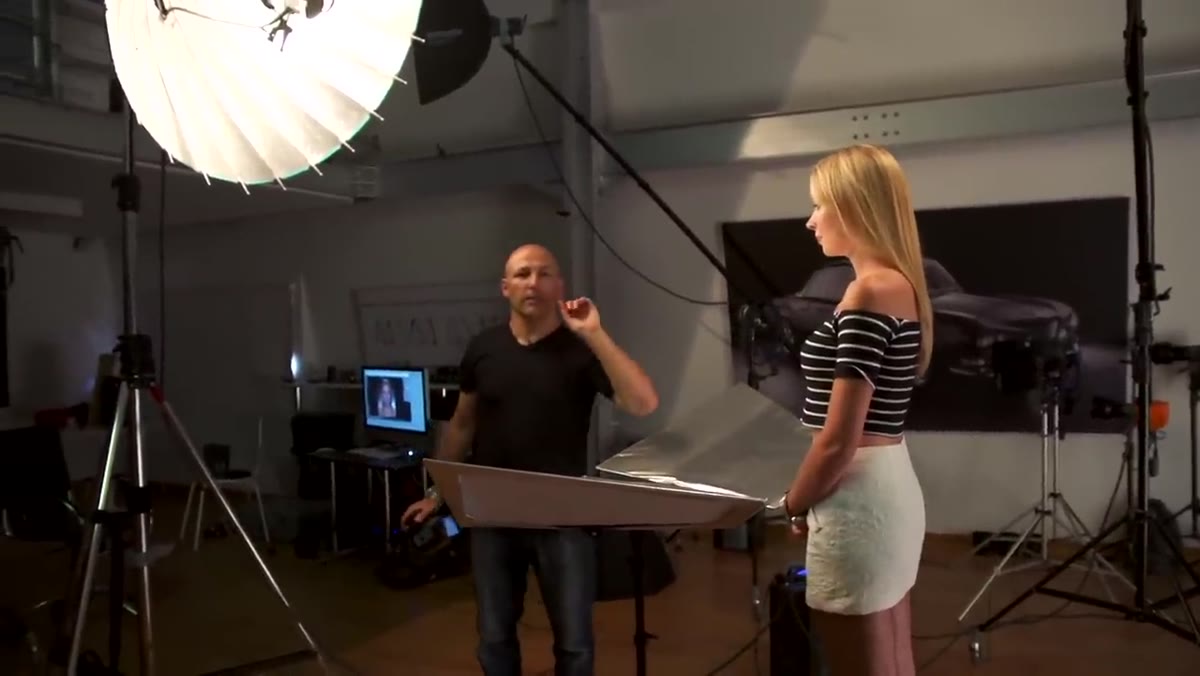
Carl’s lighting setup here is a classic beauty configuration and worth memorising if you ever touch portrait work. The main light is a Broncolor Para 133, which is a large parabolic reflector that produces a slightly specular but very flattering quality of light. Directly underneath it sits a tri-reflector that bounces fill back up under the chin and along the sides of the face. This combo is designed to minimise unflattering shadows and create that characteristic bright, open look you see in cosmetics advertising.
Studio beauty lighting rig with para reflector and hair light visible
Carl’s lighting setup here is a classic beauty configuration and worth memorising if you ever touch portrait work. The main light is a Broncolor Para 133, which is a large parabolic reflector that produces a slightly specular but very flattering quality of light. Directly underneath it sits a tri-reflector that bounces fill back up under the chin and along the sides of the face. This combo is designed to minimise unflattering shadows and create that characteristic bright, open look you see in cosmetics advertising.
For the hair, he’s using a beauty dish with a honeycomb grid to keep the light controlled and directional. On the background, a Broncolor head produces a graduated glow, light falling off from centre to edge. The whole setup is shooting straight at the subject. No dramatic side angles, no rembrandt shadows. This is a setup designed to flatter, and that’s the point. Before Sophie puts on any makeup, the lighting alone is already doing significant heavy lifting.
Step 3: Shoot the No-Makeup Studio Frame
 Sophie under studio lights, no makeup, square-on portrait
With the lighting dialled in, Carl shoots Sophie in the exact same position as the window shot. Same camera angle, same focal length, same square-on framing. This is the critical comparison frame because it isolates what professional lighting contributes on its own, independent of makeup or retouching. If you’re building a before-and-after for a client presentation, this is the discipline you need: change only one variable at a time.
Sophie under studio lights, no makeup, square-on portrait
With the lighting dialled in, Carl shoots Sophie in the exact same position as the window shot. Same camera angle, same focal length, same square-on framing. This is the critical comparison frame because it isolates what professional lighting contributes on its own, independent of makeup or retouching. If you’re building a before-and-after for a client presentation, this is the discipline you need: change only one variable at a time.
The difference between this frame and the window shot is significant, and it’s worth sitting with that before moving on. Better light doesn’t just mean brighter. It means more three-dimensional, more even, more flattering shadow placement. A good lighting setup is doing retouching work before you even open Photoshop. That’s not a knock on retouching. It’s an argument for getting the shoot right first.
Step 4: Reshoot With Full Makeup Applied
 Sophie with makeup under same studio lighting setup
Sophie comes back with her full makeup done, and Carl shoots the same frame again. Nothing about the lighting or camera position changes. This is pure variable isolation. The image you end up with here, makeup plus good lighting, is already a commercially viable portrait before a single slider gets moved. That’s the point Carl is building toward: each stage stacks on the previous one, and Photoshop is the final layer, not the foundation.
Sophie with makeup under same studio lighting setup
Sophie comes back with her full makeup done, and Carl shoots the same frame again. Nothing about the lighting or camera position changes. This is pure variable isolation. The image you end up with here, makeup plus good lighting, is already a commercially viable portrait before a single slider gets moved. That’s the point Carl is building toward: each stage stacks on the previous one, and Photoshop is the final layer, not the foundation.
For retouchers working from other photographers’ files, this stage is a reminder to pay attention to what came in the door. If the lighting is already doing its job and the makeup is clean and well-applied, your retouching should be light. You’re polishing, not rebuilding. When retouching feels like an uphill battle, it’s usually because one of the earlier stages in this chain was skipped or rushed.
Step 5: Retouch the Final Frame in Photoshop
 Carl moving to Photoshop post-production on the makeup studio shot
The post-production work Carl does on the final frame is where everything gets refined. Skin texture evening, colour correction, any stray hairs or small distractions. This is standard beauty retouching territory: frequency separation for texture versus tone, dodge and burn for contouring, possibly some liquify work if needed. The point he’s making is that this retouching, applied to a well-lit and well-prepared image, produces results that would be nearly impossible to replicate if you were starting from the natural light no-makeup frame.
Carl moving to Photoshop post-production on the makeup studio shot
The post-production work Carl does on the final frame is where everything gets refined. Skin texture evening, colour correction, any stray hairs or small distractions. This is standard beauty retouching territory: frequency separation for texture versus tone, dodge and burn for contouring, possibly some liquify work if needed. The point he’s making is that this retouching, applied to a well-lit and well-prepared image, produces results that would be nearly impossible to replicate if you were starting from the natural light no-makeup frame.
The before-and-after comparison across all four stages, window light bare face, studio light bare face, studio light with makeup, and final retouch, makes the cumulative argument visually. Photoshop is powerful, but it’s most powerful when it’s finishing a strong photograph rather than compensating for a weak one.
What I’d Add From My Own Experience
I used to treat retouching as the heavy lifter. Client sends me a flat, badly lit headshot, and I’d spend an hour trying to coax something out of it. I’d dodge and burn until my wrist hurt, trying to fake dimension that the lighting never created. What Carl’s video made obvious to me is that I was working backwards. The light creates the structure. Makeup refines what the light hits. Photoshop cleans up what’s left.
If you’re doing your own photography and retouching both, run this same four-stage experiment on yourself or a willing friend. The gap between stage one and stage four will tell you exactly where your time is best spent. For most people, it’s not more hours in Photoshop. It’s a reflector and a window.
The single most important thing this tutorial communicates is that professional results are a system, not a trick. Each stage, lighting, makeup, retouching, multiplies the one before it. Skip one and the whole chain is weaker. Watch the full tutorial on YouTube and pay attention to how much the image changes before Carl ever opens Photoshop. That’s the real lesson.
Comments
Leave a Comment