There’s a certain kind of client request that makes every freelance designer’s eye twitch a little: “Can you just make this photo look more dramatic?” No notes, no reference image, just vibes. I’ve been handed sunny, flat, completely unremarkable stock photos and asked to make them feel cinematic. Rain is one of the fastest ways to get there, and for a long time I was doing it the slow, ugly way. Too much noise, wrong angle on the streaks, rain that looked like TV static instead of actual weather.
Then I stumbled on a Kelvin Designs tutorial that reframed how I think about the whole effect. Watch the full tutorial on YouTube before or after reading this, it’s worth your time. What Kelvin does well is show how much of the work is really about selling the environment, not just slapping a rain texture on top. The rain itself is almost the last thing you add. First, you have to make the world feel like it could actually be raining. That starts with the sky.
One thing I genuinely appreciated: the base photo he uses has a blown-out white sky, which a lot of people would treat as a problem. Kelvin treats it as a feature. Here’s how the whole thing breaks down.
Step 1: Open Your Base Image and Source Files
 Folder containing base photo, cloud image, and Photoshop brushes
Kelvin provides source files for this tutorial through his site, including a photo of a man walking on train tracks, a stormy cloud image, and a set of custom Photoshop brushes. Download those and open the base photo first. The image has a flat, white sky, which is exactly what you want here. That empty sky is your canvas for the next step.
Folder containing base photo, cloud image, and Photoshop brushes
Kelvin provides source files for this tutorial through his site, including a photo of a man walking on train tracks, a stormy cloud image, and a set of custom Photoshop brushes. Download those and open the base photo first. The image has a flat, white sky, which is exactly what you want here. That empty sky is your canvas for the next step.
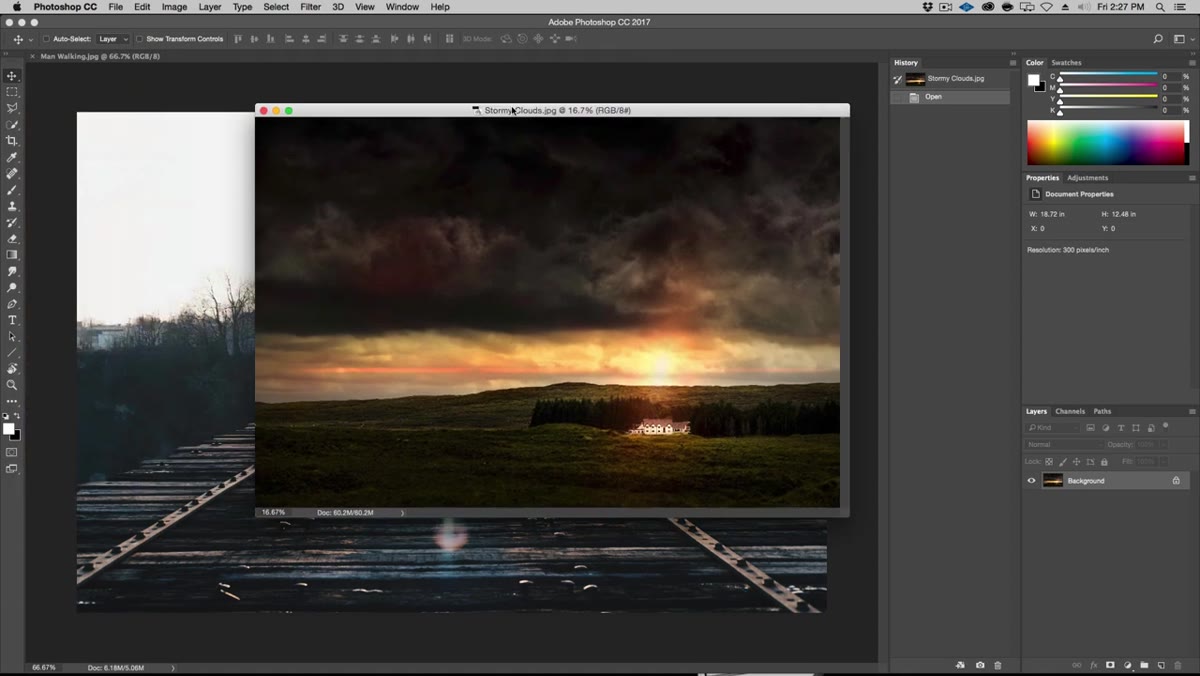
Step 2: Place the Stormy Cloud Image and Set It to Multiply
 Stormy cloud layer dragged onto base photo document
Open the stormy clouds image separately, then drag it directly into your base photo document as a new layer. Before you do anything else, including resizing or repositioning, change the blending mode of that cloud layer to Multiply. This is the move that makes everything work. Multiply drops out the light tones and blends the darker areas into your base photo, so the cloud texture integrates naturally instead of sitting on top like a bad collage. You’ll be able to see through it, which means you can actually position it intelligently.
Stormy cloud layer dragged onto base photo document
Open the stormy clouds image separately, then drag it directly into your base photo document as a new layer. Before you do anything else, including resizing or repositioning, change the blending mode of that cloud layer to Multiply. This is the move that makes everything work. Multiply drops out the light tones and blends the darker areas into your base photo, so the cloud texture integrates naturally instead of sitting on top like a bad collage. You’ll be able to see through it, which means you can actually position it intelligently.
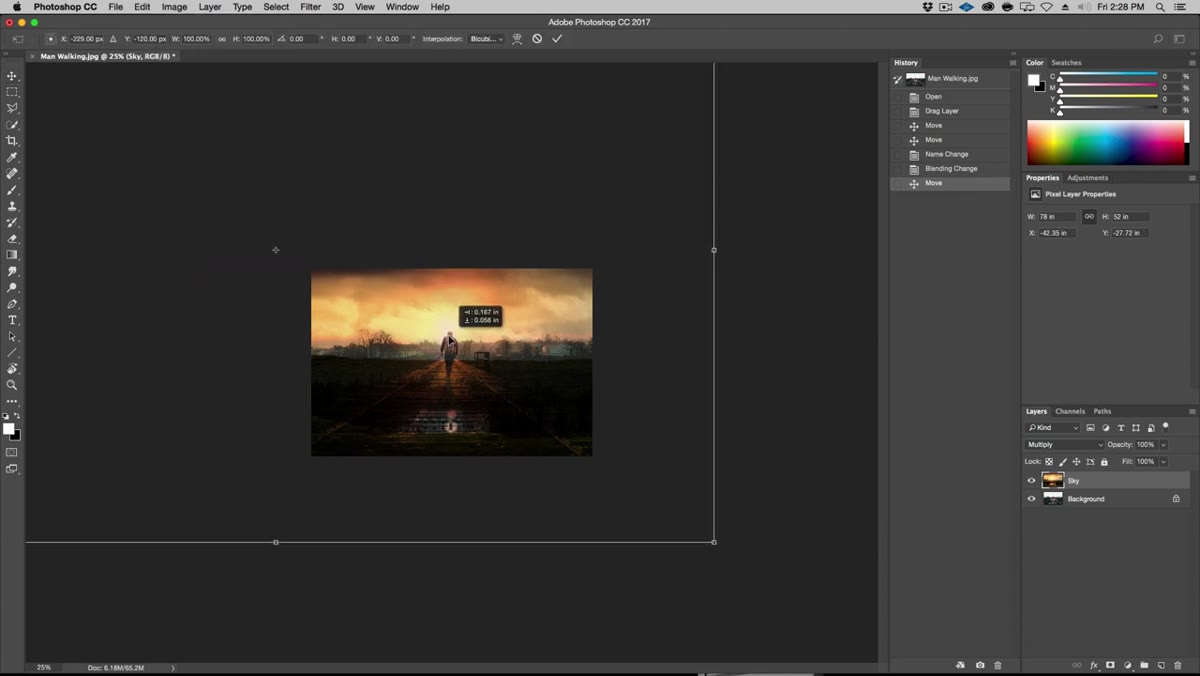
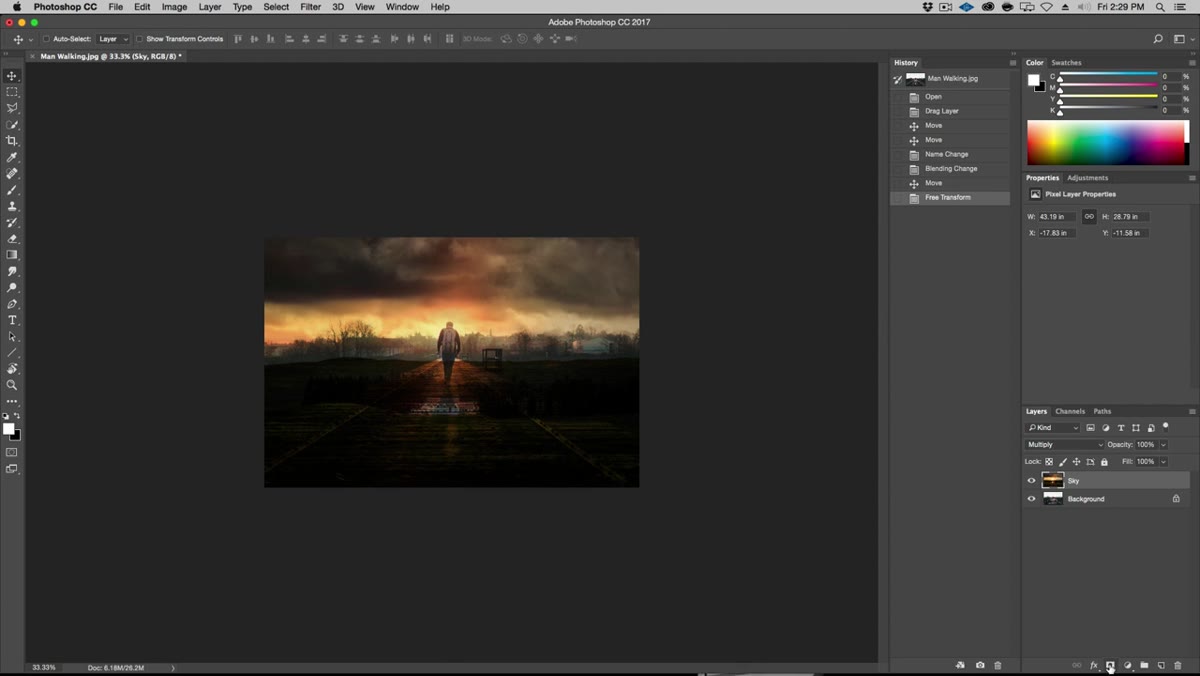
Step 3: Use Free Transform to Align the Sun with the Light Source
 Free transform handle moved to match existing light source behind subject
Here’s where Kelvin does something that separates thoughtful compositing from sloppy compositing. Before scaling the cloud layer, he moves the transform’s anchor point. By default, Photoshop scales from the center of a layer. But if you want to scale toward a specific point, you drag that anchor to where you want the focal point to be. In this case, he moves it to where the sun sits in the cloud image, lining it up behind the subject. That way, when he scales down and repositions the cloud layer, the light in the clouds matches the existing backlight on the figure. Hold Alt and Shift while dragging a corner handle to scale proportionally from that custom anchor point.
Free transform handle moved to match existing light source behind subject
Here’s where Kelvin does something that separates thoughtful compositing from sloppy compositing. Before scaling the cloud layer, he moves the transform’s anchor point. By default, Photoshop scales from the center of a layer. But if you want to scale toward a specific point, you drag that anchor to where you want the focal point to be. In this case, he moves it to where the sun sits in the cloud image, lining it up behind the subject. That way, when he scales down and repositions the cloud layer, the light in the clouds matches the existing backlight on the figure. Hold Alt and Shift while dragging a corner handle to scale proportionally from that custom anchor point.
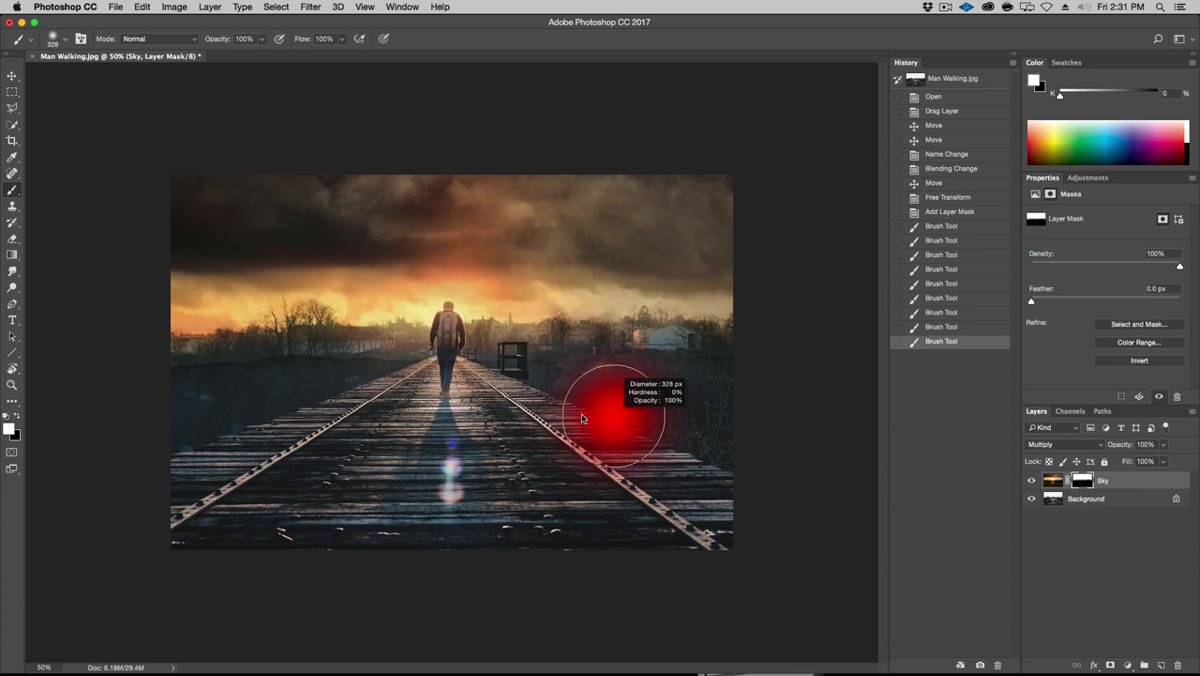
Step 4: Mask the Cloud Layer to Blend Into the Horizon
 Black mask hiding cloud layer, white brush painting sky back in
Once the clouds are positioned, you don’t want them covering everything. Hold Alt and click the layer mask button at the bottom of the Layers panel. Alt-clicking creates a black mask, which hides the entire layer immediately. From there, grab a soft round brush, set it to white, crank the size up (Kelvin uses around 400px), and paint the sky back in. Keep the brush soft so the clouds feather naturally into the treeline. You can intentionally let a little cloud texture bleed over the top of the trees, that ambiguity at the edge actually helps the composite read as real.
Black mask hiding cloud layer, white brush painting sky back in
Once the clouds are positioned, you don’t want them covering everything. Hold Alt and click the layer mask button at the bottom of the Layers panel. Alt-clicking creates a black mask, which hides the entire layer immediately. From there, grab a soft round brush, set it to white, crank the size up (Kelvin uses around 400px), and paint the sky back in. Keep the brush soft so the clouds feather naturally into the treeline. You can intentionally let a little cloud texture bleed over the top of the trees, that ambiguity at the edge actually helps the composite read as real.
Step 5: Add Rain Using a Custom Brush
 Custom rain brush being applied on a new layer above the photo
This is where the custom brushes from the source files come in. Create a new layer above everything, then load the Photoshop brush presets Kelvin provides. These are pre-built rain streak brushes, which means the angle, spacing, and shape are already dialed in for you. Select one, set your foreground color to white, and paint across the image on your new layer. You’re not trying to be precise here. A single broad stroke across the whole frame is usually enough to start. The brush does the heavy lifting.
Custom rain brush being applied on a new layer above the photo
This is where the custom brushes from the source files come in. Create a new layer above everything, then load the Photoshop brush presets Kelvin provides. These are pre-built rain streak brushes, which means the angle, spacing, and shape are already dialed in for you. Select one, set your foreground color to white, and paint across the image on your new layer. You’re not trying to be precise here. A single broad stroke across the whole frame is usually enough to start. The brush does the heavy lifting.
Step 6: Adjust Rain Layer Opacity and Blending Mode
 Rain layer with blending mode and opacity adjusted for realism
A rain layer at 100% opacity on Normal mode looks like a special effect, not weather. Bring the opacity down, somewhere in the 50-70% range is a reasonable starting point, and experiment with blending modes like Screen or Soft Light to let the underlying image show through. The goal is for the rain to feel like it exists in the scene, catching the available light, not like it was printed on top of a photo.
Rain layer with blending mode and opacity adjusted for realism
A rain layer at 100% opacity on Normal mode looks like a special effect, not weather. Bring the opacity down, somewhere in the 50-70% range is a reasonable starting point, and experiment with blending modes like Screen or Soft Light to let the underlying image show through. The goal is for the rain to feel like it exists in the scene, catching the available light, not like it was printed on top of a photo.
One Thing I’d Add: Duplicate and Offset Your Rain Layers
The single technique I started stacking on top of Kelvin’s method is using two or three rain layers at slightly different opacities and scales. Duplicate your rain layer, transform it to be slightly larger or at a slightly different angle, and drop the opacity lower on the second layer. This creates a sense of depth, rain in the foreground versus rain further back. Real rain has that kind of layering. One flat rain texture, no matter how good the brush is, tends to feel a bit 2D. Two or three layers with variance feel genuinely atmospheric. It adds maybe two minutes to the process and makes a noticeable difference, especially if the image is going anywhere people will actually look at it closely.
The core lesson from Kelvin’s approach is one I keep coming back to: build the environment before you build the effect. Get the sky right, get the light source consistent, and the rain almost sells itself. Layering textures on top of a photo that doesn’t already feel like the right world is why most rain effects look fake.
If you’re working on a composite that needs that stormy, cinematic weight, this tutorial is worth the time. Watch the full tutorial on YouTube and grab Kelvin’s source files while you’re there. The brushes alone are useful to have in your kit.
Comments (5)
The before and after really sells it. Incredible difference.
Tried this technique this morning. Game changer for real.
Couldn't agree more. I've seen this make a huge difference in landscape work specifically.
Been doing this wrong for years apparently. Thanks for the wake-up call.
Clear and practical. No fluff. Appreciate that.
Leave a Comment