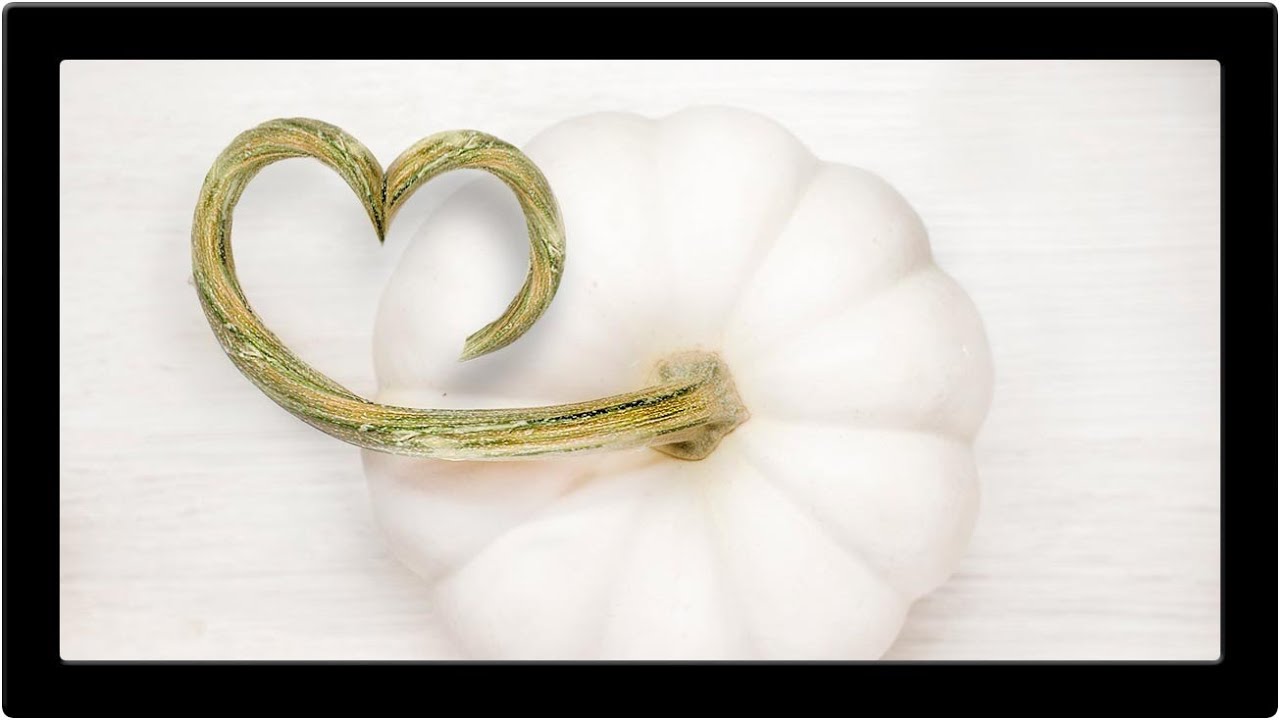
There’s a specific kind of client brief that used to make me sweat: “make it look natural, but also… different.” You know the one. A product photo where the stem of a flower needs to curl into a logo shape, or a branch needs to extend three inches further than it actually does in real life. Clean, simple, advertising-ready. The kind of thing that looks effortless until you try to pull it off and end up with a smeared, obviously-Photoshopped disaster at 2am.
This is exactly the problem that Aaron Nace tackles in this PHLEARN tutorial, using a high-key pepper photo as his canvas. The goal sounds almost silly at first: bend the pepper’s stem into a heart shape. But the techniques he uses to get there, sketching a plan before touching the pen tool, using clone stamping to extend organic textures, and building the whole thing with clipping masks, are legitimately useful for any project where you need to manipulate a real object and keep it believable. Watch the full tutorial on YouTube if you want to follow along with the actual footage.
I’ve spent too many hours jumping straight into the pen tool on jobs like this, winging it, and ending up with anchor point spaghetti. Aaron’s workflow is more disciplined than mine was, and after watching it, I reorganized how I approach this whole category of job.
Step 1: Sketch Before You Touch the Pen Tool
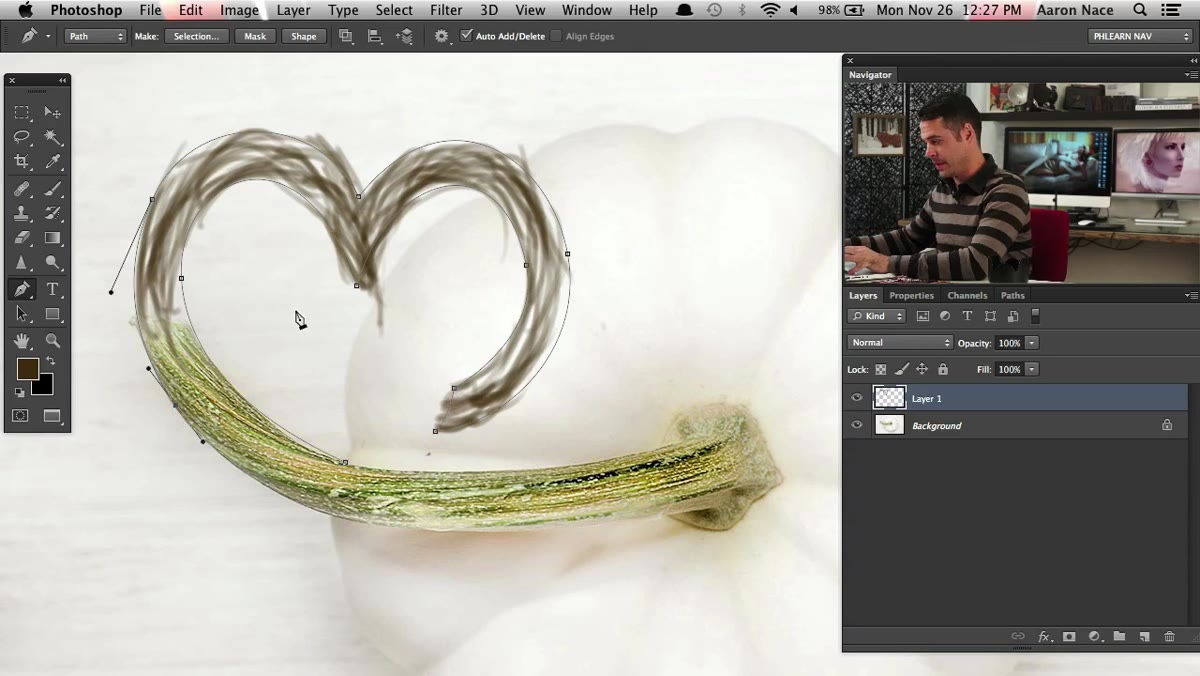
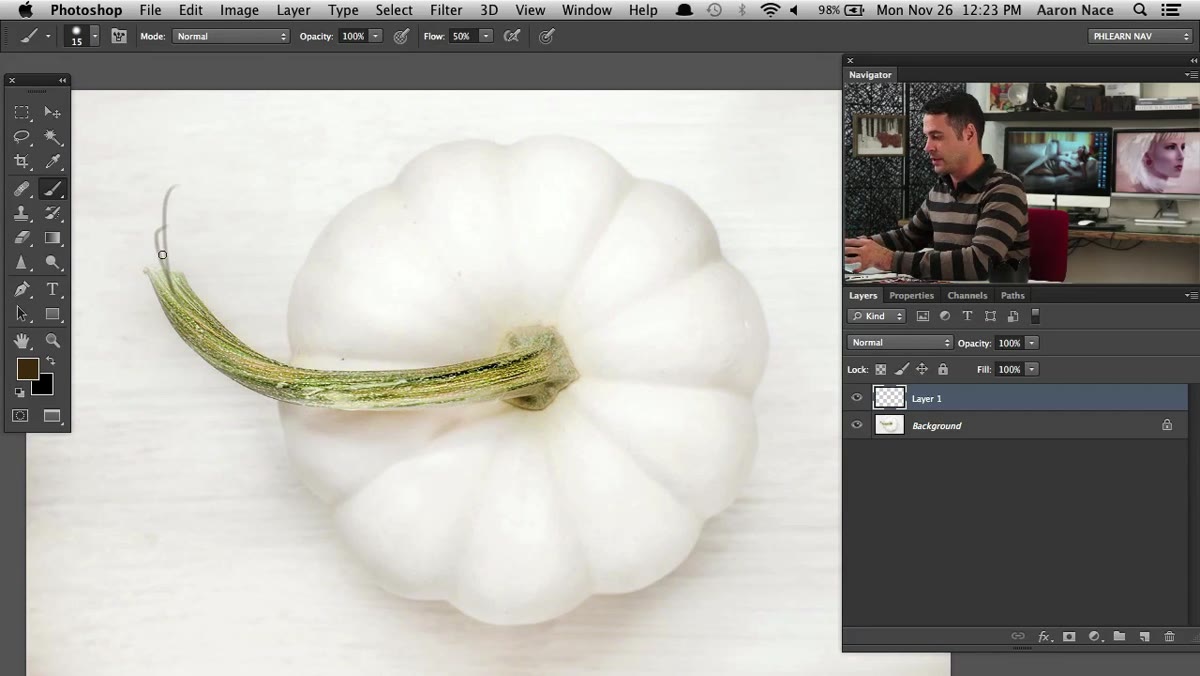 Aaron brushing a rough heart sketch over the pepper stem
Before opening the pen tool, Aaron grabs a regular brush and loosely sketches the shape he wants the stem to follow directly on a new layer over the image. In this case it’s a heart, but the principle applies to any organic extension or reshape job. The sketch doesn’t need to be clean. It just needs to answer the question: where is this thing actually going?
Aaron brushing a rough heart sketch over the pepper stem
Before opening the pen tool, Aaron grabs a regular brush and loosely sketches the shape he wants the stem to follow directly on a new layer over the image. In this case it’s a heart, but the principle applies to any organic extension or reshape job. The sketch doesn’t need to be clean. It just needs to answer the question: where is this thing actually going?
This step sounds obvious and it is, but I’d bet most people skip it. The pen tool punishes you for not having a plan. Knowing whether your curve needs to loop back or fold into a crease (Aaron chooses a crease here, which is simpler to execute and reads just as well) saves you from rebuilding paths halfway through. Spend two minutes with a soft brush first.
Step 2: Trace the Existing Stem with the Pen Tool
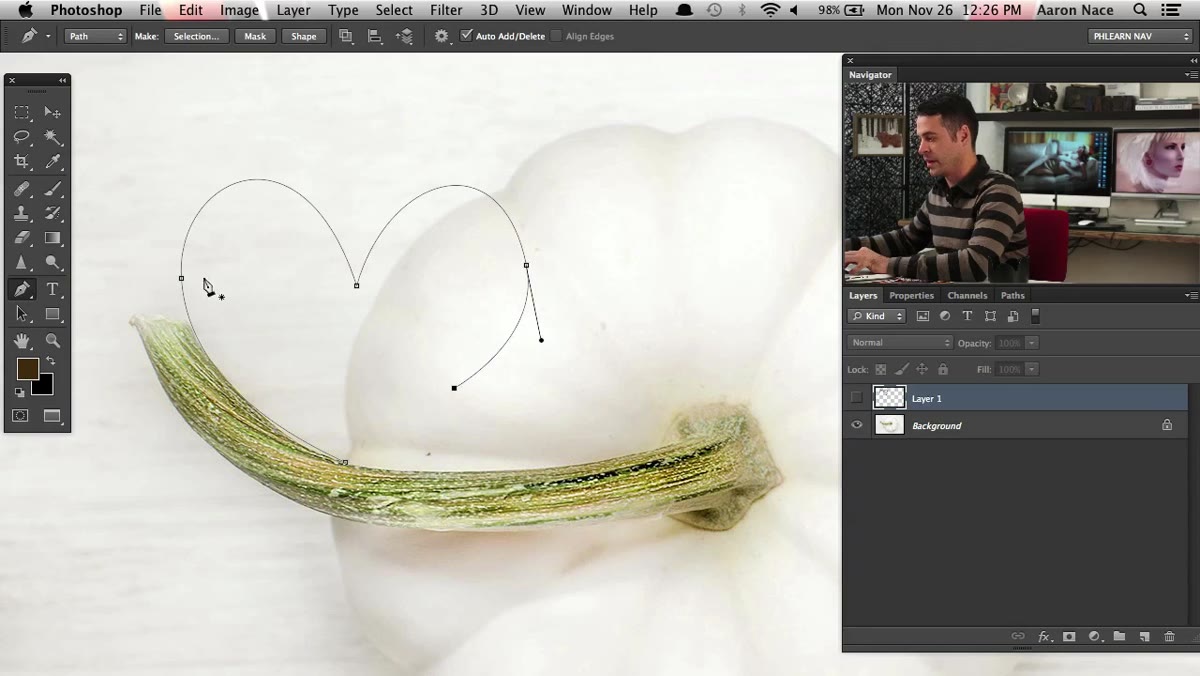
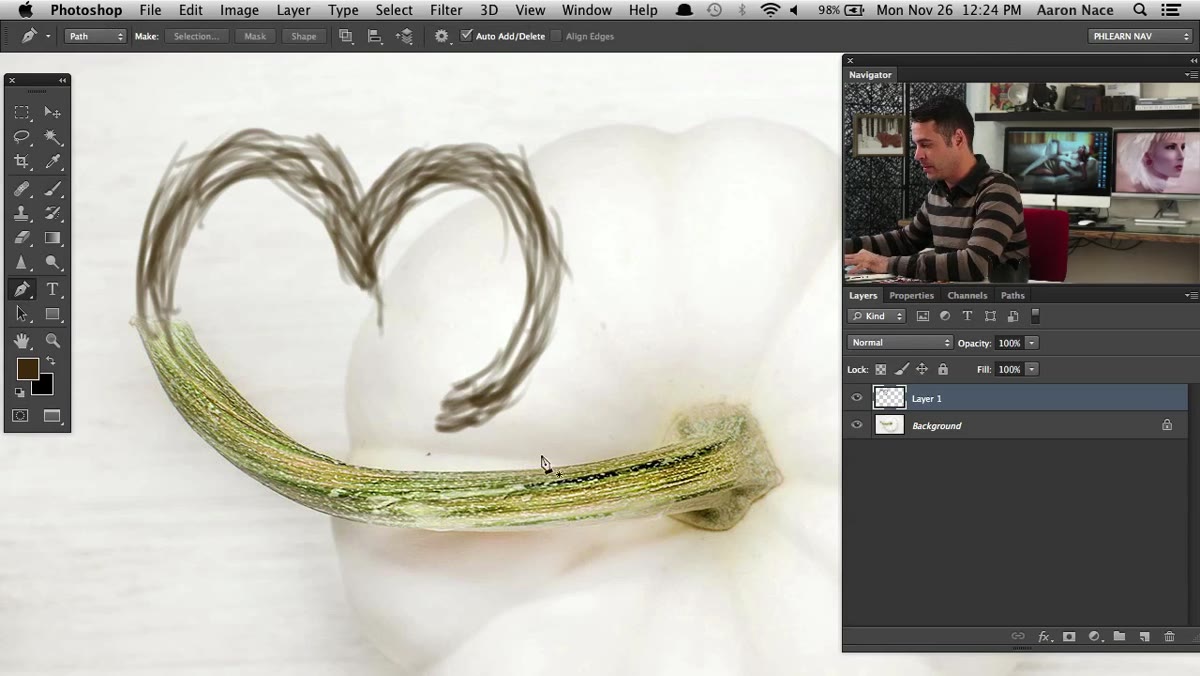 Pen tool anchor points being placed along the pepper stem edge
Hit P to grab the pen tool and start tracing the actual stem as it exists in the photo. Aaron’s rule here is worth burning into your brain: use as few anchor points as possible. Click and drag to create curved points rather than clicking repeatedly to approximate a curve with straight segments. The handle that extends from the anchor point controls the arc of the curve on either side, and learning to trust that handle instead of adding more points is what separates clean paths from messy ones.
Pen tool anchor points being placed along the pepper stem edge
Hit P to grab the pen tool and start tracing the actual stem as it exists in the photo. Aaron’s rule here is worth burning into your brain: use as few anchor points as possible. Click and drag to create curved points rather than clicking repeatedly to approximate a curve with straight segments. The handle that extends from the anchor point controls the arc of the curve on either side, and learning to trust that handle instead of adding more points is what separates clean paths from messy ones.
On long, sweeping sections of the stem, a single well-placed anchor point with a long handle can cover ground that a nervous user might attack with ten clicks. Zoom in, go slow, and resist the urge to add points every time the edge of the stem shifts slightly.
Step 3: Break the Handle Direction with Alt/Option
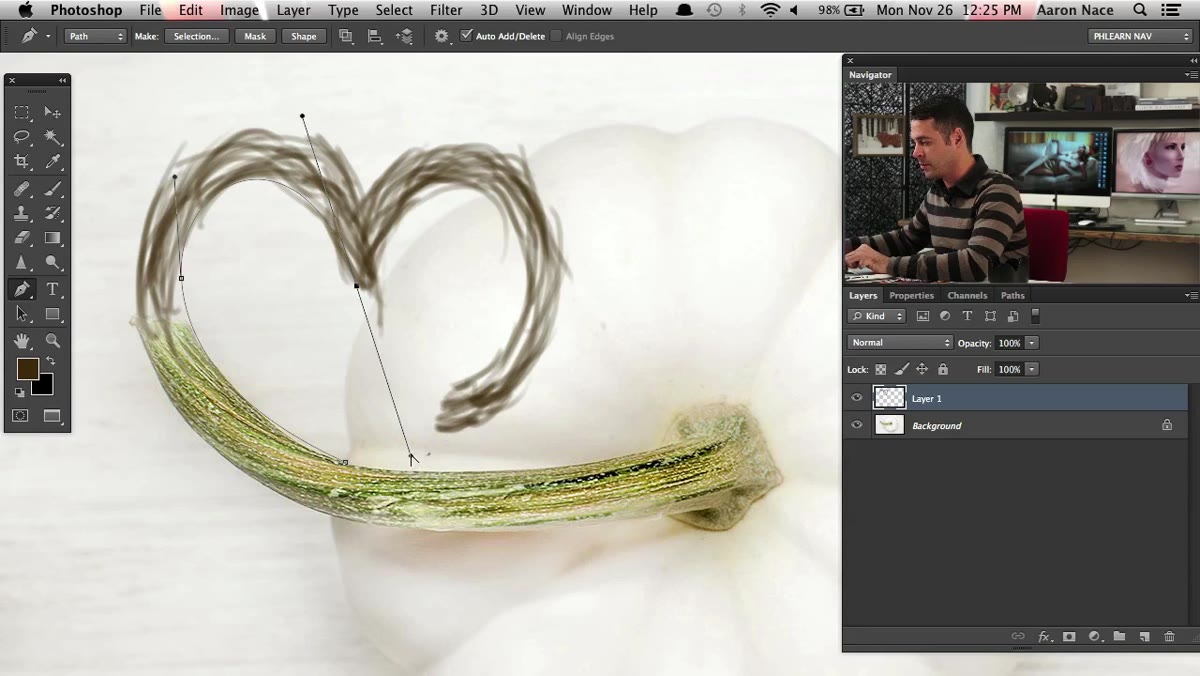 Alt-clicking an anchor point to redirect the handle independently
Here’s the move that unlocks the pen tool for complex curves: when you need a sharp change of direction, like the point at the bottom of a heart, you can’t just place a new anchor point. You need to break the relationship between the two handles on either side of that point.
Alt-clicking an anchor point to redirect the handle independently
Here’s the move that unlocks the pen tool for complex curves: when you need a sharp change of direction, like the point at the bottom of a heart, you can’t just place a new anchor point. You need to break the relationship between the two handles on either side of that point.
Hold Alt (Windows) or Option (Mac), click directly on the anchor point, and drag. This lets you move one handle independently of the other, so your path can come in on one curve and exit on a completely different one. Without this, your path will try to maintain a smooth S-curve through every point, which is useless when you need a hard crease or a pointed bottom. This single shortcut probably makes up 40% of what makes someone good with the pen tool.
Step 4: Build the Extended Stem Shape with Clone Stamping
 Clone Stamp tool sampling texture from the existing stem
Once the path defines where the new stem section needs to go, the actual visual work begins: filling that shape with texture that matches the original stem. Aaron uses the Clone Stamp tool (S) to sample from the existing stem and paint new stem texture into the extended or reshaped area.
Clone Stamp tool sampling texture from the existing stem
Once the path defines where the new stem section needs to go, the actual visual work begins: filling that shape with texture that matches the original stem. Aaron uses the Clone Stamp tool (S) to sample from the existing stem and paint new stem texture into the extended or reshaped area.
The key is sampling at a similar angle and lighting position to where you’re painting. Organic objects like vegetable stems have grain and highlight direction baked into them. If you clone from the wrong section, the texture will look like it belongs to a different object entirely. Sample often, sample close to your target area, and use a low-hardness brush to blend edges.
Step 5: Confine the Clone Work with a Clipping Mask
 Clipping mask applied to keep clone stamp within the path shape
To keep all that clone stamping from bleeding outside the intended stem shape, Aaron converts his pen tool path into a selection (or a shape layer) and uses a clipping mask to constrain the painted texture. This means you can paint freely and aggressively without worrying about accidentally covering parts of the pepper or the background.
Clipping mask applied to keep clone stamp within the path shape
To keep all that clone stamping from bleeding outside the intended stem shape, Aaron converts his pen tool path into a selection (or a shape layer) and uses a clipping mask to constrain the painted texture. This means you can paint freely and aggressively without worrying about accidentally covering parts of the pepper or the background.
Create your shape from the path, add a new layer above it, and clip it to the shape layer (Alt/Option click between the two layers in the Layers panel). Everything you paint on the clipped layer will only show inside the bounds of the shape below. Clean, non-destructive, and easy to adjust if the shape needs tweaking.
What I’d Do Differently (Or Add)
The technique Aaron demonstrates is solid for a controlled studio image with a clean background. Where I’ve had to adapt it is on location photography with messy, uneven backgrounds, which is most of what actually lands in my inbox. In those cases I’ll often duplicate the original stem layer, warp and transform sections of it using Edit > Transform > Warp before I even touch the pen tool, just to rough out the new position using real pixels. Then I clean up with clone stamping on top. It’s a messier intermediate state, but it gets the overall shape closer before the detail work starts, which saves time on jobs where the brief can still change.
The single most important thing I took from this tutorial is the sketch-first discipline. Every hour I’ve wasted fighting the pen tool traces back to not knowing exactly what I was trying to draw before I started drawing it. Thirty seconds with a brush layer, even a sloppy one, changes the whole session.
If you want to watch Aaron walk through the full process with the actual pepper image, here it is: Watch the full tutorial on YouTube. The section where he breaks the anchor point handles is worth watching in motion even if you read everything above.
Comments (2)
Just subscribed. If the rest of your content is this good, I'm in.
I've watched a dozen tutorials on this and yours is the clearest by far.
Leave a Comment