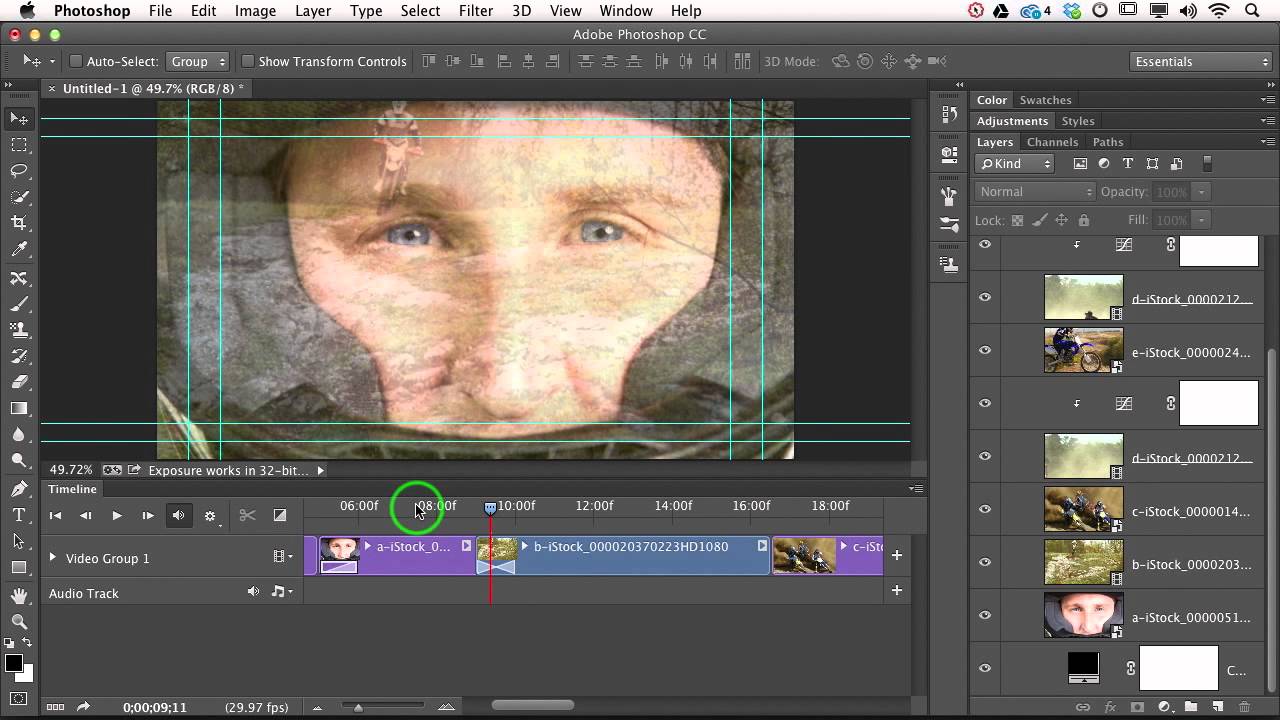
Most people don’t think of Photoshop as a video tool. I didn’t either, until a client handed me a simple slideshow project and I realized I had no budget for Premiere and no patience to learn it that week. Photoshop’s Timeline panel is genuinely capable of handling short video edits, and once you know where things live, it moves fast. The part that tripped me up was transitions. Not adding them — that part’s easy — but making them look right without mysterious transparency issues eating my footage.
In this CreativeLive tutorial, Lesa Snider walks through exactly how transitions work in Photoshop’s Timeline panel. Watch the full tutorial on YouTube — but if you want a written breakdown you can follow alongside Photoshop, here’s every step pulled apart and explained.
The technique covers two main moves: adding a simple fade to a clip and placing a crossfade between two clips. It also covers a genuinely useful fix for the transparency problem that catches everyone the first time. Let’s get into it.
Step 1: Open the Transition Menu in the Timeline Panel
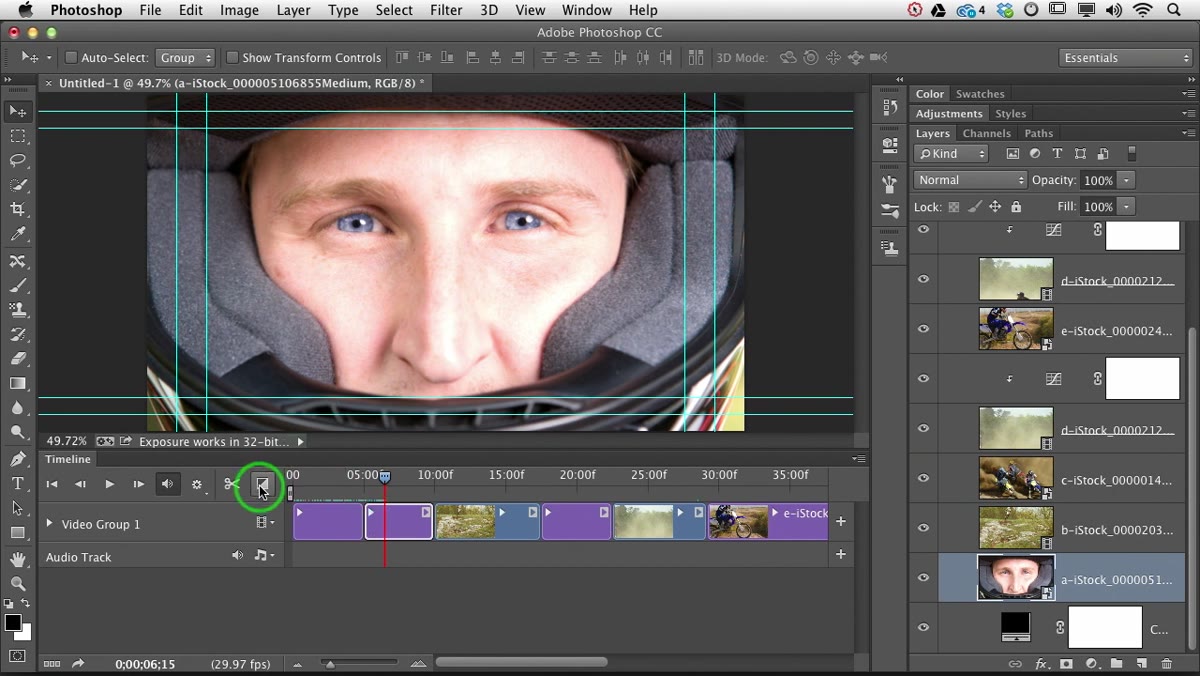 Clicking the transition icon in the Timeline panel
With your Timeline panel open and your video clips loaded, look for the small transition icon near the top left of the panel. It looks like a little overlapping-squares symbol. Click it and a menu drops down showing all available transition types. The two you’ll use most are the basic fade options and the crossfade.
Clicking the transition icon in the Timeline panel
With your Timeline panel open and your video clips loaded, look for the small transition icon near the top left of the panel. It looks like a little overlapping-squares symbol. Click it and a menu drops down showing all available transition types. The two you’ll use most are the basic fade options and the crossfade.
If you haven’t used the Timeline panel much, it helps to zoom in a bit so the clip icons and transition markers are easier to click accurately. Lesa mentions this in the tutorial for good reason — some of these targets are genuinely tiny.
Step 2: Drag a Fade Transition onto a Clip
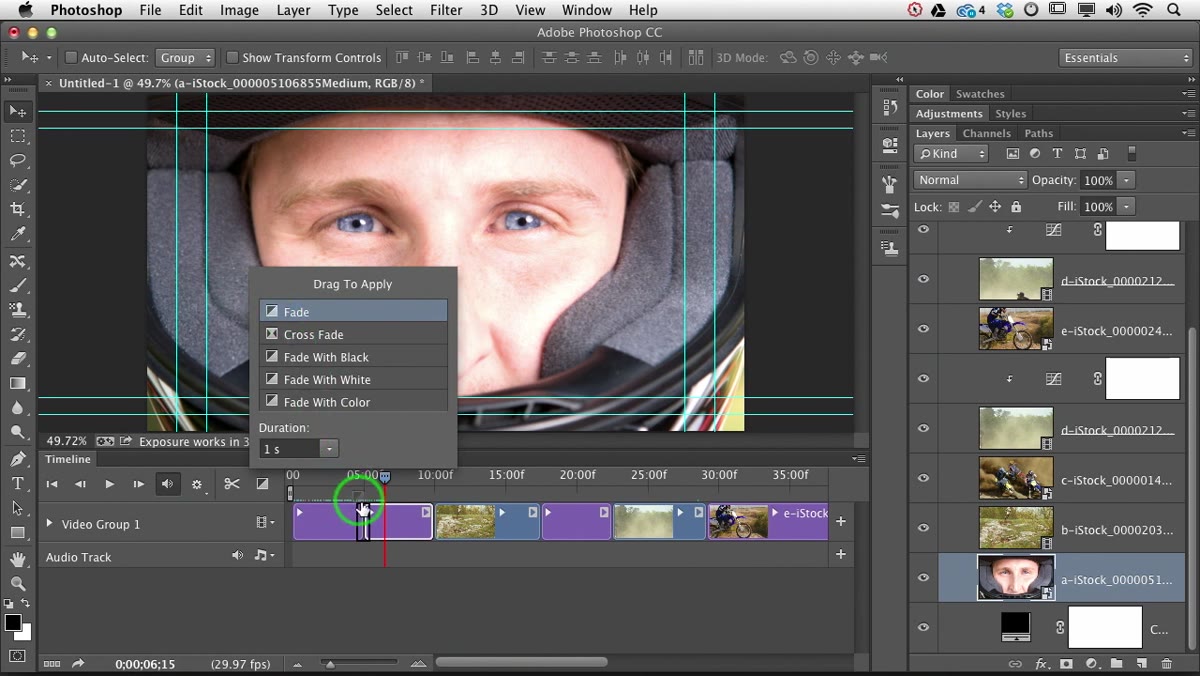 Dragging a fade transition onto a clip in the timeline
Click the transition you want from the menu and drag it directly onto the clip in your timeline. Drop it at the beginning of the clip for a fade-in, or at the end for a fade-out. You’ll see a small black outline appear as you hover, showing you where the transition will land. When it snaps into place, release it.
Dragging a fade transition onto a clip in the timeline
Click the transition you want from the menu and drag it directly onto the clip in your timeline. Drop it at the beginning of the clip for a fade-in, or at the end for a fade-out. You’ll see a small black outline appear as you hover, showing you where the transition will land. When it snaps into place, release it.
Scrub through your timeline with the playhead to preview the effect. The clip will fade in — but here’s where a lot of people hit their first snag.
Step 3: Fix the Transparency Problem with “Fade with Black”
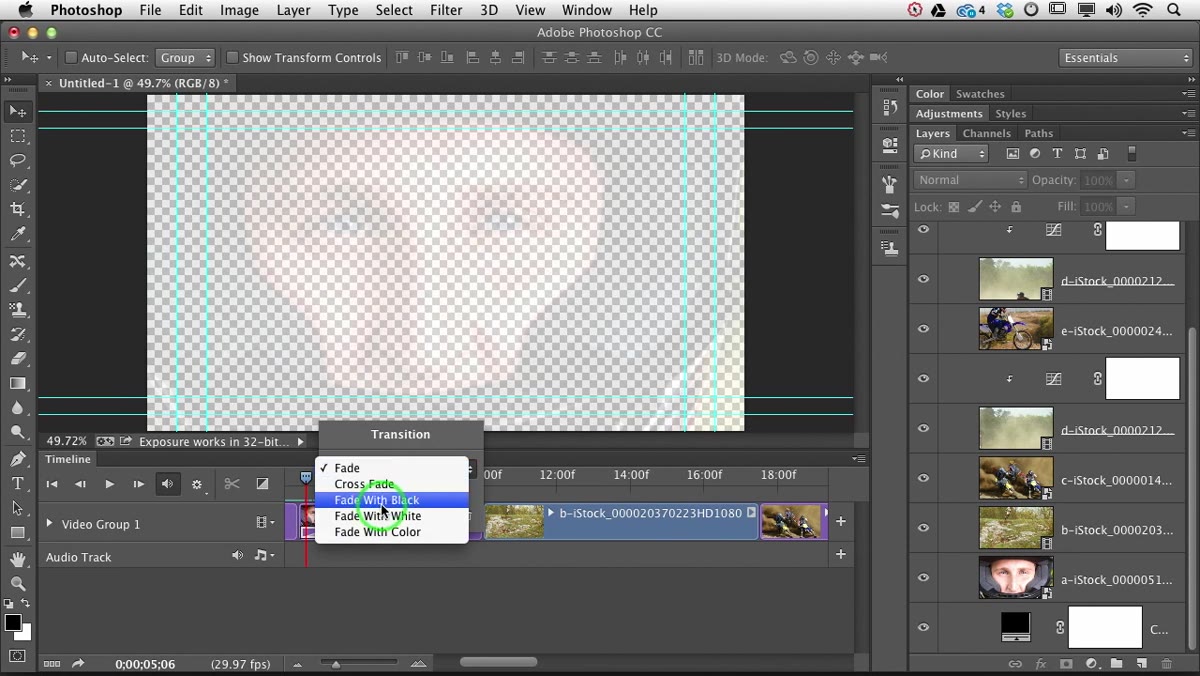 Right-click menu showing Fade with Black option
If there’s no layer sitting underneath your clip in the timeline, a basic fade transition will fade to transparency, not to black or white. You’ll see a checkerboard pattern bleed in, which almost certainly isn’t what you want. The fix is quick: right-click (or Control-click on Mac) directly on the transition icon that appeared on your clip. A small popup menu appears giving you the option to swap the transition style.
Right-click menu showing Fade with Black option
If there’s no layer sitting underneath your clip in the timeline, a basic fade transition will fade to transparency, not to black or white. You’ll see a checkerboard pattern bleed in, which almost certainly isn’t what you want. The fix is quick: right-click (or Control-click on Mac) directly on the transition icon that appeared on your clip. A small popup menu appears giving you the option to swap the transition style.
Choose “Fade with Black” or “Fade with White” depending on your project. This bakes the color into the transition itself so you don’t need a separate solid-color layer sitting underneath just to catch the fade. It’s a small thing that saves a surprising amount of setup time. Lesa notes that black and white are the standard choices in video work, and I’d agree — I’ve never had a client ask for a fade to beige.
Step 4: Add a Crossfade Between Two Clips
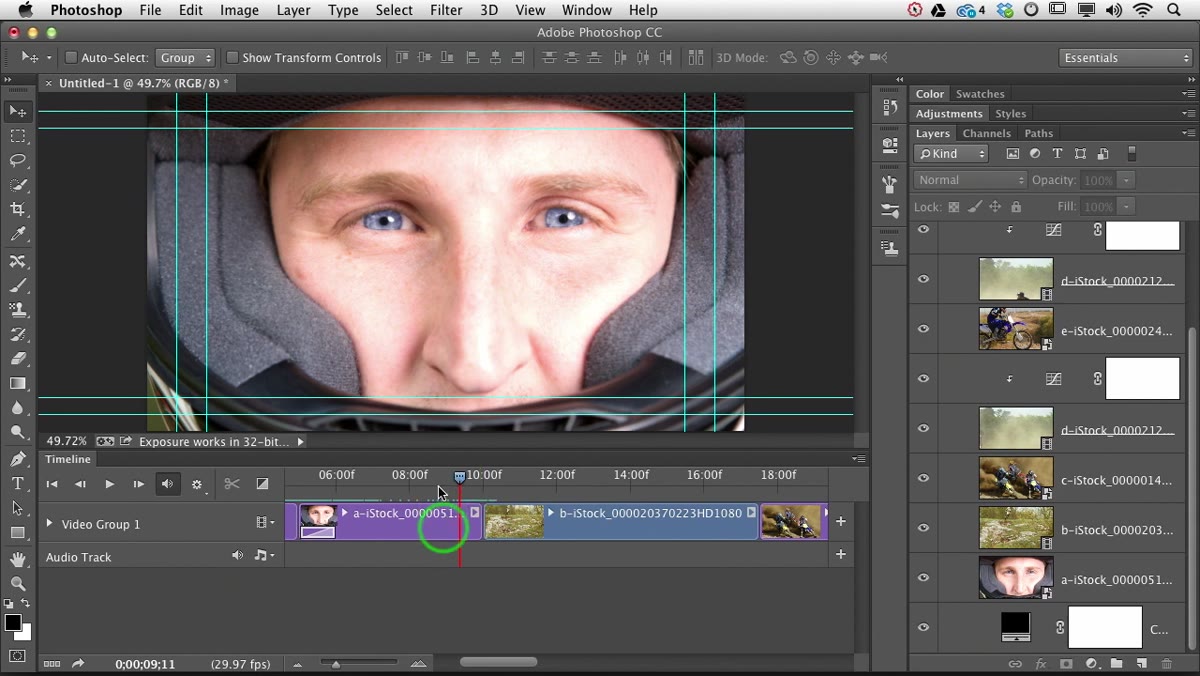 Dragging a crossfade transition between two clips
A crossfade is what you use when two clips need to blend into each other, with one fading out as the next fades in. Open the transition menu again, grab the crossfade option, and this time drag it to the junction between two clips, not to the beginning or end of one. The black outline will appear centered on that edit point.
Dragging a crossfade transition between two clips
A crossfade is what you use when two clips need to blend into each other, with one fading out as the next fades in. Open the transition menu again, grab the crossfade option, and this time drag it to the junction between two clips, not to the beginning or end of one. The black outline will appear centered on that edit point.
Drop it there and scrub through. You should see the first clip gradually disappearing as the second one comes up underneath it. It’s a smooth, professional-looking cut that takes about five seconds to set up.
Step 5: Set the Transition Duration
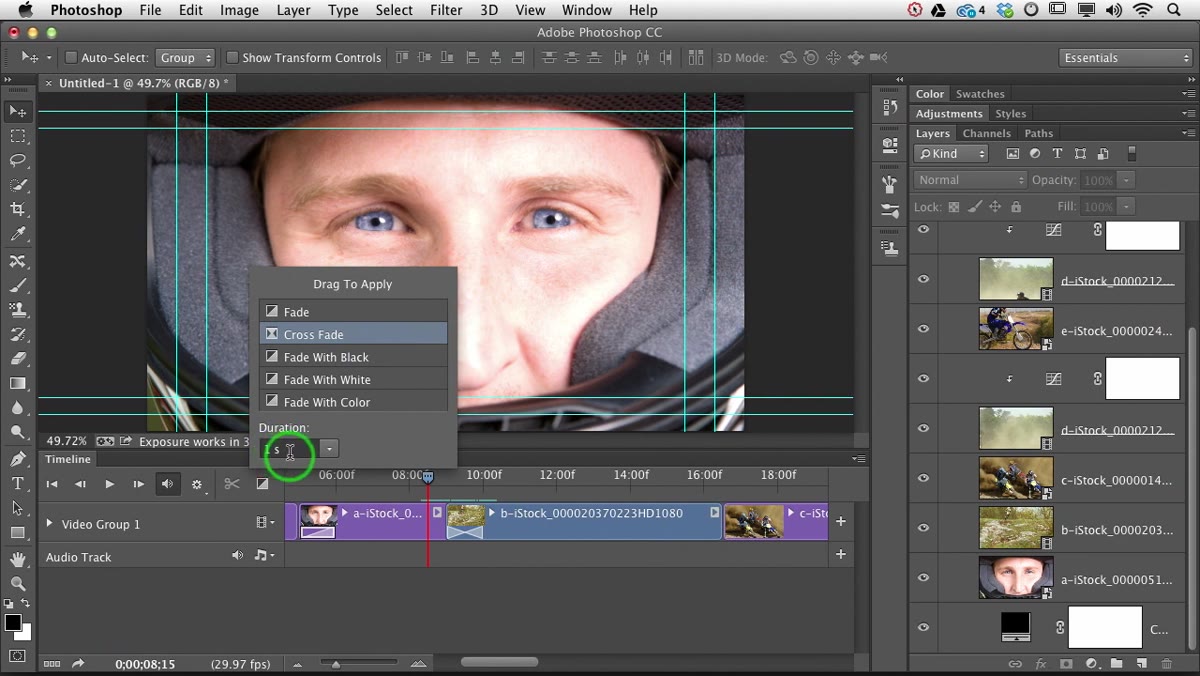 Duration slider shown at the bottom of the transition menu
At the bottom of the transition menu, there’s a duration slider that defaults to one second. You can type in a specific value or use the small triangle to pull up a slider. One second is a solid default for most cuts, but for a slower, more cinematic feel you might push it to two or three seconds.
Duration slider shown at the bottom of the transition menu
At the bottom of the transition menu, there’s a duration slider that defaults to one second. You can type in a specific value or use the small triangle to pull up a slider. One second is a solid default for most cuts, but for a slower, more cinematic feel you might push it to two or three seconds.
If you’d rather set the duration visually, you can do it directly in the timeline. Hover over the edge of the transition icon on the clip until your cursor changes to that bracket shape, the same one you see when trimming clips. Then click and drag: left to shorten the transition, right to lengthen it. This is honestly my preferred method because I can eyeball it against the actual footage instead of guessing at a number.
Step 6: Remove or Adjust a Transition After the Fact
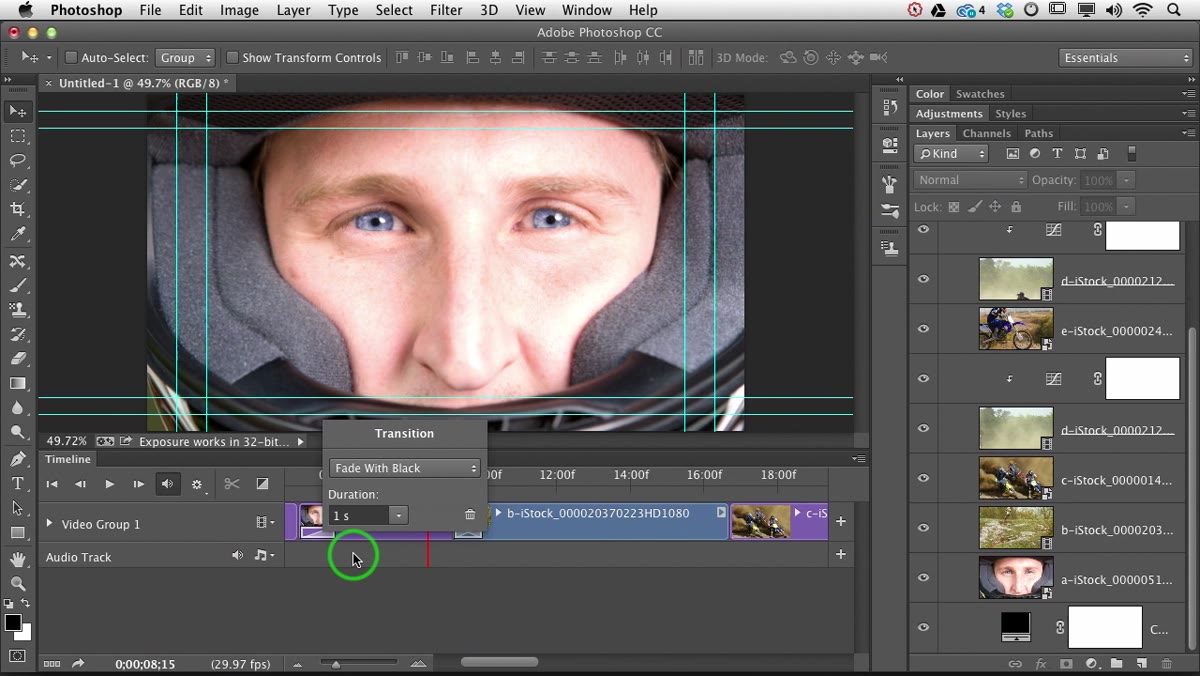 Right-clicking a transition icon to access duration and delete options
If a transition isn’t working, you have a couple of options. Right-click the transition icon on the clip to get the popup menu again, where you can change the duration by typing a new value directly. Or, if you want to delete it entirely, click the transition icon to select it and press the Delete key. There’s also a trash can icon in that right-click menu if you prefer clicking over keyboard shortcuts (I don’t, but no judgment).
Right-clicking a transition icon to access duration and delete options
If a transition isn’t working, you have a couple of options. Right-click the transition icon on the clip to get the popup menu again, where you can change the duration by typing a new value directly. Or, if you want to delete it entirely, click the transition icon to select it and press the Delete key. There’s also a trash can icon in that right-click menu if you prefer clicking over keyboard shortcuts (I don’t, but no judgment).
The ability to right-click and adjust without going back to the menu every time is one of those small workflow details that matters a lot when you’re iterating quickly.
What I’d Add: Check Your Layer Stack Before You Start
Before I even touch the transition menu on any project, I take thirty seconds to look at what’s in my layer stack. If there’s a background layer sitting at the bottom, Photoshop will pick it up as a separate video track, and it will show through during any transparent fade. That’s not always bad — if that background is black, a regular fade transition will look perfectly fine. But if it’s a white canvas or some leftover design element, you’ll get an unintended flash of color during your transition.
The “Fade with Black” or “Fade with White” options Lesa covers sidestep this entirely, and I use them by default now. But knowing why they exist makes you less likely to panic when a basic fade looks weird, and faster at diagnosing it when it does.
Transitions in Photoshop are not complicated once you understand that the transparency behavior is the main gotcha. Drag the transition, right-click to pick the right fade style, adjust the duration either numerically or visually, and you’re done. The crossfade between clips is genuinely one of the slickest-looking things you can add to a simple slideshow or short video edit with almost zero effort.
Watch the full tutorial on YouTube to see Lesa walk through all of this in real time — it’s worth watching just to see how fluidly the whole timeline workflow comes together.
Comments
Leave a Comment