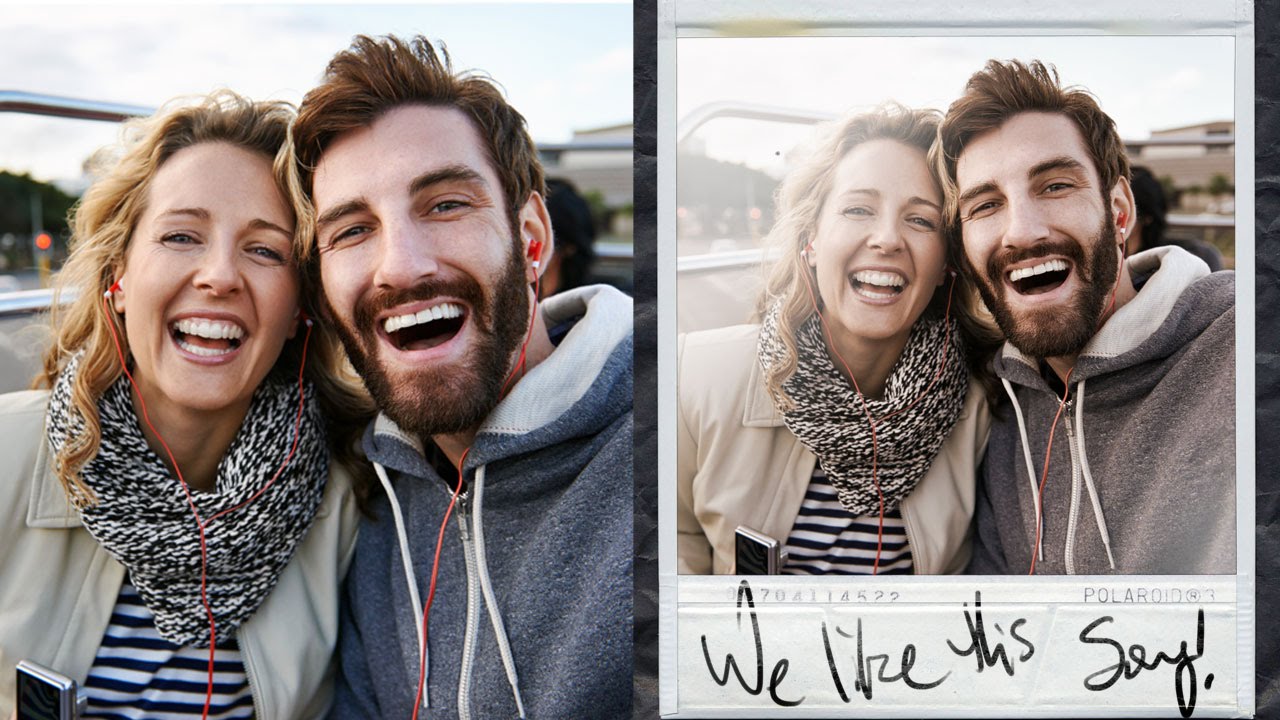
Client asks for “something vintage, you know, like a Polaroid vibe.” You nod confidently. You have no plan. This has happened to me more times than I care to admit, usually while nursing a cold brew at my usual corner table at whatever coffee shop I’ve colonized that week. The good news is that the actual technique is way simpler than it looks, and once you’ve done it once, you can knock it out in about ten minutes. In this Aaron Nace (PHLEARN) tutorial, he walks through a clean, beginner-friendly method for compositing any photo inside a Polaroid frame using nothing but layer masks and a couple of tools you probably already use every day. Watch the full tutorial on YouTube if you want to follow along in real time, or keep reading for the full breakdown.
The core insight here is that you don’t need a physical Polaroid, a scanner, or a fancy plugin. You just need a stock photo of a Polaroid frame and a working knowledge of how layer masks interact with the content underneath them. Aaron’s version of this walks through a handful of steps that each teach you something genuinely useful beyond just this one effect. The unlinking trick alone is worth the price of admission, and that price is free, so.
Step 1: Gather Your Two Source Images
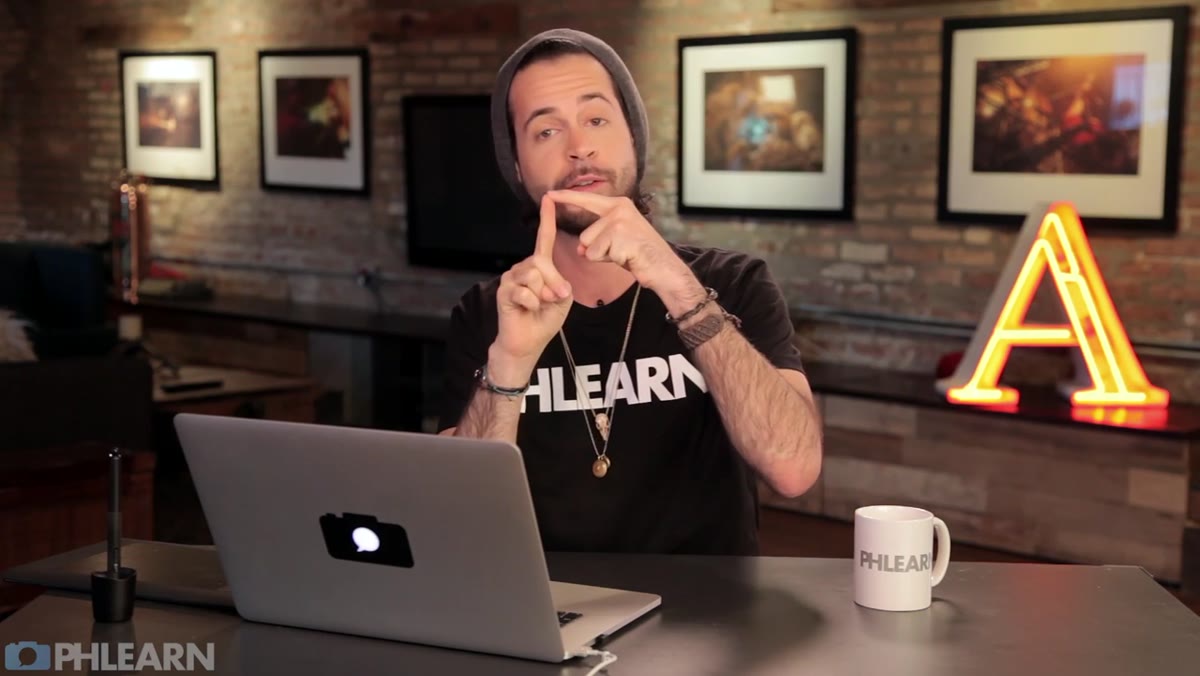 Two open documents: Polaroid frame and couple photo
Before you open Photoshop, you need two files. First, your subject photo. Second, a photo of an actual Polaroid. Aaron recommends checking DeviantArt’s stock section, where you can find free-to-use Polaroid frame images uploaded by photographers. Search “Polaroid stock” and you’ll find plenty. Make sure the image you grab shows the full frame with a clearly defined dark interior window, because that dark center is what you’re going to use as your selection area later.
Two open documents: Polaroid frame and couple photo
Before you open Photoshop, you need two files. First, your subject photo. Second, a photo of an actual Polaroid. Aaron recommends checking DeviantArt’s stock section, where you can find free-to-use Polaroid frame images uploaded by photographers. Search “Polaroid stock” and you’ll find plenty. Make sure the image you grab shows the full frame with a clearly defined dark interior window, because that dark center is what you’re going to use as your selection area later.
Step 2: Combine Both Images into One Document
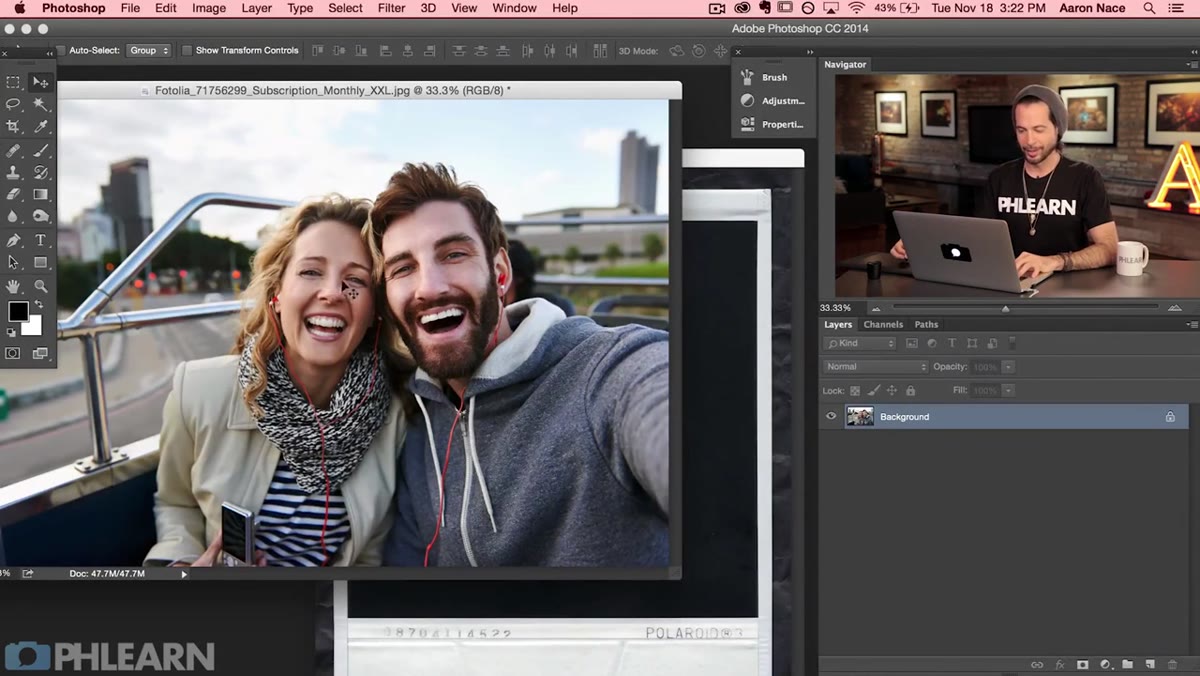 Move tool dragging photo layer onto Polaroid document
Open both images in Photoshop. Grab the Move tool (keyboard shortcut: V) and hold Shift while clicking and dragging your subject photo onto the Polaroid document. Holding Shift centers the layer on the canvas as it lands, which saves you from having to nudge it manually. At this point you should have two layers in your Layers panel: the Polaroid frame as your background, and your subject photo sitting on top. Go ahead and hide the subject layer by clicking the eye icon. You need a clear view of just the Polaroid frame for the next step.
Move tool dragging photo layer onto Polaroid document
Open both images in Photoshop. Grab the Move tool (keyboard shortcut: V) and hold Shift while clicking and dragging your subject photo onto the Polaroid document. Holding Shift centers the layer on the canvas as it lands, which saves you from having to nudge it manually. At this point you should have two layers in your Layers panel: the Polaroid frame as your background, and your subject photo sitting on top. Go ahead and hide the subject layer by clicking the eye icon. You need a clear view of just the Polaroid frame for the next step.
Step 3: Select the Inner Window with the Magic Wand
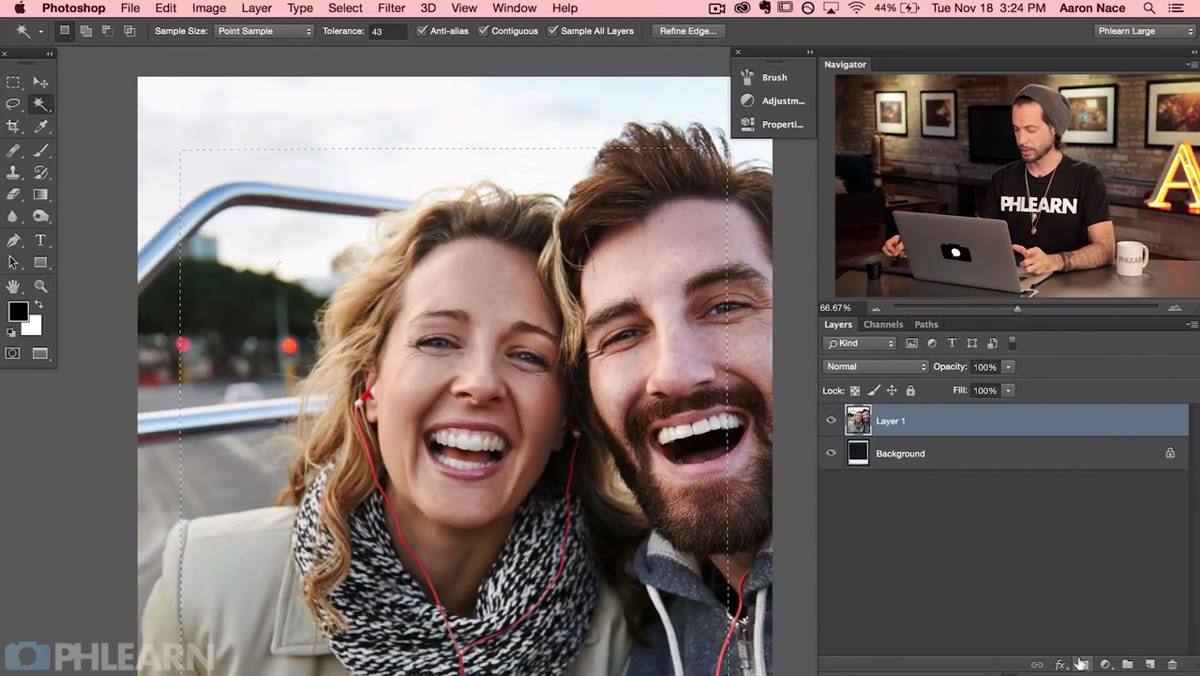
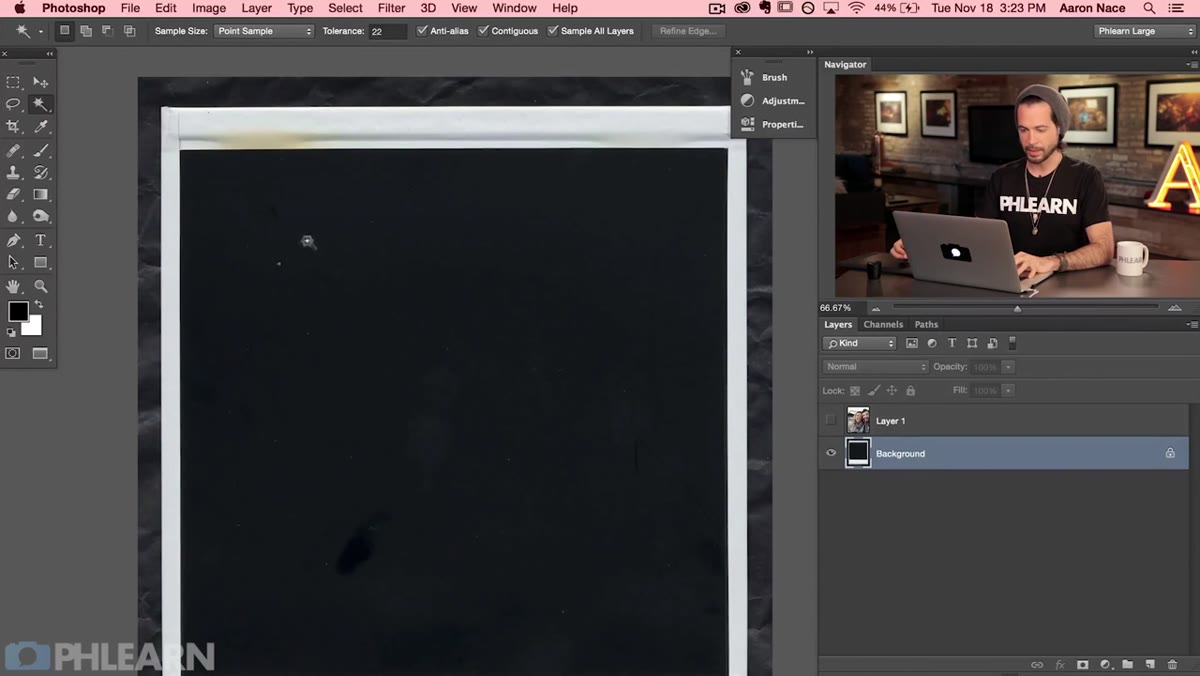 Magic Wand active, selection on dark center of Polaroid
With your subject layer hidden, click the Polaroid background layer to make it active. Hit W to grab the Magic Wand tool. Click once inside the dark interior window of the Polaroid frame. If your selection is only grabbing part of the area, bump up the Tolerance value in the options bar. Aaron lands on around 40 for his image, and that extends the selection cleanly to the edges of the window without bleeding into the white frame. You want a tight selection that covers the entire interior opening, because this selection is about to become your layer mask.
Magic Wand active, selection on dark center of Polaroid
With your subject layer hidden, click the Polaroid background layer to make it active. Hit W to grab the Magic Wand tool. Click once inside the dark interior window of the Polaroid frame. If your selection is only grabbing part of the area, bump up the Tolerance value in the options bar. Aaron lands on around 40 for his image, and that extends the selection cleanly to the edges of the window without bleeding into the white frame. You want a tight selection that covers the entire interior opening, because this selection is about to become your layer mask.
Step 4: Apply the Selection as a Layer Mask
 Layer mask applied to portrait layer in Layers panel
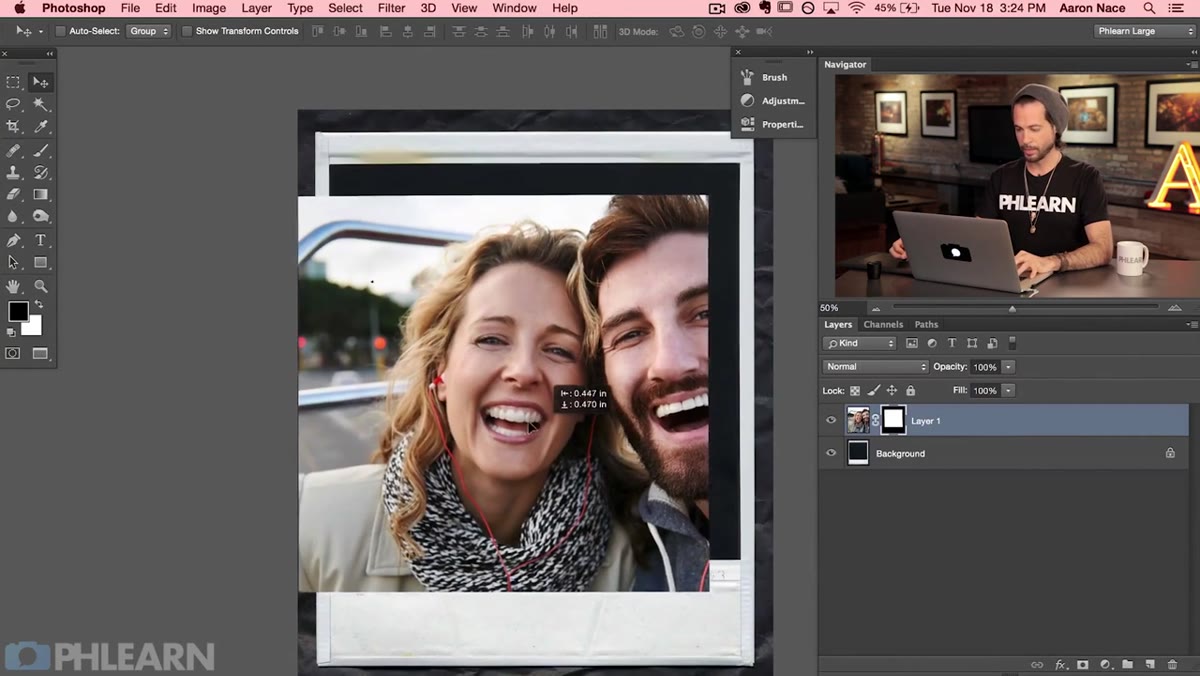
Turn your subject layer back on and click it to make it active. While your selection is still active (you’ll see the marching ants), click the Add Layer Mask button at the bottom of the Layers panel. It looks like a rectangle with a circle cut out of it. Photoshop immediately uses your selection to create a mask that hides everything outside the Polaroid window and reveals only what’s inside. At this point your photo appears to sit inside the frame. The bulk of the work is genuinely already done.
Layer mask applied to portrait layer in Layers panel
Turn your subject layer back on and click it to make it active. While your selection is still active (you’ll see the marching ants), click the Add Layer Mask button at the bottom of the Layers panel. It looks like a rectangle with a circle cut out of it. Photoshop immediately uses your selection to create a mask that hides everything outside the Polaroid window and reveals only what’s inside. At this point your photo appears to sit inside the frame. The bulk of the work is genuinely already done.
Step 5: Unlink the Layer from Its Mask
 Chain link icon between layer thumbnail and mask thumbnail
This is the step that most people skip, and it’s the one that causes the most frustration. By default, Photoshop links your layer and its mask together so they move as a unit. That sounds logical until you realize it means you can’t reposition your photo inside the frame without also moving the mask. Click the small chain link icon sitting between the layer thumbnail and the mask thumbnail in the Layers panel. This unlinks them. Now you can click directly on the layer thumbnail (not the mask) and move or transform your photo freely while the mask stays locked in place over the Polaroid window.
Chain link icon between layer thumbnail and mask thumbnail
This is the step that most people skip, and it’s the one that causes the most frustration. By default, Photoshop links your layer and its mask together so they move as a unit. That sounds logical until you realize it means you can’t reposition your photo inside the frame without also moving the mask. Click the small chain link icon sitting between the layer thumbnail and the mask thumbnail in the Layers panel. This unlinks them. Now you can click directly on the layer thumbnail (not the mask) and move or transform your photo freely while the mask stays locked in place over the Polaroid window.
Step 6: Reposition and Scale Your Photo Inside the Frame
 Free Transform handles visible, photo scaling inside Polaroid
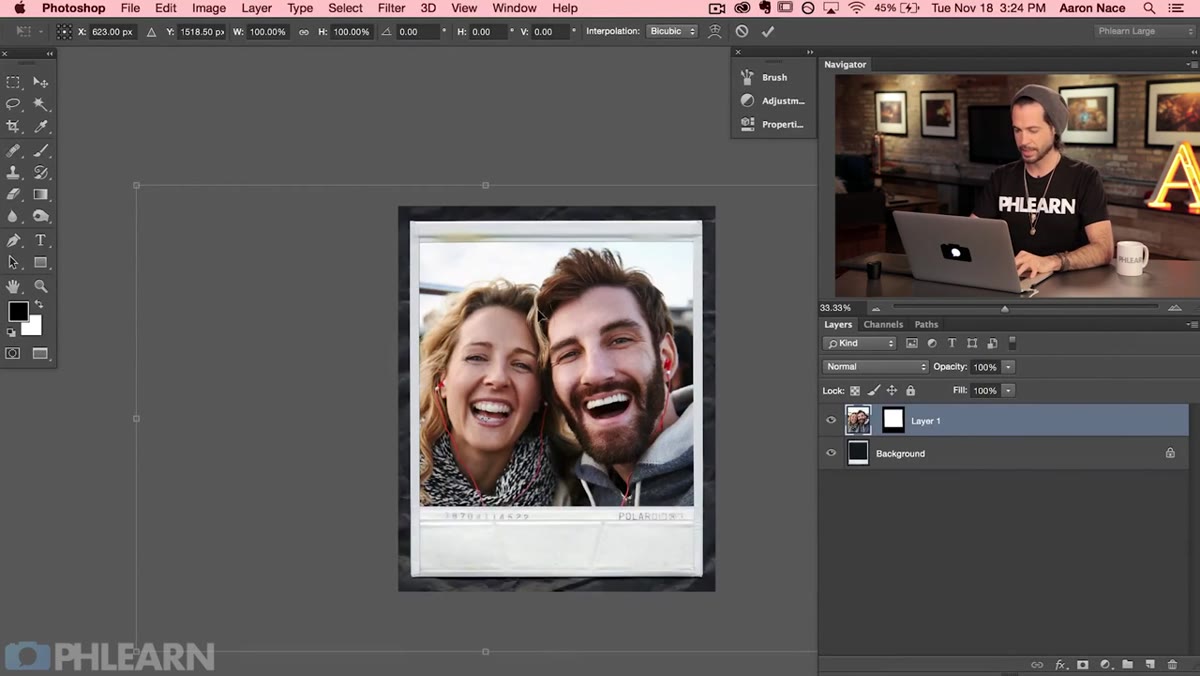
With the layer unlinked from its mask, click the layer thumbnail to select just the image. Use the Move tool to drag your photo around inside the window until the composition feels right. To resize it, hit Command+T (Mac) or Ctrl+T (Windows) to bring up Free Transform. Drag the corner handles to scale the photo so your subject fills the window naturally. Once you’re happy, press Enter to commit the transform. The mask stays put, the photo moves to wherever you positioned it. Clean and simple.
Free Transform handles visible, photo scaling inside Polaroid
With the layer unlinked from its mask, click the layer thumbnail to select just the image. Use the Move tool to drag your photo around inside the window until the composition feels right. To resize it, hit Command+T (Mac) or Ctrl+T (Windows) to bring up Free Transform. Drag the corner handles to scale the photo so your subject fills the window naturally. Once you’re happy, press Enter to commit the transform. The mask stays put, the photo moves to wherever you positioned it. Clean and simple.
Step 7: Re-link the Layer and Mask
 Chain link icon clicked again to re-link layer and mask
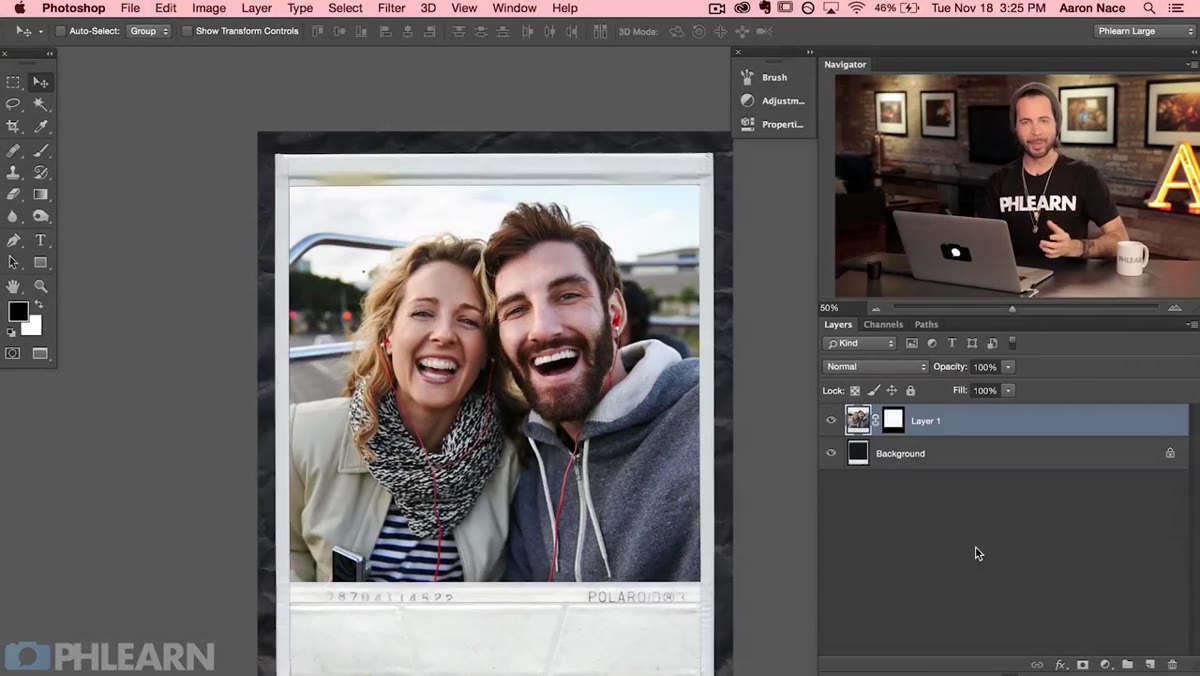
Once your photo is positioned exactly where you want it, click the gap between the layer and mask thumbnails again to re-link them. This restores the linked behavior so that if you ever move the whole Polaroid composite around the canvas later, the photo and its mask travel together. Skipping this step means you’ll accidentally nudge the mask out of alignment the next time you drag the layer somewhere, and you’ll spend ten minutes wondering why half your photo disappeared.
Chain link icon clicked again to re-link layer and mask
Once your photo is positioned exactly where you want it, click the gap between the layer and mask thumbnails again to re-link them. This restores the linked behavior so that if you ever move the whole Polaroid composite around the canvas later, the photo and its mask travel together. Skipping this step means you’ll accidentally nudge the mask out of alignment the next time you drag the layer somewhere, and you’ll spend ten minutes wondering why half your photo disappeared.
My Extension: Stack a Few for a Scatter Effect
The single-Polaroid version is solid on its own, but where this technique really earns its keep is when you duplicate the whole layer group a few times, drop in different crop variations of the same image or different photos entirely, rotate each one slightly, and scatter them across a canvas like they were tossed on a table. I’ve done this for client mood boards and event recap graphics. The key is keeping your rotation angles subtle, anywhere from 3 to 12 degrees feels natural, and adding a very soft drop shadow (blend mode: Multiply, opacity around 35%) to each one so they read as physically separate objects. The layer mask unlinking trick Aaron teaches here is what makes all of that fast enough to be worth doing.
The single most important thing this tutorial teaches is not the Polaroid effect itself. It’s the habit of unlinking your layer from its mask when you need to move content independently inside a frame. That behavior applies to any shape mask, any text cutout, any clipping scenario in Photoshop. Once it clicks, you’ll use it constantly.
Watch the full tutorial on YouTube to see Aaron walk through each step with his usual clarity. PHLEARN’s back catalog is worth bookmarking if you’re not already on it.
Comments (1)
Just subscribed. If the rest of your content is this good, I'm in.
Leave a Comment