
Here’s a situation I’ve been in more than once: I’m halfway through a client job, I’ve been leaning on Photoshop’s AI tools like they’re going out of style, and then I get that little notification that my generative credits are running low. Cue mild panic, a lot of Googling, and the realization that I had absolutely no idea which tools were burning through credits and which ones were free. Turns out, I’d been playing the game without reading the rules.
Adobe’s AI features are genuinely useful, but the credit system is legitimately confusing. Not every AI-powered tool costs credits. Some do. Some don’t. And if you don’t know the difference, you’ll either burn through your monthly allowance on things that didn’t need to cost anything, or you’ll avoid useful tools out of fear. Neither is a great place to be. Watch the full tutorial on YouTube
In this Aaron Nace (PHLEARN) tutorial, he lays out the complete picture: which tools are free, which ones cost credits, how many credits different operations use, and how to keep tabs on your balance. I watched it, took notes, and now I’m going to walk you through the whole thing so you can stop guessing and start working smarter.
Step 1: Understand the Core Rule Before You Touch Anything
 Aaron explaining the general rule about generating new pixels
The mental model that makes everything click: if a tool is creating brand new image pixels, it’s going to cost credits. If it’s just analyzing what’s already there, like making a selection or reducing noise, it’s free. That’s the dividing line. Keep that in your head and the rest of this makes a lot more sense. Your generative credits aren’t a tax on using AI. They’re specifically a cost for having the model invent new visual information.
Aaron explaining the general rule about generating new pixels
The mental model that makes everything click: if a tool is creating brand new image pixels, it’s going to cost credits. If it’s just analyzing what’s already there, like making a selection or reducing noise, it’s free. That’s the dividing line. Keep that in your head and the rest of this makes a lot more sense. Your generative credits aren’t a tax on using AI. They’re specifically a cost for having the model invent new visual information.
One more thing to know upfront: credits don’t roll over. They reset every month based on your Creative Cloud plan tier. And here’s the painful part, if you generate something and hate the result, those credits are still gone. There’s no undo for credit spending, which is exactly why understanding the cost before you click matters.
Step 2: Use AI Selections in Photoshop for Free
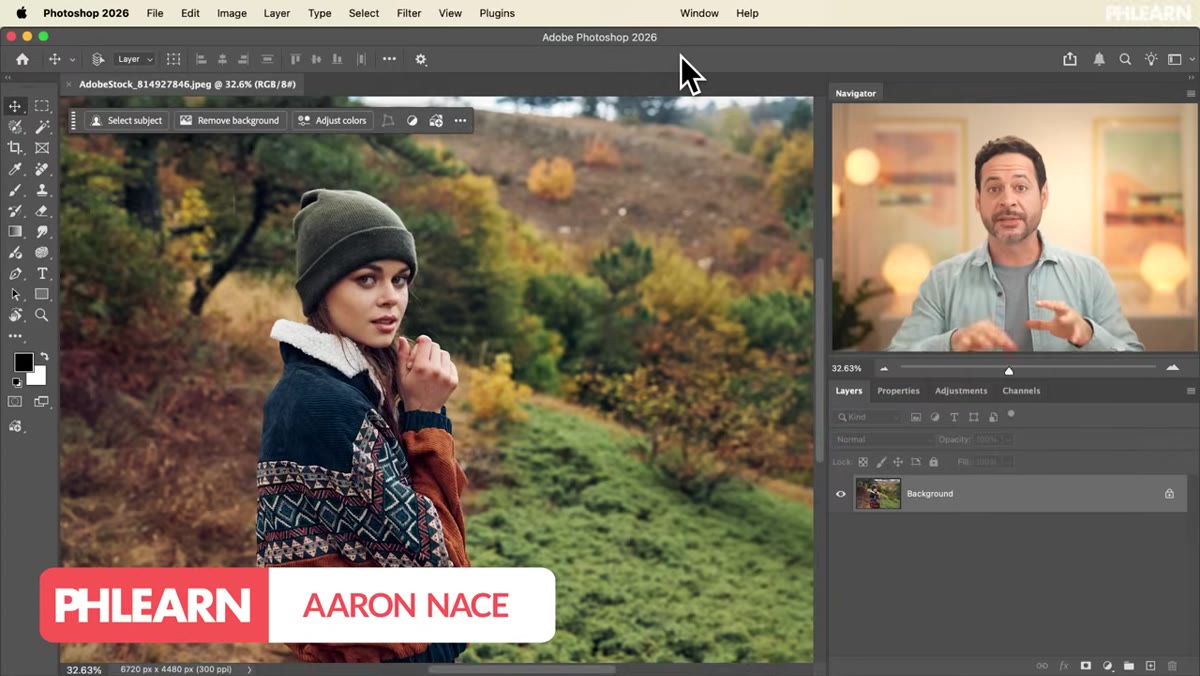 Select Subject button highlighted in the contextual taskbar
Start by making sure your contextual taskbar is visible. Go to Window and check Contextual Task Bar. From there, with your layer selected, you’ll see a “Select Subject” button. Click it, and Photoshop uses cloud-based AI to build a selection around the main subject in your image. It’s fast, it’s accurate, and it costs exactly zero credits. Same goes for “Remove Background,” which is right next to it in the taskbar.
Select Subject button highlighted in the contextual taskbar
Start by making sure your contextual taskbar is visible. Go to Window and check Contextual Task Bar. From there, with your layer selected, you’ll see a “Select Subject” button. Click it, and Photoshop uses cloud-based AI to build a selection around the main subject in your image. It’s fast, it’s accurate, and it costs exactly zero credits. Same goes for “Remove Background,” which is right next to it in the taskbar.
These two are genuinely powerful and I’d encourage you to use them without hesitation. The AI here is doing recognition work, not generation work. It’s reading the image and drawing a line. No new pixels, no credit charge.
Step 3: Explore the Object Selection Tool’s AI Features
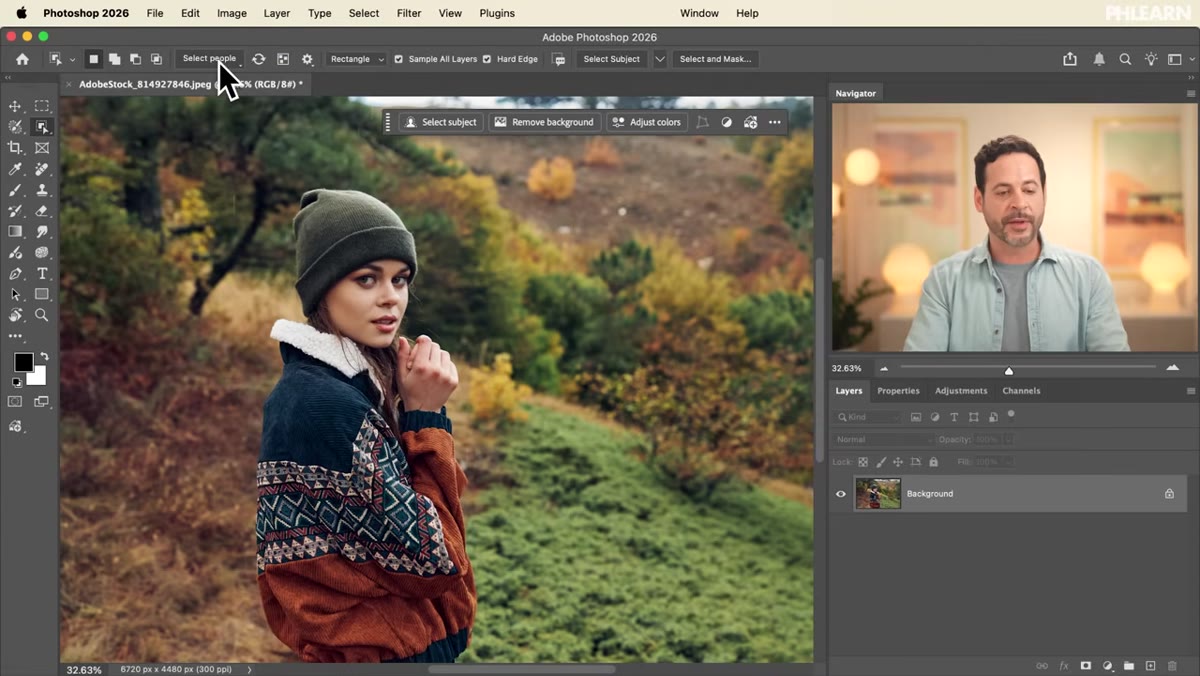 Object Selection Tool active with Select People option in toolbar
Grab the Object Selection Tool from the toolbar and look up at the options bar. There’s a “Select People” option that takes things a step further. You can hover over a person in your image and Photoshop will highlight individual body parts, their hat, jacket, hands, whatever you need. A single click selects that specific region with solid accuracy.
Object Selection Tool active with Select People option in toolbar
Grab the Object Selection Tool from the toolbar and look up at the options bar. There’s a “Select People” option that takes things a step further. You can hover over a person in your image and Photoshop will highlight individual body parts, their hat, jacket, hands, whatever you need. A single click selects that specific region with solid accuracy.
Beyond people, this tool works on objects generally. Cars, furniture, animals. It’s context-aware and it’s all happening without touching your credit balance. Aaron also points out that you can go to Select > Select Sky for another free AI-powered selection. These tools are doing the boring, time-consuming masking work that used to eat up half a session. Use them freely.
Step 4: Access the Same Tools Inside Camera Raw (and Lightroom)
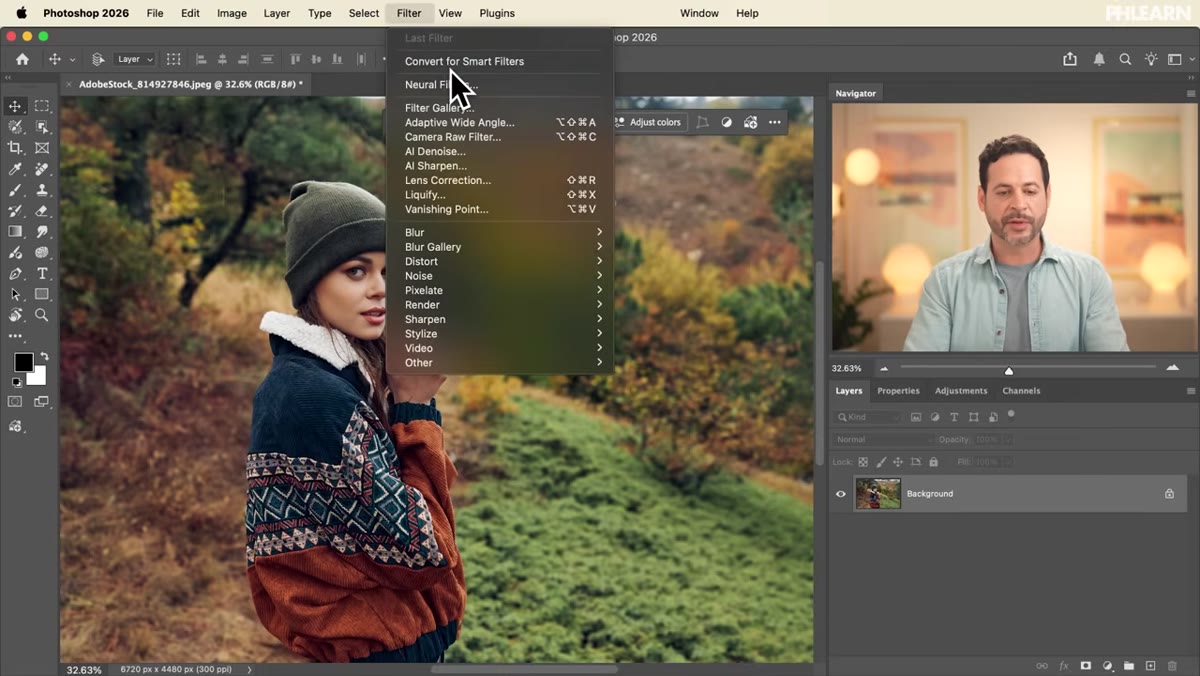 Camera Raw filter open with Masks panel visible on right side
To get into Camera Raw from Photoshop, go to Filter > Convert for Smart Filters first (this keeps things non-destructive), then Filter > Camera Raw Filter. Once inside, navigate to the Masks panel on the right side. What you’ll find here is essentially a mirror of Lightroom’s masking system, because they’re built on the same engine.
Camera Raw filter open with Masks panel visible on right side
To get into Camera Raw from Photoshop, go to Filter > Convert for Smart Filters first (this keeps things non-destructive), then Filter > Camera Raw Filter. Once inside, navigate to the Masks panel on the right side. What you’ll find here is essentially a mirror of Lightroom’s masking system, because they’re built on the same engine.
You’ve got AI-generated masks for Subject, Sky, Background, and a Landscape option that goes even further. The Landscape mask is particularly impressive. It can segment out Sky, Vegetation, Natural Ground, and more as separate masks in one pass. None of these cost credits. You’re analyzing and selecting, not generating. If you work in Lightroom regularly, this is the same workflow you’d use there, just accessed through Camera Raw inside Photoshop.
Step 5: Build Precise Masks with the People Selector in Camera Raw
 Select People mask being created for a subject in Camera Raw
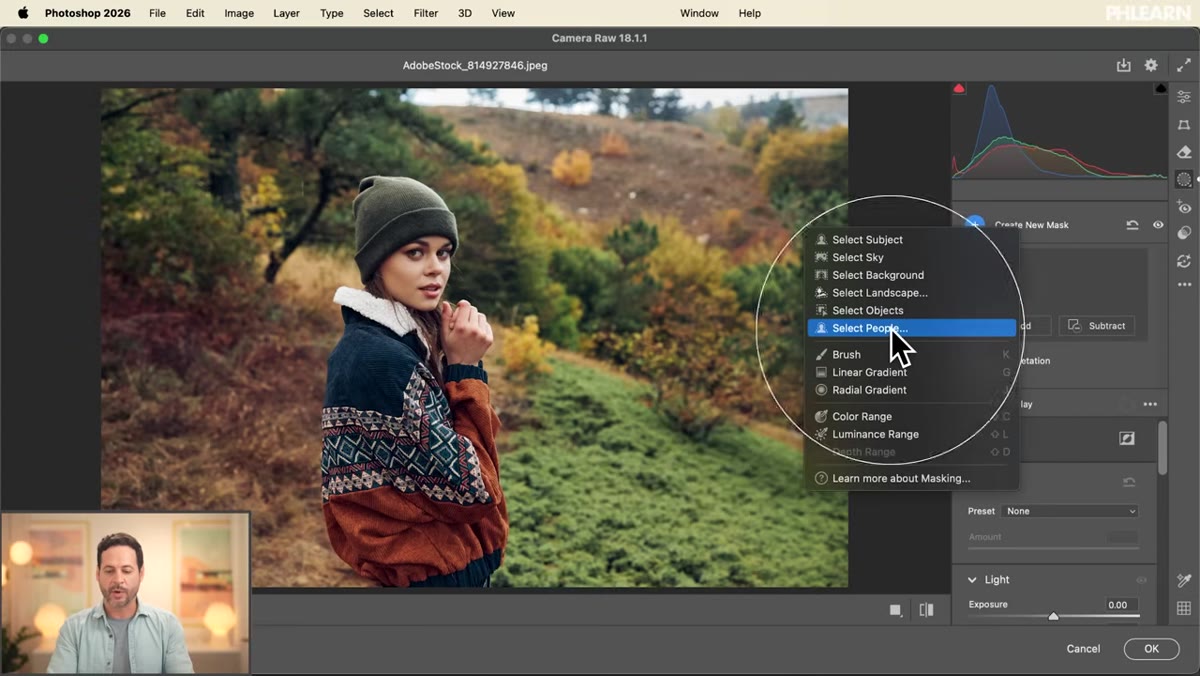
Inside that same Masks panel, choose “Select People” and click on your subject. You’ll get the option to either select the entire person as one mask or break them into individual body part masks, hair, skin, clothing, each on its own. Choose what you need and hit Create.
Select People mask being created for a subject in Camera Raw
Inside that same Masks panel, choose “Select People” and click on your subject. You’ll get the option to either select the entire person as one mask or break them into individual body part masks, hair, skin, clothing, each on its own. Choose what you need and hit Create.
This is where things get granular. If you need to push the exposure on someone’s skin without affecting their jacket, this is how you do it without spending ten minutes with a brush. Again, free. The AI is categorizing existing pixels, not making new ones. Once the mask exists, you can stack adjustments on top of it exactly like any other mask in Camera Raw or Lightroom.
What I’d Add From My Own Experience
The “new pixels = credits” rule is clean and useful, but there’s a practical extension to it worth knowing: some tools that do cost credits cost dramatically different amounts depending on the operation. Outpainting a large canvas extension costs more than a small Generative Fill patch. If you’re working on a tight monthly budget, it’s worth planning your generative work in batches rather than peppering it throughout a session. I’ve also found that doing all my free selection and masking work first, before touching anything generative, keeps me from accidentally spending credits on a rough draft I’m just going to scrap anyway.
Check your credit balance before any major session. It’s buried but findable. In Photoshop, your account info and plan details will show your remaining generative credits. Knowing the number before you start is a lot less stressful than discovering the limit mid-project.
The single biggest thing I took from this tutorial is that the free tools are genuinely good. I was underusing AI selections because I assumed everything AI-related was eating into my monthly allowance. That was wrong, and fixing that assumption has made my workflow noticeably faster.
If you want to see Aaron walk through all of this live, including the credit-costing tools he covers later in the video, Watch the full tutorial on YouTube. PHLEARN’s breakdowns are some of the clearest in the Photoshop space, and this one in particular is worth bookmarking before your next project.
Comments (1)
Solid advice. Especially the part about taking your time with it.
Leave a Comment