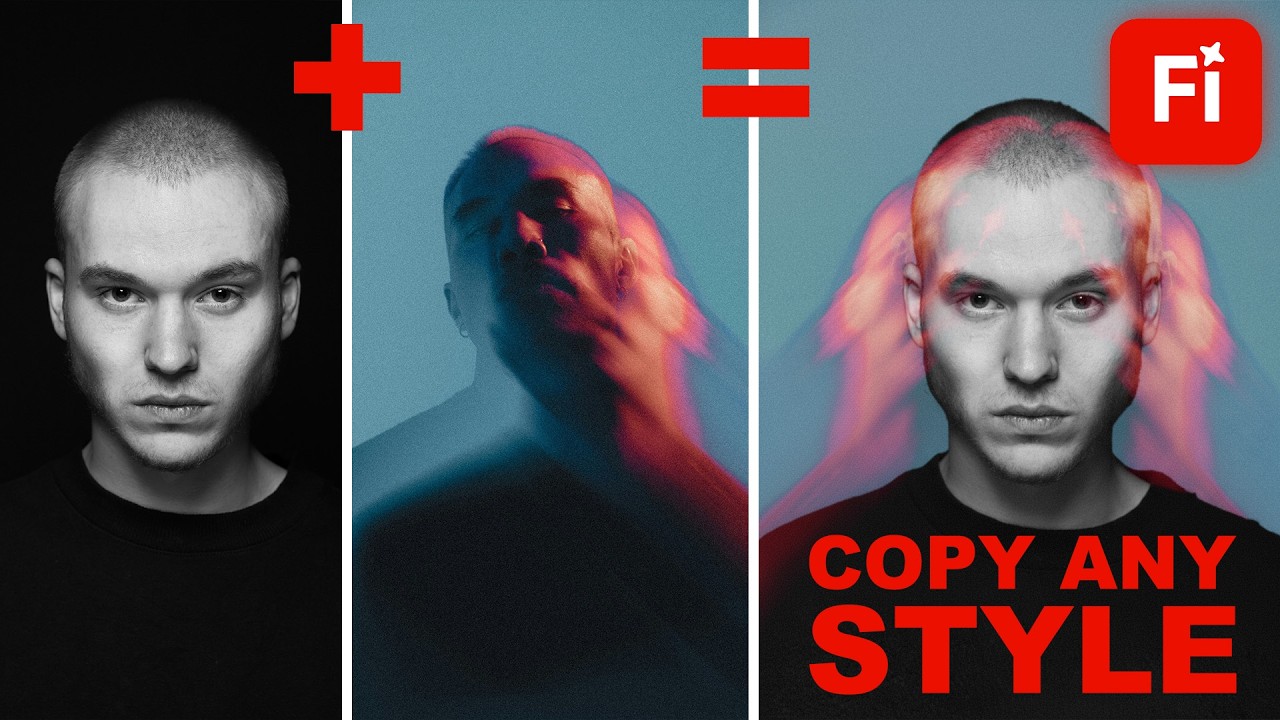
There’s a specific kind of frustration that comes from spending three hours manually color grading a portrait to match a reference photo, only to look at the result and think, “close enough, I guess.” I’ve been there more times than I’d like to admit. Color matching across different lighting conditions, skin tones, and moods is genuinely hard, and the manual approach is one of those tasks that separates the people who are okay at Photoshop from the people who’ve paid their dues in misery.
So when I came across this tutorial from Aaron Nace over at PHLEARN, I stopped what I was doing mid-coffee and watched the whole thing. Watch the full tutorial on YouTube - seriously, do it. Because what he walks through isn’t just another AI gimmick. It’s a legitimate workflow shift. Firefly Boards is Adobe’s new creative sandbox that gives you access to AI models, including some that haven’t even landed in Photoshop yet, and the style transfer capability alone is worth the price of admission. Which, for now, appears to be free.
The workflow Aaron demonstrates has two main acts: clone the visual style of one photo onto another using AI generation, then animate the result as video. Both parts are faster than you’d expect, and neither requires any deep prompting knowledge. Here’s how it works.
Step 1: Get Into Firefly Boards and Create a New Board
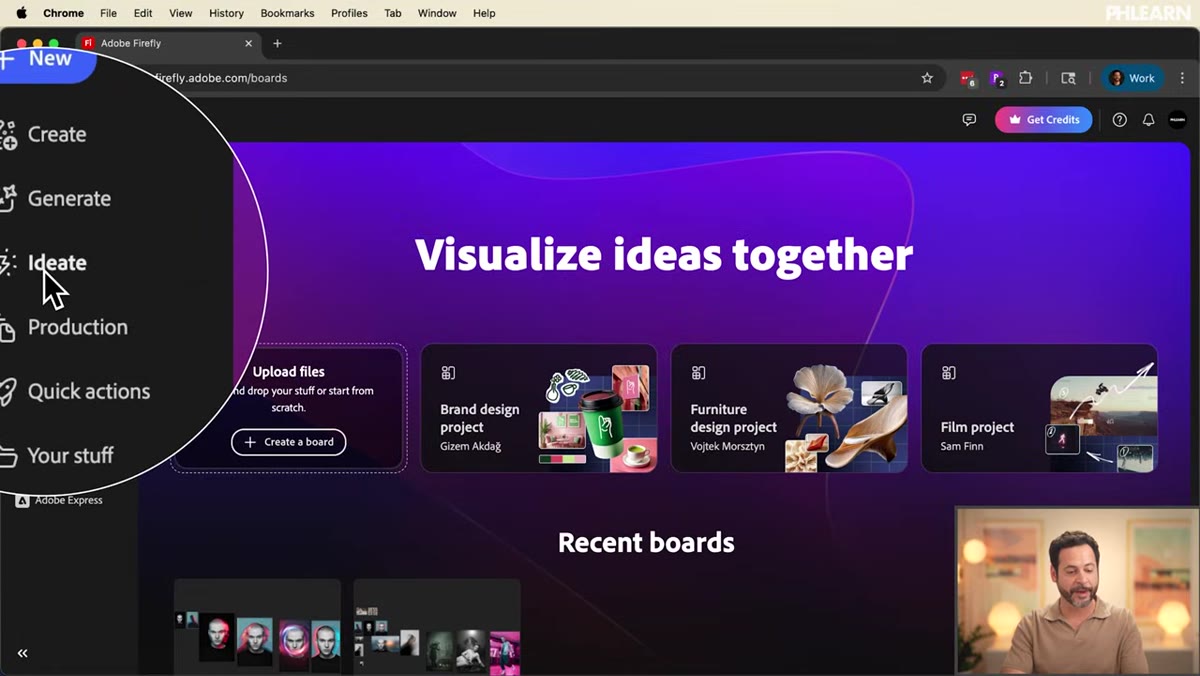 Firefly Boards interface with ID8 panel on left side
Head to Adobe Firefly (firefly.adobe.com) and look for the Boards option. Aaron navigates to it via the ID8 icon on the left sidebar. Once you’re in, create a new board. Think of the board as a canvas workspace where everything happens, your images, your generations, your video outputs. It’s all non-destructive and lives in one place, which is genuinely useful if you’re juggling multiple variations of a concept.
Firefly Boards interface with ID8 panel on left side
Head to Adobe Firefly (firefly.adobe.com) and look for the Boards option. Aaron navigates to it via the ID8 icon on the left sidebar. Once you’re in, create a new board. Think of the board as a canvas workspace where everything happens, your images, your generations, your video outputs. It’s all non-destructive and lives in one place, which is genuinely useful if you’re juggling multiple variations of a concept.
What’s immediately interesting is the model selection. Firefly Boards surfaces models that aren’t available in Photoshop 2026 yet, including Firefly Image Model 5. If you’re the kind of person who likes having the newest tools before everyone else, this alone is a reason to poke around in here.
Step 2: Upload Your Subject and Style Reference Images
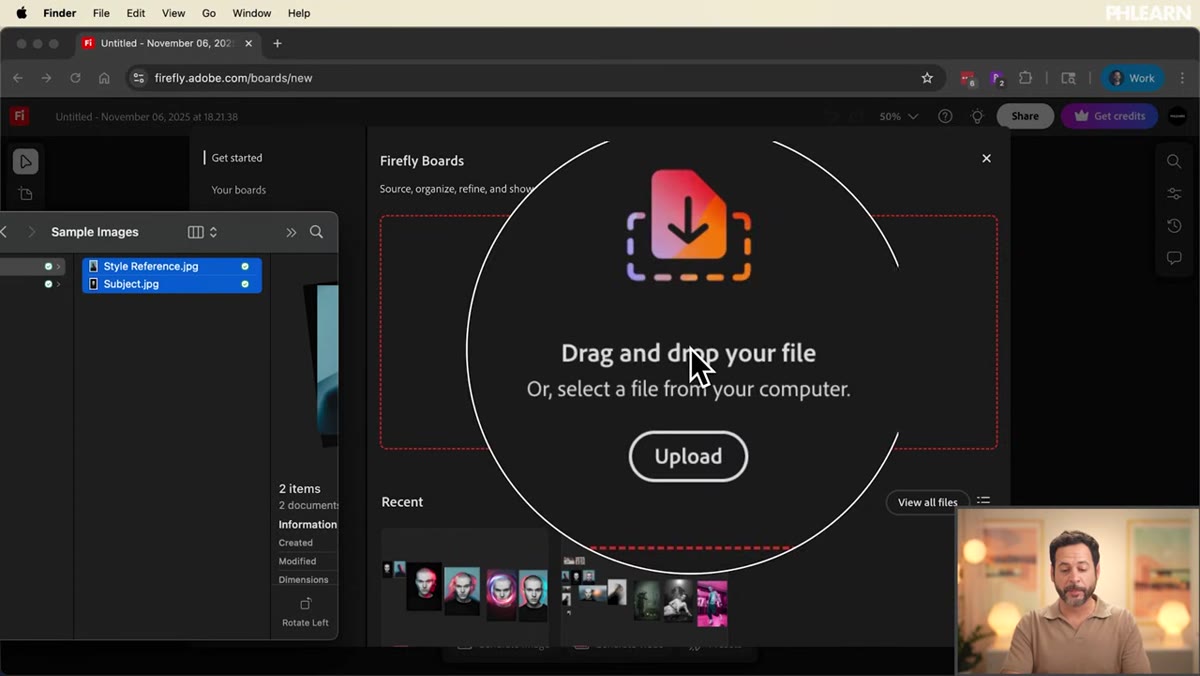 Two photos being dragged onto the Firefly Board canvas
This is the setup step, and it’s simple. Aaron is working with two images: a black and white portrait (the subject) and a second photo with a distinct visual style he wants to transfer over (a blurred, colorful image). Drag and drop both onto the board. They populate automatically as objects you can reposition.
Two photos being dragged onto the Firefly Board canvas
This is the setup step, and it’s simple. Aaron is working with two images: a black and white portrait (the subject) and a second photo with a distinct visual style he wants to transfer over (a blurred, colorful image). Drag and drop both onto the board. They populate automatically as objects you can reposition.
The key mental model here is this: one image is the content, one image is the style. You’re not blending them into a double exposure or anything like that. You’re telling the AI to take the visual language of image B, the palette, the mood, the texture, and apply it to image A. Keep that distinction clear in your head before you touch the generation settings.
Step 3: Set Up the Generate Image Panel and Choose Your Model
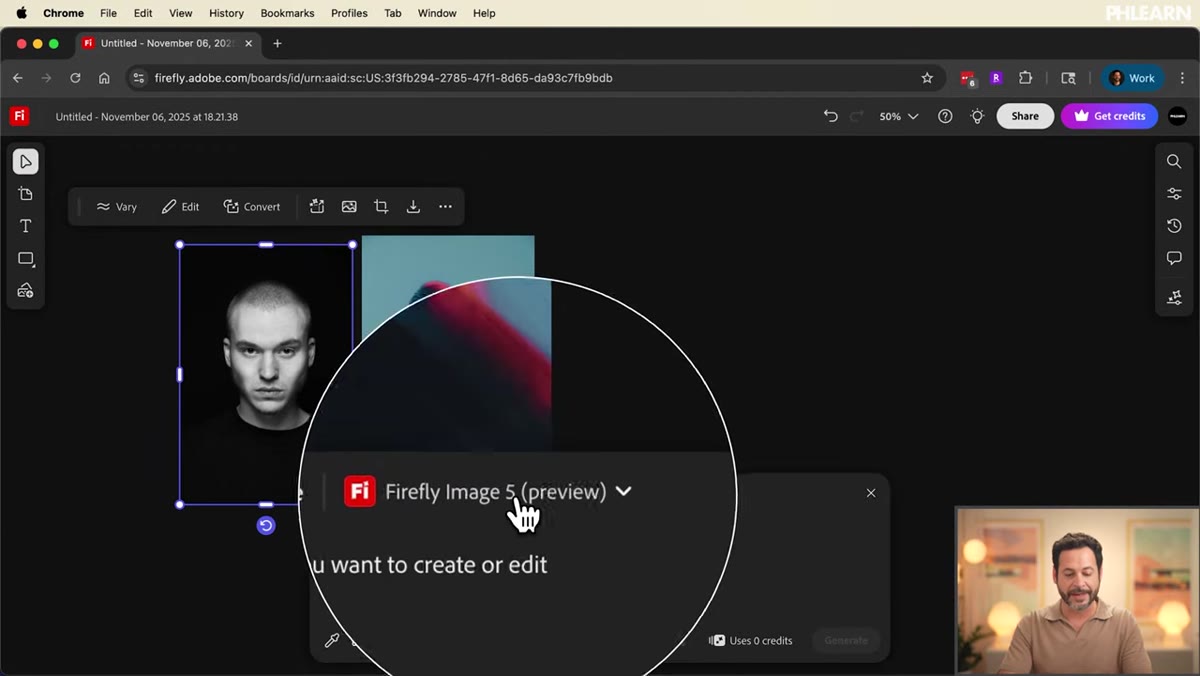 Generate Image panel open showing multiple Firefly and Flux model options
Scroll down in the right panel to find the Generate Image option. Click it and you’ll see a dropdown of available models. Aaron runs through what’s available: Firefly Image 5, Firefly Image 4 Ultra, various Flux models, Gemini 2.5. For this tutorial, he goes with Gemini 2.5 Nano, which he refers to by its internal nickname. The model choice will affect your results, so it’s worth experimenting across a few.
Generate Image panel open showing multiple Firefly and Flux model options
Scroll down in the right panel to find the Generate Image option. Click it and you’ll see a dropdown of available models. Aaron runs through what’s available: Firefly Image 5, Firefly Image 4 Ultra, various Flux models, Gemini 2.5. For this tutorial, he goes with Gemini 2.5 Nano, which he refers to by its internal nickname. The model choice will affect your results, so it’s worth experimenting across a few.
Don’t skip the image prompt inputs. This is where Firefly Boards earns its keep. Instead of just typing a text description, you can eyedropper your uploaded photos directly into the prompt as visual references. Click on each image to sample it. This is what gives the AI actual reference points rather than forcing you to describe a mood in words.
Step 4: Write Your Prompt and Generate Variations
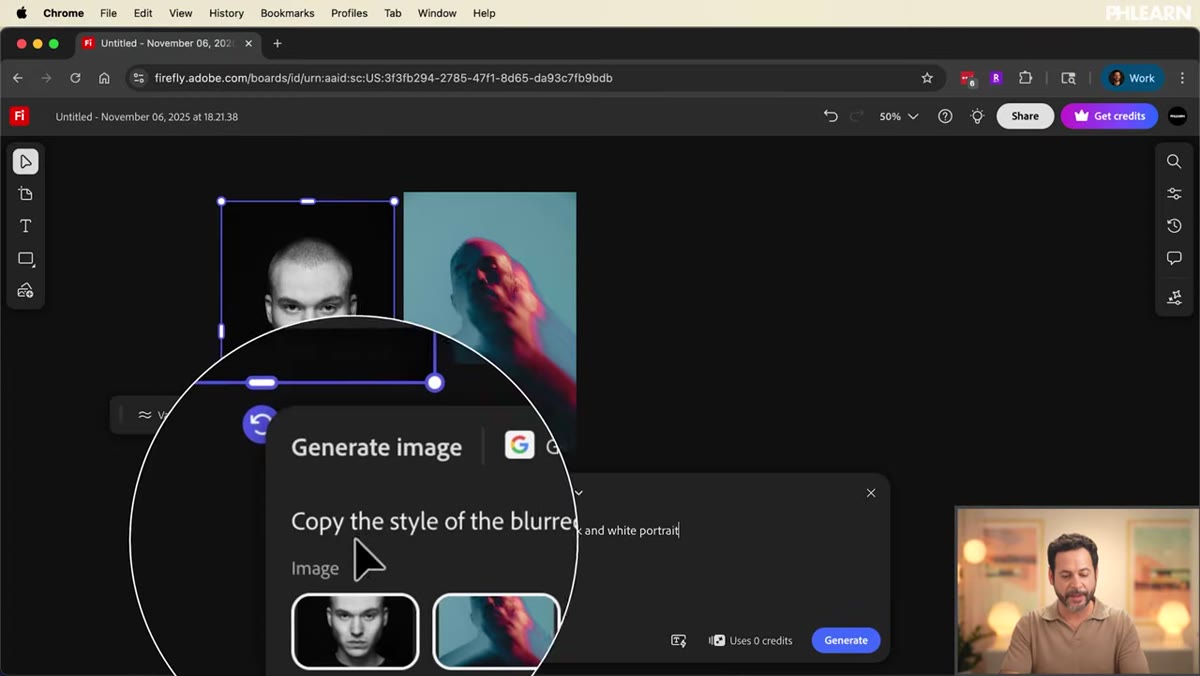 Prompt field filled in with style transfer instruction
With both images loaded into your prompt as visual references, you need a short text instruction. Aaron keeps it direct: something like “copy the style of the blurred image onto the black and white portrait.” He also mentions that even something as minimal as “merge these two photographs” can work. Don’t overthink the phrasing.
Prompt field filled in with style transfer instruction
With both images loaded into your prompt as visual references, you need a short text instruction. Aaron keeps it direct: something like “copy the style of the blurred image onto the black and white portrait.” He also mentions that even something as minimal as “merge these two photographs” can work. Don’t overthink the phrasing.
Hit generate, then hit it again. And again. Firefly Boards doesn’t make you wait for one generation to finish before kicking off the next, so you can queue up four or five variations in the time it would normally take to get one. When the results land, scroll through them. Aaron’s results in the video are genuinely impressive, pulling the color and atmospheric quality of the reference image into the portrait without destroying the likeness. Pick the one that lands closest to your vision.
Step 5: Change Aspect Ratio Without Starting Over
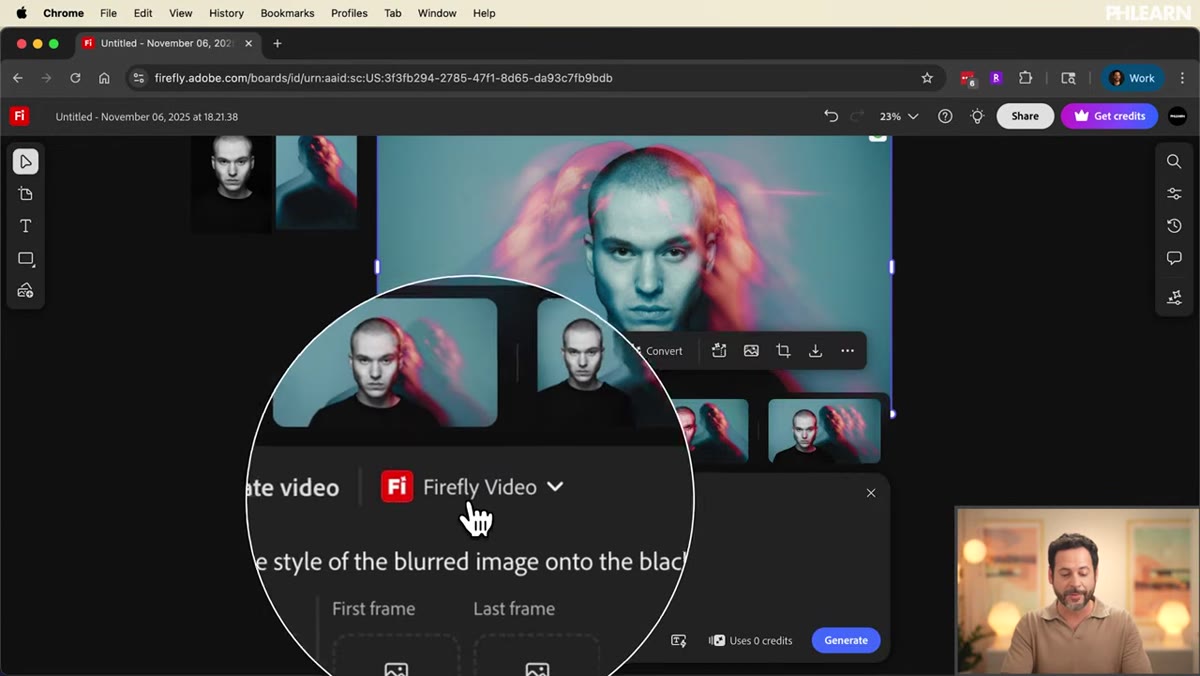
 Load icon selected on generated image to reload prompt settings
Say you generated a nice horizontal result but you actually need a vertical crop for Instagram or a phone wallpaper. You don’t have to rebuild the whole prompt. Click on your generated image and hit the load icon. This reloads the exact prompt you used, image references included. From there, just switch the aspect ratio to portrait and generate again. The new version drops right onto your board.
Load icon selected on generated image to reload prompt settings
Say you generated a nice horizontal result but you actually need a vertical crop for Instagram or a phone wallpaper. You don’t have to rebuild the whole prompt. Click on your generated image and hit the load icon. This reloads the exact prompt you used, image references included. From there, just switch the aspect ratio to portrait and generate again. The new version drops right onto your board.
This is one of those workflow details that seems minor but saves real time. I’ve lost entire afternoons reconstructing prompts because I forgot to save parameters somewhere. Having the prompt baked into the image tile is a smarter approach.
Step 6: Animate Your Image with Generate Video
 Generate Video panel open with VO3.1 model option visible
Once you’ve got an image you like, close the generation model panel and move to Generate Video. The model options here are equally wild, including VO3.1 from Google, which Aaron calls his favorite. Select your generated image as the first frame, then write a motion prompt.
Generate Video panel open with VO3.1 model option visible
Once you’ve got an image you like, close the generation model panel and move to Generate Video. The model options here are equally wild, including VO3.1 from Google, which Aaron calls his favorite. Select your generated image as the first frame, then write a motion prompt.
Aaron’s example: something like “slowly shake his head from left to right as you zoom into the photo.” The AI interprets that and builds motion around your still image. You can also swap to portrait aspect ratio here if you want a vertical video, and kick off multiple variations the same way you did with the image generations. The output is a short video clip that starts from your styled photo and adds believable motion. For social content, editorial work, or client concepts, that’s a serious capability.
My Take: Where This Actually Fits in a Real Workflow
I’ll be honest. My first instinct with AI tools is to test where they break. So I started thinking about the cases where manual style matching still wins: when a client needs pixel-level control, when brand guidelines are extremely specific, when the source and target images are compositionally too different for the AI to bridge cleanly.
But for mood boarding, for pitching a visual direction to a client before committing hours to execution, or for rapidly generating styled content for social? Firefly Boards clears the bar easily. It’s also just useful for learning. Seeing how an AI interprets a style transfer prompt can actually teach you something about what visual elements are doing the heavy lifting in a reference image.
The thing I’d tell anyone starting here: resist the urge to write complex prompts. Simple, direct language works better than elaborate descriptions. The image references do most of the work.
The single most important thing I took from Aaron’s tutorial is that style transfer no longer requires manual skill to prototype. You can go from two reference images to a styled portrait to an animated video in under ten minutes. Whether you use it as a creative shortcut or a client communication tool, that speed changes what’s possible.
Watch the full tutorial on YouTube to see Aaron walk through the whole thing in real time, including the actual model comparisons and generation results. Worth every minute.
Comments (1)
Shared this with my photography group. Everyone loved it.
Leave a Comment