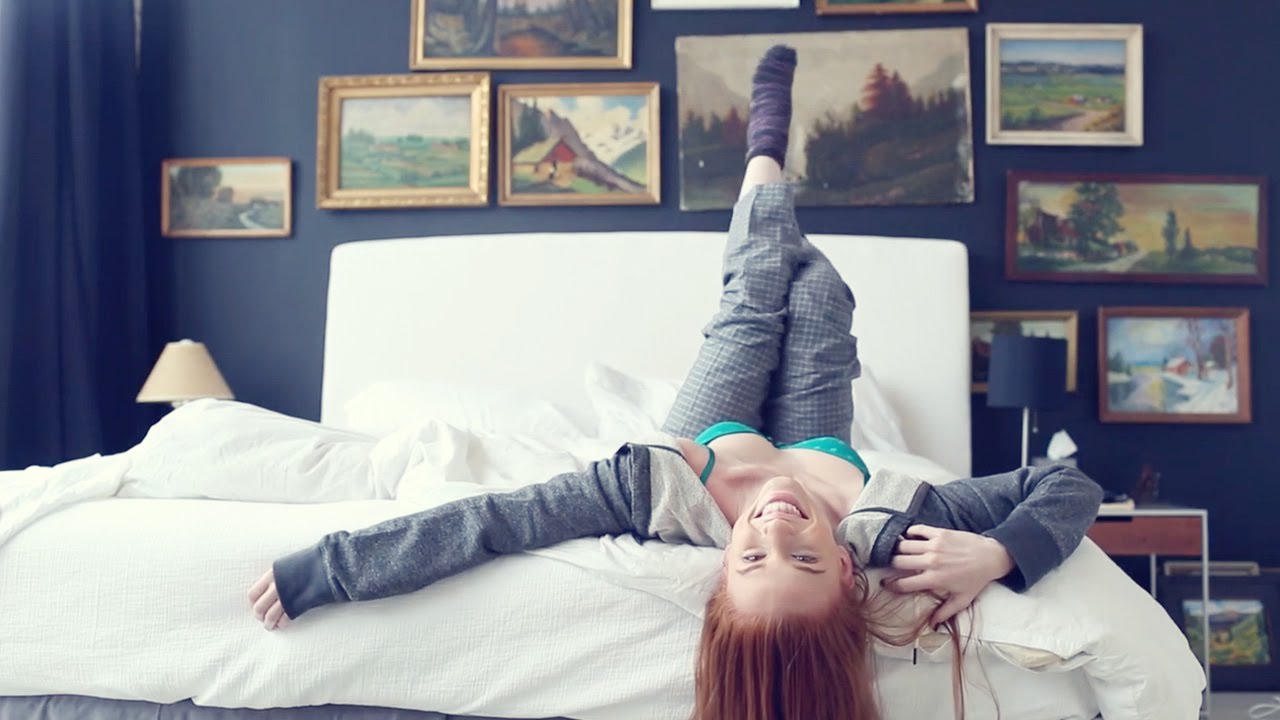
Most of my work lives in still images. Composites, retouching, the occasional logo a client describes as “clean but also edgy.” Video always felt like someone else’s problem. Then a client handed me raw footage and asked me to “make it look cinematic,” and suddenly it was very much my problem. I didn’t want to learn Premiere for one project, and After Effects felt like jumping into the deep end wearing a backpack full of bricks. What I already had open on my laptop, as always, was Photoshop.
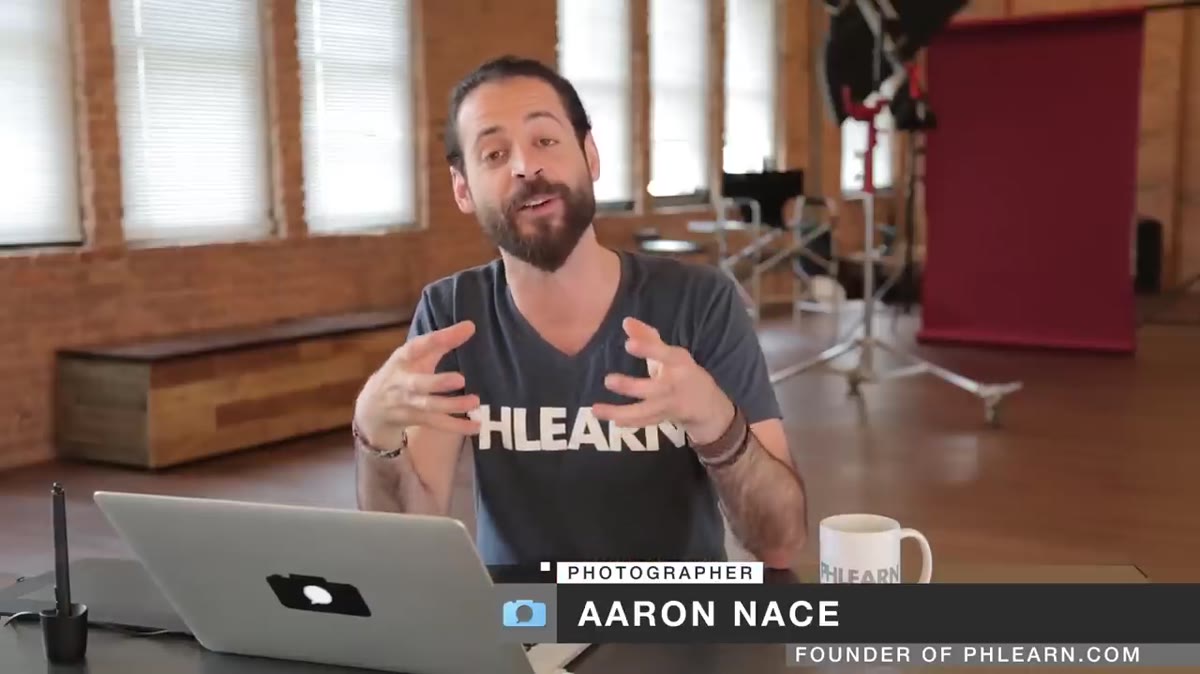
That’s when I found this Aaron Nace (PHLEARN) tutorial on color grading video inside Photoshop. Watch the full tutorial on YouTube. It turned out the skills I’d spent years building for photo work translate almost directly to video grading. The core idea is simple: Photoshop adjustment layers work on video clips the same way they work on images. Once that clicked, I stopped dreading the footage and started actually enjoying it.
The tutorial covers two distinct approaches, and understanding the difference between them is the whole game. A local adjustment targets a single clip. A global adjustment hits everything in your timeline at once. Aaron walks through both, and I’m going to break down each one so you can follow along without pausing the video every 30 seconds.
Step 1: Set Up Your Timeline With Your Footage
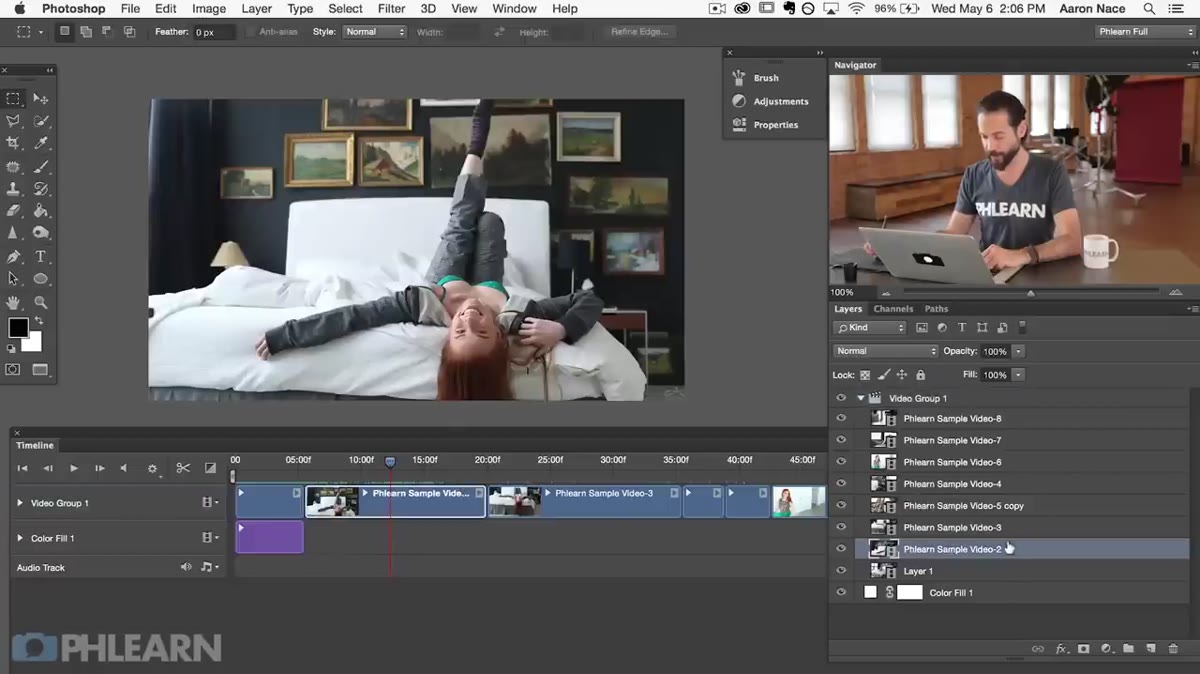
 Photoshop timeline panel showing multiple video clips in a group
Before any grading happens, your footage needs to be living inside a video group on the timeline. Aaron’s tutorial is part of a series, and by this point the timeline is already built out with multiple clips stacked and organized. If you’re starting fresh, import your video via File > Open, and Photoshop will automatically create a timeline with a video group. Your clips sit inside that group as individual layers, and that structure is what makes both local and global adjustments possible. Get this right and the rest of the workflow makes sense immediately.
Photoshop timeline panel showing multiple video clips in a group
Before any grading happens, your footage needs to be living inside a video group on the timeline. Aaron’s tutorial is part of a series, and by this point the timeline is already built out with multiple clips stacked and organized. If you’re starting fresh, import your video via File > Open, and Photoshop will automatically create a timeline with a video group. Your clips sit inside that group as individual layers, and that structure is what makes both local and global adjustments possible. Get this right and the rest of the workflow makes sense immediately.
Step 2: Select the Specific Clip You Want to Adjust Locally
 Layers panel with a single video clip layer highlighted inside a video group
For a local adjustment, you need to tell Photoshop exactly which clip you’re targeting. In the Layers panel, click directly on the video layer you want to affect. When you click it, you’ll see that section of the timeline highlight, confirming the selection. This matters because the next step, adding an adjustment layer, will automatically clip to whichever layer is active. Don’t skip this click. If nothing is selected, your adjustment will float loose and affect everything rather than just the one clip you care about.
Layers panel with a single video clip layer highlighted inside a video group
For a local adjustment, you need to tell Photoshop exactly which clip you’re targeting. In the Layers panel, click directly on the video layer you want to affect. When you click it, you’ll see that section of the timeline highlight, confirming the selection. This matters because the next step, adding an adjustment layer, will automatically clip to whichever layer is active. Don’t skip this click. If nothing is selected, your adjustment will float loose and affect everything rather than just the one clip you care about.
Step 3: Add a Curves Adjustment Layer
 Curves adjustment layer dialog open in Photoshop over a video clip
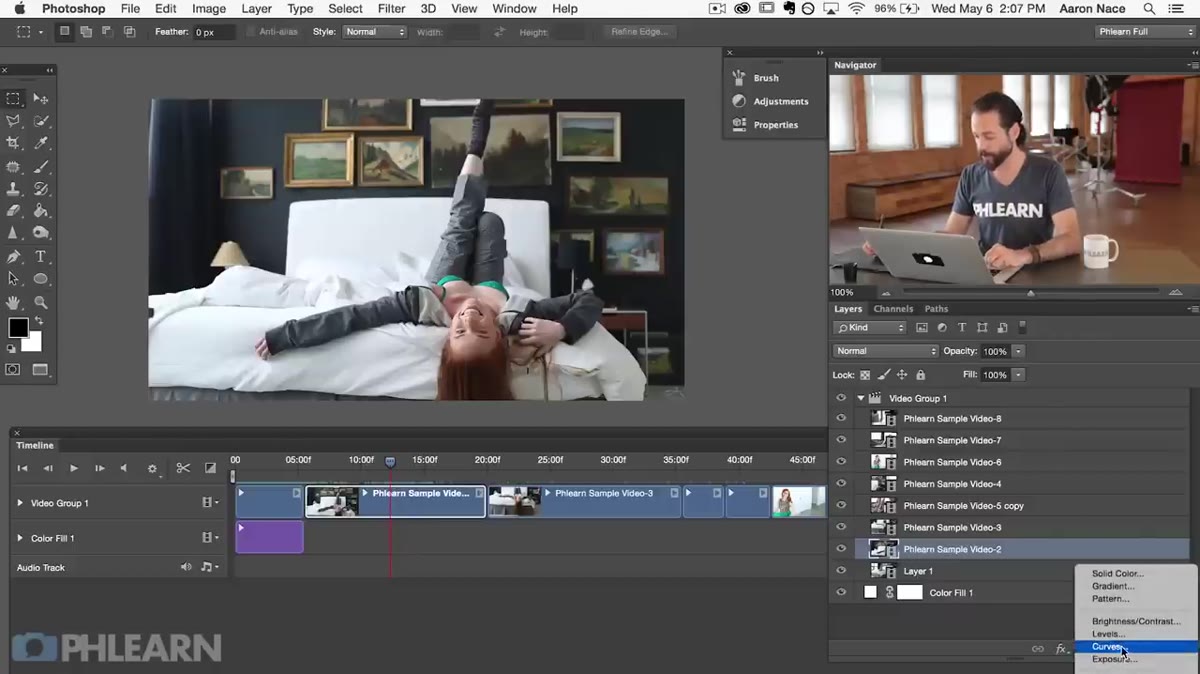
With your clip layer selected, add a Curves adjustment layer the same way you would for any photo. Go to the Adjustments panel and click Curves, or use Layer > New Adjustment Layer > Curves. Here’s the part that surprised me the first time: Photoshop automatically clips the adjustment layer to the video layer below it. You’ll see the small arrow icon in the Layers panel indicating it’s clipped, which means it will only affect that one clip. Aaron demonstrates this by dragging the curve down to darken the footage slightly. Nothing fancy to start, just proof that the method works. Make any curve adjustment you want, whether that’s a simple brightness tweak or an S-curve for contrast.
Curves adjustment layer dialog open in Photoshop over a video clip
With your clip layer selected, add a Curves adjustment layer the same way you would for any photo. Go to the Adjustments panel and click Curves, or use Layer > New Adjustment Layer > Curves. Here’s the part that surprised me the first time: Photoshop automatically clips the adjustment layer to the video layer below it. You’ll see the small arrow icon in the Layers panel indicating it’s clipped, which means it will only affect that one clip. Aaron demonstrates this by dragging the curve down to darken the footage slightly. Nothing fancy to start, just proof that the method works. Make any curve adjustment you want, whether that’s a simple brightness tweak or an S-curve for contrast.
Step 4: Verify the Local Adjustment Is Clipped Correctly
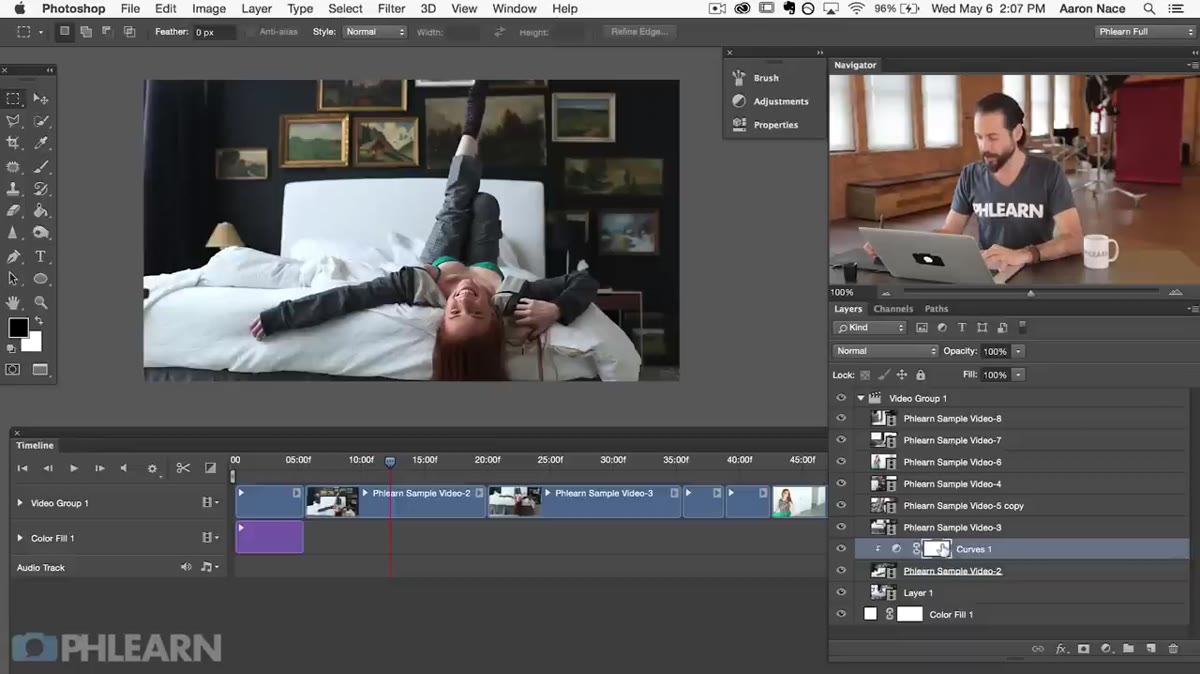 Layers panel showing curves adjustment clipped to a single video layer
Check your Layers panel after adding the adjustment. The Curves layer should be indented slightly and showing the clipping arrow pointing down toward your video layer. Play the timeline from the beginning and scrub through to confirm the adjustment only affects that one clip. Toggle the adjustment layer’s visibility eye on and off as you play back. You should see the change appear exactly when that clip starts and disappear when it ends. If the adjustment is bleeding into other clips, it’s not clipped properly. Drag it directly above your target clip and use Alt+click (Option+click on Mac) between the two layers to clip it manually.
Layers panel showing curves adjustment clipped to a single video layer
Check your Layers panel after adding the adjustment. The Curves layer should be indented slightly and showing the clipping arrow pointing down toward your video layer. Play the timeline from the beginning and scrub through to confirm the adjustment only affects that one clip. Toggle the adjustment layer’s visibility eye on and off as you play back. You should see the change appear exactly when that clip starts and disappear when it ends. If the adjustment is bleeding into other clips, it’s not clipped properly. Drag it directly above your target clip and use Alt+click (Option+click on Mac) between the two layers to clip it manually.
Step 5: Use the Same Adjustment Layer Logic for Other Corrections
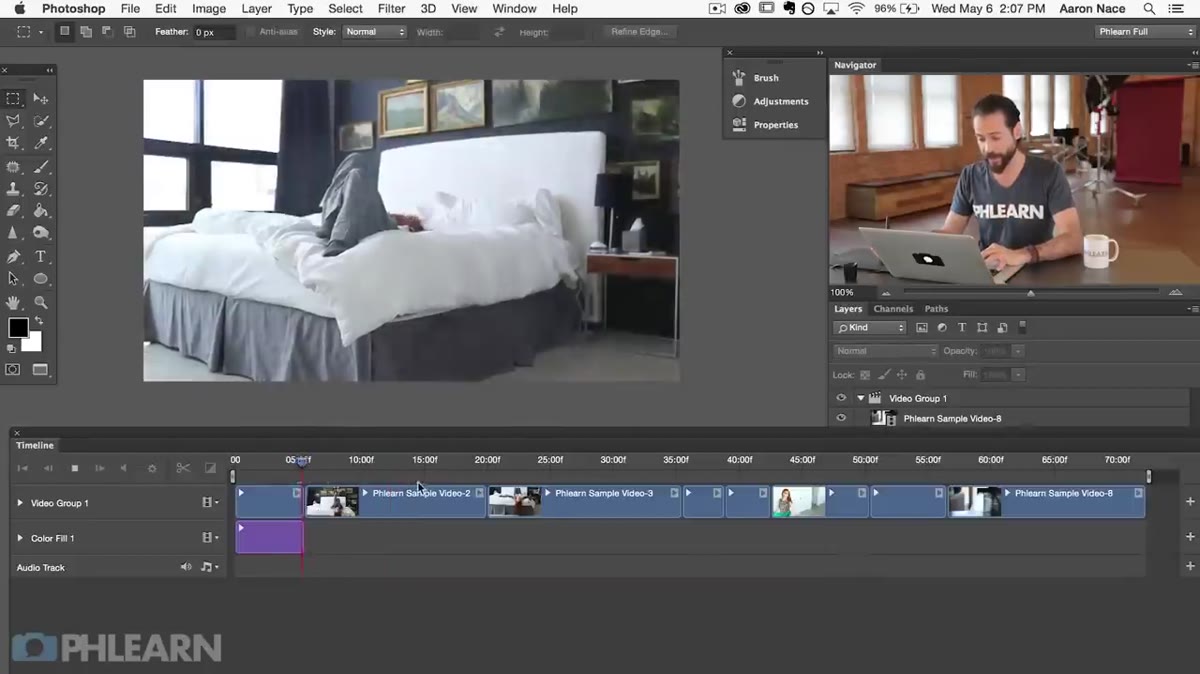 Video timeline playing with darkened clip visible between unaffected clips
One thing Aaron makes clear, and that I’ve found genuinely useful in practice, is that you’re not limited to Curves here. Any adjustment layer you’d use on a photo works the same way on a video clip. Hue/Saturation to kill the color on a single clip and go black and white. Color Balance to push a clip warmer or cooler. Vibrance to subtly pump saturation without blowing out skin tones. The technique is identical every time: select the clip, add the adjustment layer, confirm it clipped automatically. Repeat for each clip that needs individual treatment. This is where Photoshop actually earns its place in a video workflow because you already know these tools.
Video timeline playing with darkened clip visible between unaffected clips
One thing Aaron makes clear, and that I’ve found genuinely useful in practice, is that you’re not limited to Curves here. Any adjustment layer you’d use on a photo works the same way on a video clip. Hue/Saturation to kill the color on a single clip and go black and white. Color Balance to push a clip warmer or cooler. Vibrance to subtly pump saturation without blowing out skin tones. The technique is identical every time: select the clip, add the adjustment layer, confirm it clipped automatically. Repeat for each clip that needs individual treatment. This is where Photoshop actually earns its place in a video workflow because you already know these tools.
Step 6: Apply a Global Adjustment to the Entire Timeline
 Adjustment layer sitting above a video group in the Layers panel, affecting all clips
For a global grade that affects every clip at once, the approach shifts slightly. Instead of clipping an adjustment layer to a single video layer, you place the adjustment layer above the entire video group in the Layers panel, not inside it. This means it sits at the top of the layer stack, unclipped, and everything below it gets affected. Think of it like putting a color filter over the entire project. This is where you’d apply your overall look: a slight warm push, a fade to crush the blacks, or a teal-and-orange grade if you’re doing that thing everyone was doing for about five years straight.
Adjustment layer sitting above a video group in the Layers panel, affecting all clips
For a global grade that affects every clip at once, the approach shifts slightly. Instead of clipping an adjustment layer to a single video layer, you place the adjustment layer above the entire video group in the Layers panel, not inside it. This means it sits at the top of the layer stack, unclipped, and everything below it gets affected. Think of it like putting a color filter over the entire project. This is where you’d apply your overall look: a slight warm push, a fade to crush the blacks, or a teal-and-orange grade if you’re doing that thing everyone was doing for about five years straight.
What I’d Add From My Own Experience
The clipping behavior in Photoshop is powerful, but it can catch you off guard when you’re moving layers around. I’ve accidentally unclipped adjustment layers by dragging clips to reorder the timeline, and suddenly my carefully graded clip looks completely different. My habit now is to group each clip with its adjustment layers into a folder before I start moving anything. It takes an extra ten seconds and has saved me from a lot of confused staring at my screen in coffee shops.
It’s also worth knowing that you can stack multiple adjustment layers on a single clip. A Curves layer for contrast, a Hue/Saturation layer to desaturate slightly, and a Photo Filter to add warmth can all be clipped to the same clip, each one doing its own job. The order matters, same as with photo editing, so experiment with the stack sequence if something looks off.
The single most important takeaway here is this: the wall between photo editing and video editing in Photoshop is much lower than it looks. If you already know how to use adjustment layers on images, you already know 80% of what you need to color grade video. Local adjustments clip to individual clips. Global adjustments sit above the video group. That’s the whole framework.
Watch the full tutorial on YouTube and follow along with Aaron’s footage. Seeing it in motion for the clips Aaron uses makes the timeline behavior a lot more intuitive than reading about it ever could.
Comments
Leave a Comment