I’ve done a lot of work creating promotional graphics for clients, and one request that comes up more than you’d think is: “Can you make it… move a little?” Not full video, not a complex After Effects production. Just a clean, looping GIF that cycles through a few variations of something. A product. A print. A lineup of options. Simple idea, but if you’ve never built a frame animation in Photoshop before, it’s surprisingly easy to overcomplicate it in your head.
That’s exactly why I kept coming back to this tutorial. In this Aaron Nace (PHLEARN) tutorial on creating frame animations in Photoshop, Aaron walks through a genuinely practical use case: a hand holding a print, where the print itself cycles through different designs in a seamless loop. It’s the kind of polished GIF you’d drop on a product page or social post without a second thought. Watch the full tutorial on YouTube if you want to follow along with his footage. Otherwise, here’s the full breakdown.
The core technique is three things working together: a precise Pen Tool selection around the print area, layer masks that let you swap images in and out cleanly, and Photoshop’s Timeline panel set to frame animation mode. None of it is exotic. But the way they combine is clean enough that I’ve already used a version of this on a client project for a local print shop here in Austin.
Step 1: Set Up Your Base Image
 Hand holding a print against a clean background
Start with a photo where the object you want to animate sits cleanly within the frame. In Aaron’s example, it’s a hand holding a print, roughly rectangular, with one slightly tricky area around the thumb. Your image doesn’t need to be perfect, but the object you’re masking should have reasonably defined edges. The cleaner the source photo, the less cleanup you’ll do later.
Hand holding a print against a clean background
Start with a photo where the object you want to animate sits cleanly within the frame. In Aaron’s example, it’s a hand holding a print, roughly rectangular, with one slightly tricky area around the thumb. Your image doesn’t need to be perfect, but the object you’re masking should have reasonably defined edges. The cleaner the source photo, the less cleanup you’ll do later.
Open the file in Photoshop and zoom in enough to see the edges clearly before you touch any tools. Getting your bearings before you start drawing paths saves a lot of backtracking.
Step 2: Use the Pen Tool to Trace the Print
 Pen tool creating first anchor point at corner of print
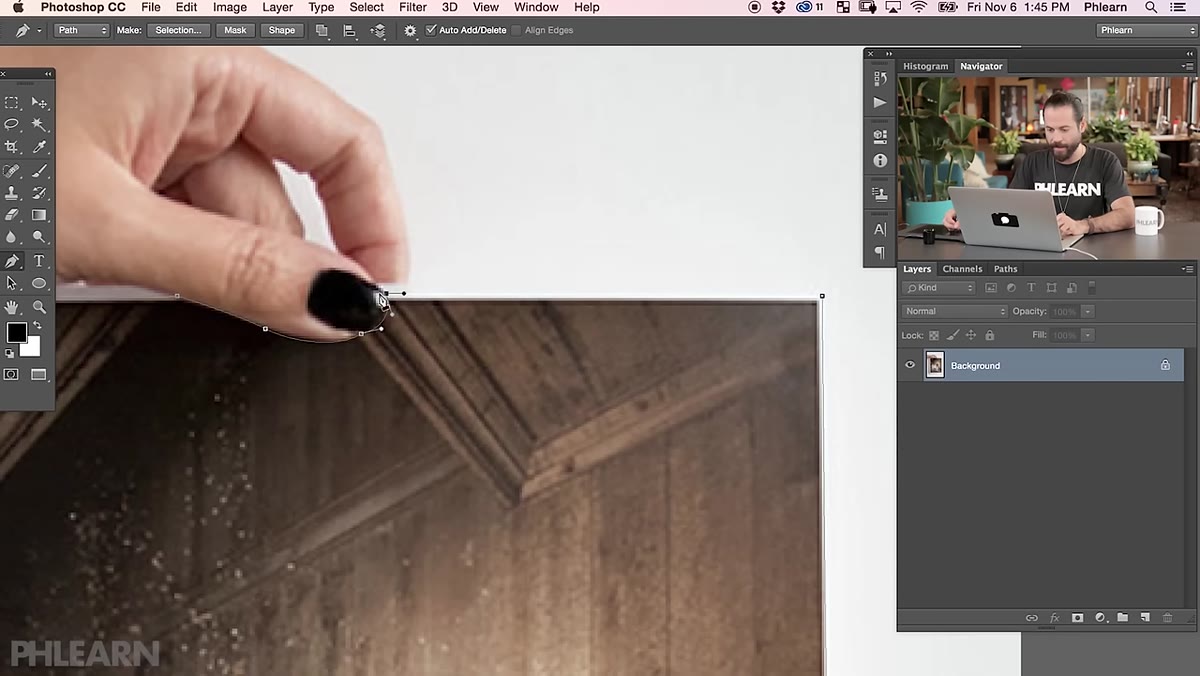
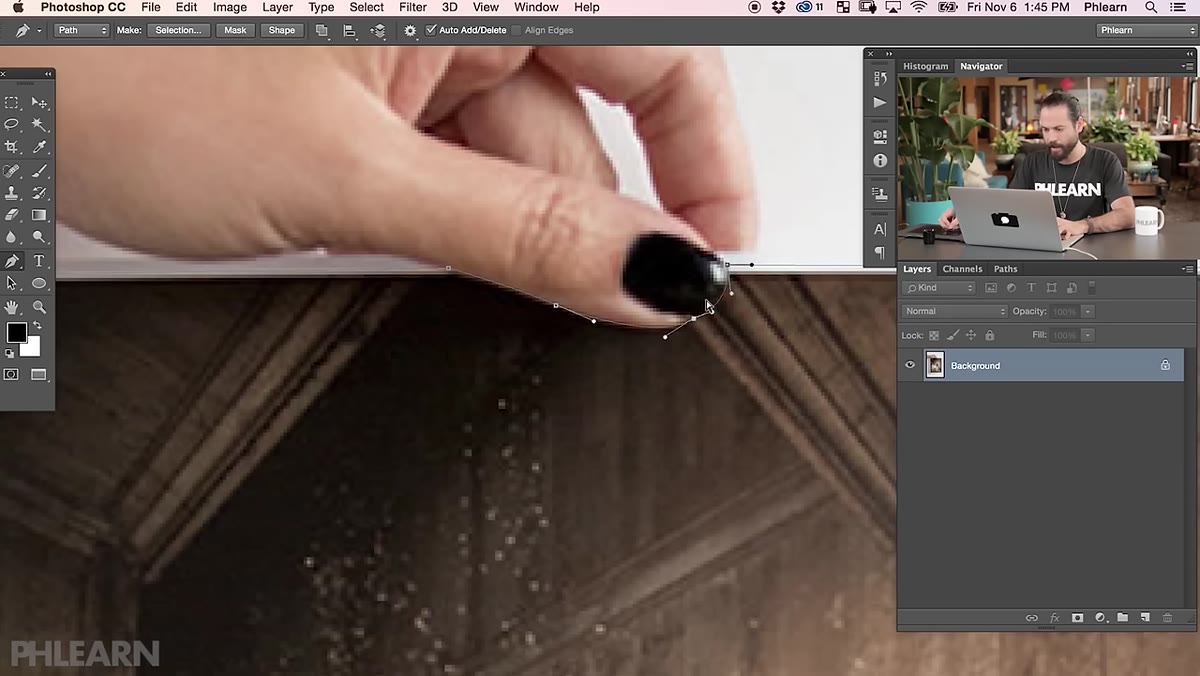
Press P to grab the Pen Tool. For a mostly rectangular subject, this is one of the easier Pen Tool jobs you’ll encounter. Click to place anchor points around the perimeter of the object, starting just outside the edge so your final selection has a clean crop with no background fringe sneaking in.
Pen tool creating first anchor point at corner of print
Press P to grab the Pen Tool. For a mostly rectangular subject, this is one of the easier Pen Tool jobs you’ll encounter. Click to place anchor points around the perimeter of the object, starting just outside the edge so your final selection has a clean crop with no background fringe sneaking in.
Where it gets interesting is any area with curves, like the thumb overlapping the print’s corner. Here, instead of just clicking to place a point, you click and drag to pull out bezier handles, which lets the path curve naturally with the shape. If you place a point in the wrong spot, hold Ctrl (or Cmd on Mac) to temporarily switch to the Direct Selection Tool and drag that point where it needs to go. Aaron makes a point of showing this recovery move, and honestly it’s the thing that made me stop being afraid of the Pen Tool years ago. You’re never locked in.
Step 3: Close the Path and Convert to a Selection
 Completed pen path closed around the print area
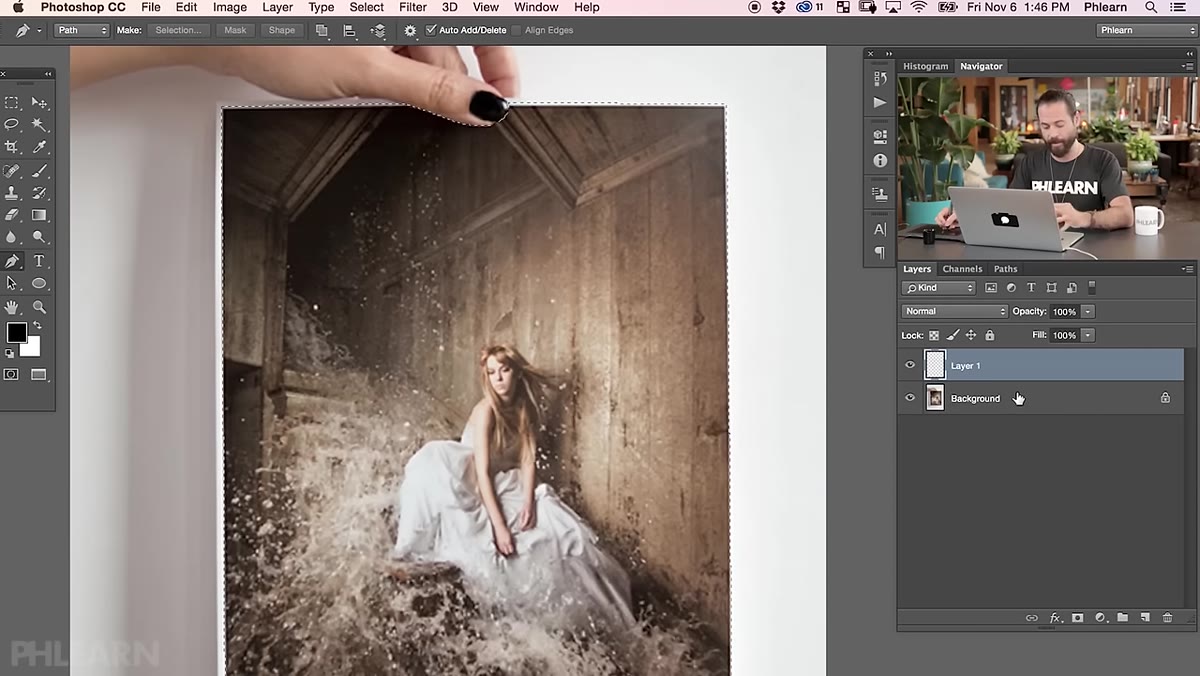
Once you’ve traced all the way around the object and clicked back on your starting point to close the path, right-click on the path in the canvas and choose Make Selection. Set the feather radius to 0 for a crisp edge. You now have a marching ants selection that perfectly follows the shape you drew.
Completed pen path closed around the print area
Once you’ve traced all the way around the object and clicked back on your starting point to close the path, right-click on the path in the canvas and choose Make Selection. Set the feather radius to 0 for a crisp edge. You now have a marching ants selection that perfectly follows the shape you drew.
This selection is going to become the mask that controls which part of each image layer is visible, so accuracy here pays off directly in the final animation quality.
Step 4: Load the Selection as a Layer Mask
 Layer mask applied to image layer in Layers panel
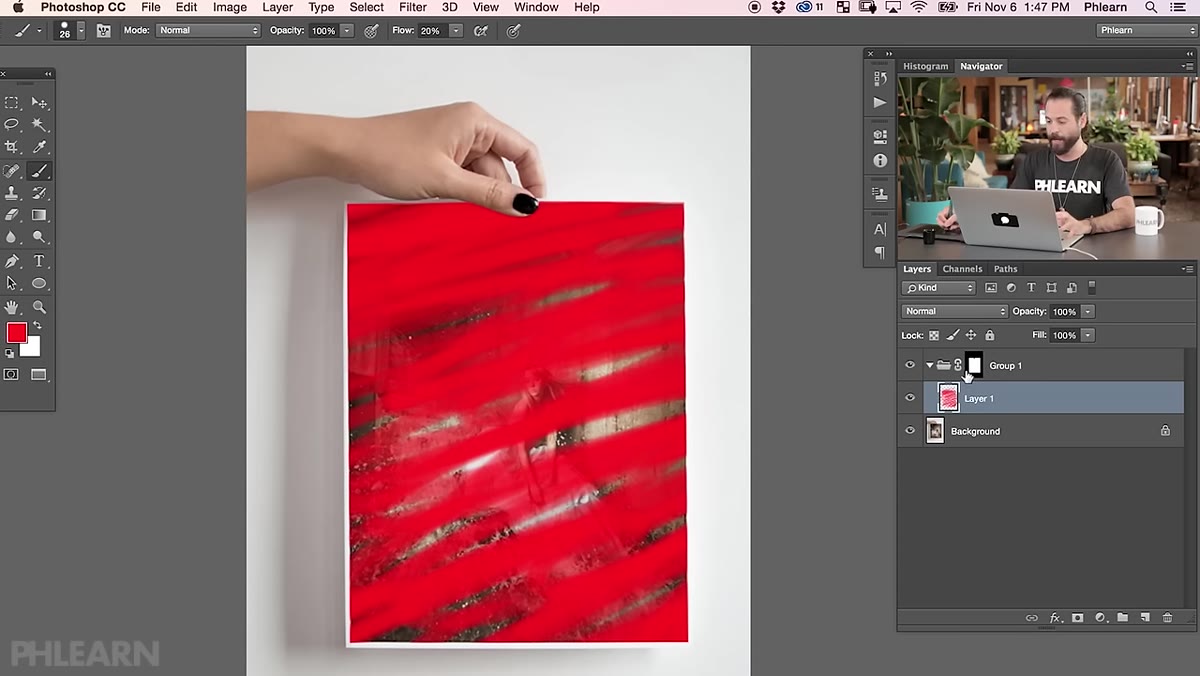
With your selection active, bring in the first alternate print image as a new layer. Position it so it fills the print area in your base photo. Then, with that layer selected, click the Add Layer Mask button at the bottom of the Layers panel. Photoshop will use your active selection to create the mask automatically, revealing only the portion of that layer that sits within the print boundary.
Layer mask applied to image layer in Layers panel
With your selection active, bring in the first alternate print image as a new layer. Position it so it fills the print area in your base photo. Then, with that layer selected, click the Add Layer Mask button at the bottom of the Layers panel. Photoshop will use your active selection to create the mask automatically, revealing only the portion of that layer that sits within the print boundary.
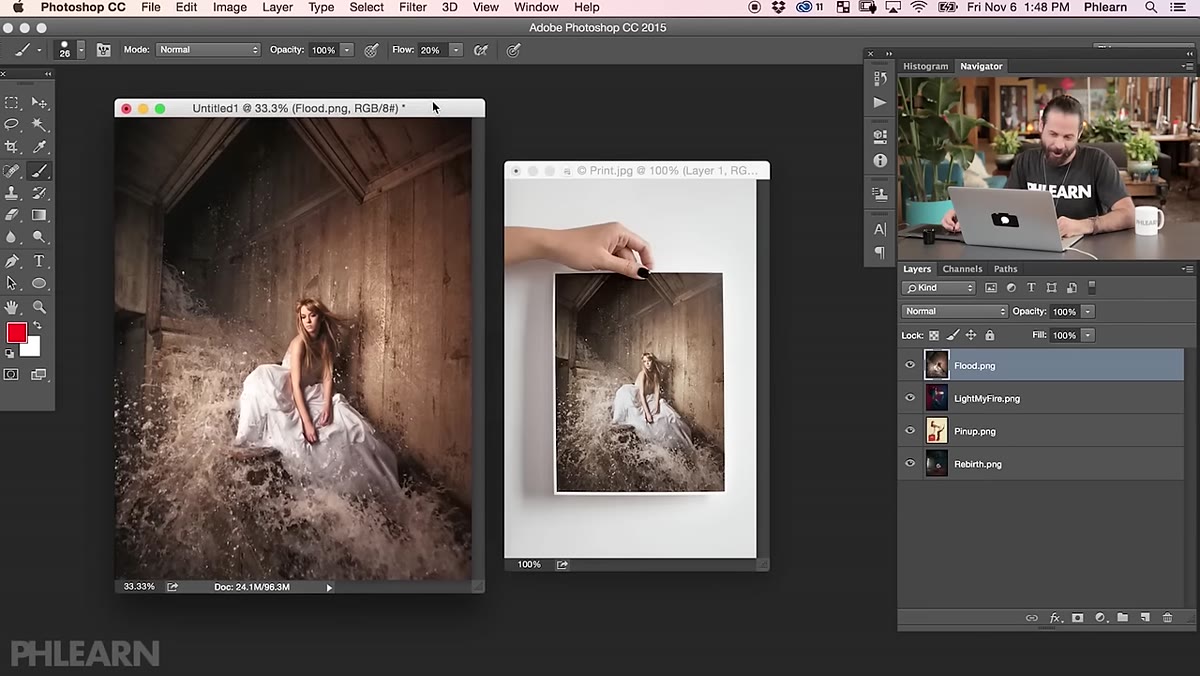
Repeat this process for each print design you want to include in the animation. Each one gets its own layer, each layer gets the same mask shape. Stack them in the Layers panel, one on top of the other. You should end up with a neat pile of masked layers, each showing a different design through the same window.
Step 5: Open the Timeline and Switch to Frame Animation Mode
 Timeline panel open with frame animation option selected
Go to Window > Timeline to open the Timeline panel. By default it may open in video timeline mode. If it does, click the small dropdown arrow in the center of the panel and switch to Create Frame Animation. Then click the button to create your first frame.
Timeline panel open with frame animation option selected
Go to Window > Timeline to open the Timeline panel. By default it may open in video timeline mode. If it does, click the small dropdown arrow in the center of the panel and switch to Create Frame Animation. Then click the button to create your first frame.
This is where the magic starts to feel tangible. Each frame in the animation corresponds to a specific state of your Layers panel visibility.
Step 6: Build Your Frames
 Multiple frames shown in Timeline panel with different layers visible
For the first frame, make sure only the first print layer is visible (toggle the eye icons on all others off). In the Timeline panel, click the New Frame icon to add a second frame, then switch visibility to the second print layer only. Repeat for each design you’ve prepared.
Multiple frames shown in Timeline panel with different layers visible
For the first frame, make sure only the first print layer is visible (toggle the eye icons on all others off). In the Timeline panel, click the New Frame icon to add a second frame, then switch visibility to the second print layer only. Repeat for each design you’ve prepared.
Set the display duration for each frame by clicking the time value below the thumbnail in the Timeline. A duration of around 1 to 2 seconds per frame works well for a product showcase loop, but you can adjust based on how fast or slow you want the cycling to feel. Set the looping option (bottom left of the Timeline) to Forever.
Step 7: Export as an Animated GIF
 Export for Web dialog showing animated GIF settings
Go to File > Export > Save for Web (Legacy). Choose GIF as the format. Make sure the Looping Options is set to Forever here as well (it should carry over, but double-check). You can adjust color reduction and dithering to balance file size against quality. For most web use, 128 colors is a reasonable starting point. Hit Save, open the file in a browser, and watch your prints cycle.
Export for Web dialog showing animated GIF settings
Go to File > Export > Save for Web (Legacy). Choose GIF as the format. Make sure the Looping Options is set to Forever here as well (it should carry over, but double-check). You can adjust color reduction and dithering to balance file size against quality. For most web use, 128 colors is a reasonable starting point. Hit Save, open the file in a browser, and watch your prints cycle.
One Thing I’d Add: Smart Object Your Print Layers
Before you start stacking masked layers, convert each print design layer to a Smart Object first. Right-click the layer and choose Convert to Smart Object. This means if you need to resize or reposition a design inside the mask, you can do it non-destructively without degrading the pixel quality. I learned about Smart Objects the hard way (a story involving a panicked client call and about two hours of undo history), and I now apply them reflexively. For animation work specifically, where you might tweak frame content multiple times before exporting, Smart Objects save you from a lot of unnecessary headaches.
The real takeaway here is that frame animations in Photoshop are less about timeline expertise and more about solid layer management. Get your mask right, keep your layers organized, and the animation side almost builds itself. Once you’ve done it once, it becomes a fast, repeatable workflow you’ll reach for any time a client asks for something with a little movement.
Watch the full tutorial on YouTube to see Aaron walk through the Pen Tool path and Timeline setup in real time. Watching the cursor move through those bezier curves is worth the extra few minutes if you’re still getting comfortable with the Pen Tool.
Comments
Leave a Comment